
Rodeo S 4WD V6-3.2L (1999)
Inspect the master cylinder for function as follows. If any abnormal function is found, replace with a new one.
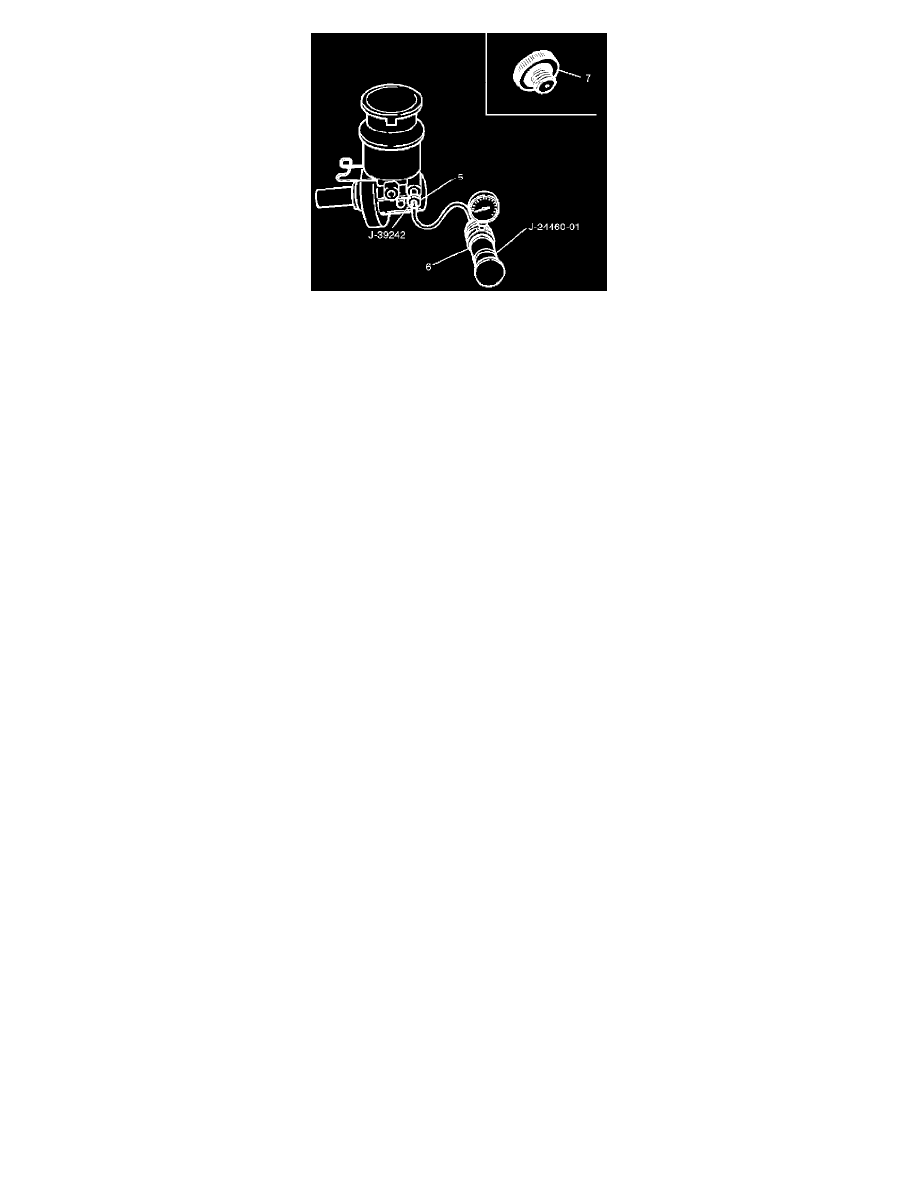
Install the primary piston holder (3) J-39242 (including the master cylinder attachment (5) and master cylinder plug (7)) onto the master cylinder (4).
Make sure the spacer (2)(2 bolts) with its adjusting bolt is screwed in up to the "0" line.
Connect the master cylinder attachment (5) J-39242 with the end of the radiator cap tester (6) J-24460-01, and apply air pressure with the cap tester.
Make sure there is no rise in pressure and that with the adjusting bolt further screwed in 5 mm (align the adjusting bolt to the "5" line). There should
be a pressure increase of 0.5 kg or more.
NOTE: When checking the front (or primary) side, be sure to mount the master cylinder plug in the rear (or secondary) port.
Apply air pressure to the front and rear ports
"0" Line
No pressure rise.
"5" Line
Pressure increase of 0.5 kg or more
Remarks
"0" Line
Checks port into the atmospheric pressure chamber
"5" Line
Checks air tightness of the pressure chamber
NOTE:
1. Do not use an air compressor, as the air from the compressor is mixed with compressor oil.
2. When installing the master cylinder onto the vacuum booster, always adjust the vacuum booster push rod.
3. After the master cylinder is installed onto the vehicle, check for leakage, pedal travel and pedal free play.
INSTALLATION
1. Install spacer and the 2 gaskets.
2. Install master cylinder. When replacing the master cylinder or vacuum booster or both, always measure the vacuum booster push rod protrusion
and adjust it as necessary.
3. Install P&B valve and bracket.
4. Install 2 attaching nuts and tighten the attaching nuts to the specified torque.
Torque: 13 Nm (113 inch lbs.)
5. Install brake pipes and tighten the brake pipe to the specified torque.
Master cylinder and P & B valve sides
Torque: 12 Nm (104 inch lbs.)
Others
Torque: 16 Nm (12 inch lbs.)
6. Connect electrical connector.