Trooper S 2WD V6-3.5L (2001)

-
Use a knife to cut through part of the adhesive caulking material.
-
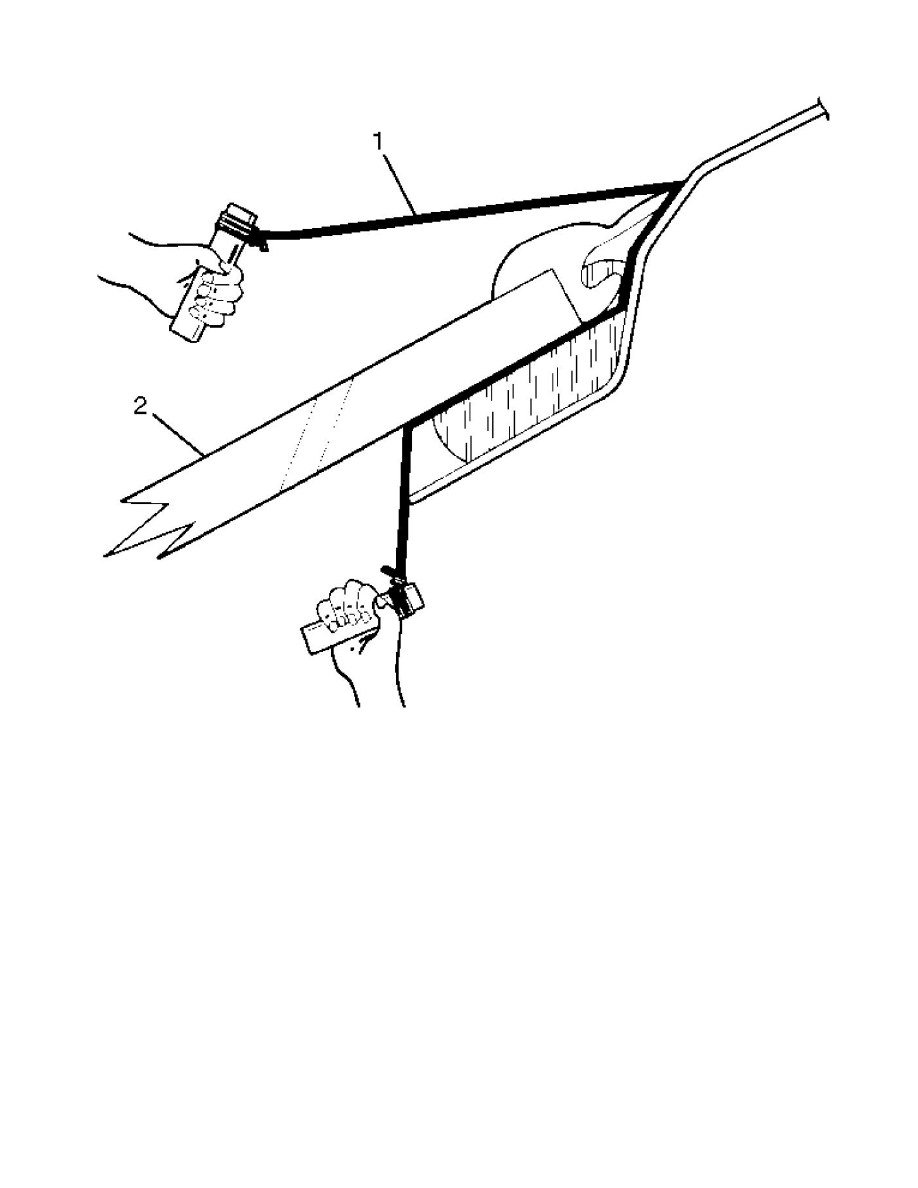
Secure one end of a piece of steel piano wire (1) (0.02 inches in diameter) to a piece of wood that can serve as a handle.
-
Use a pair of needle nose pliers to insert the other end of the piano wire through the adhesive caulking material at the edge of the windshield
glass.
-
Secure the other end of the piano wire to another piece of wood.
-
With the aid of an assistant, carefully move the piano wire with a sawing motion to cut through the adhesive caulking material around the
entire circumference of the windshield glass.
-
Clean the remaining adhesive caulking material from the area of the body which holds the windshield.
8. Remove windshield upper moulding.
-
Taking notice of the adhesive tape, and peel the moulding off the windshield upper portion.
9. Remove moulding clip.
10. Remove spacer.
Installation
1. Install the spacer (1).
-
Clean the bonding surfaces of both the windshield and the body panel.
-
When installing the spacers, align the lower side spacer to the R stop of the body panel and the side spacer to the end of the body panel. Be
sure to always use a new spacer.
