
Vanden Plas L6-4.0L (1990)
Radio/Stereo: Service and Repair
Removal and Installation
RADIO
RENEW 86.50.03
Disconnect the batterv earth lead.
Remove the centre console ashtray See: Body and Frame/Interior Moulding / Trim/Ash Tray/Service and Repair
Remove the centre console finisher veneer panel See: Body and Frame/Interior Moulding / Trim/Console/Service and Repair
Move the gearbox selector lever to 'D' drive position.
Remove the radio panel securing screws.
Displace the radio panel for access.
Disconnect the aerial lead. Remove the earth lead securing nut and remove the lead.
Disconnect the white multi-plug from 4he radio socket.
Disconnect the compact disc player 'DIN' plug from the radio socket.
Displace the radio retaining spring clips.
Carefully slide the radio through the mounting panel.
Remove the radio assembly.
Installation
Align a new radio to the panel.
Carefully slide the radio into the panel until fully seated, ensure that the retaining clips are engaged.
Connect the earth lead to the radio.
Fit and tighten the earth lead securing nut.
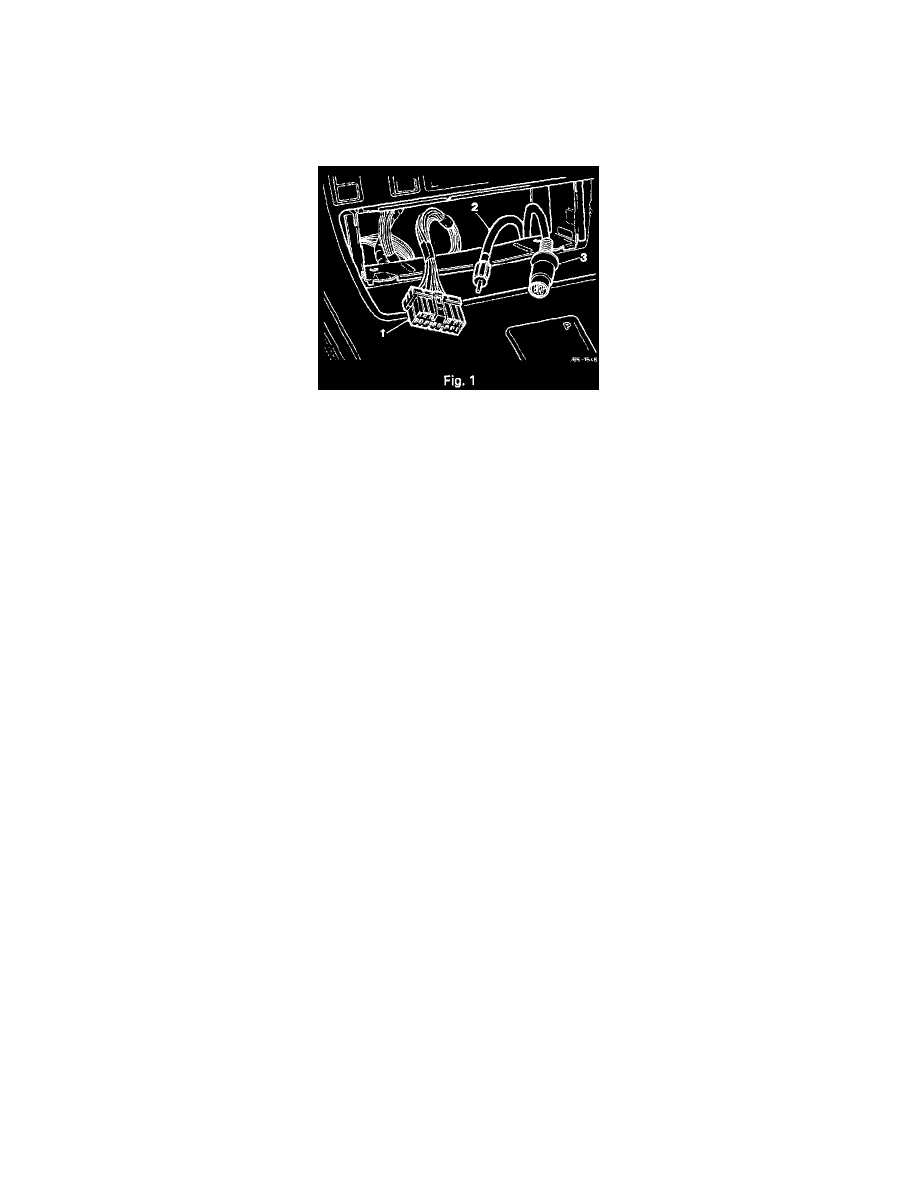
Connect the aerial lead (2 Fig. 1) into the radio.
Connect the white multi-plug connector (1 Fig. 1) into the radio socket.
Connect the compact disc player 'DIN' plug (3 Fig. 1) to the radio socket.
Check all connections are fully 'home'.
Carefully reposition the radio panel to the centre console.
Fit and tighten the radio panel securing screws.
Refit the centre console finisher veneer panel 76.47.26.
Refit the centre console ashtray 76.67.18.
Move the selector lever to 'P' park position.
Connect the battery earth lead.
Switch the ignition to the auxiliary position.
Programme the radio security code into the radio.
Tune the radio into the required stations.