
Vanden Plas L6-4.0L (1990)
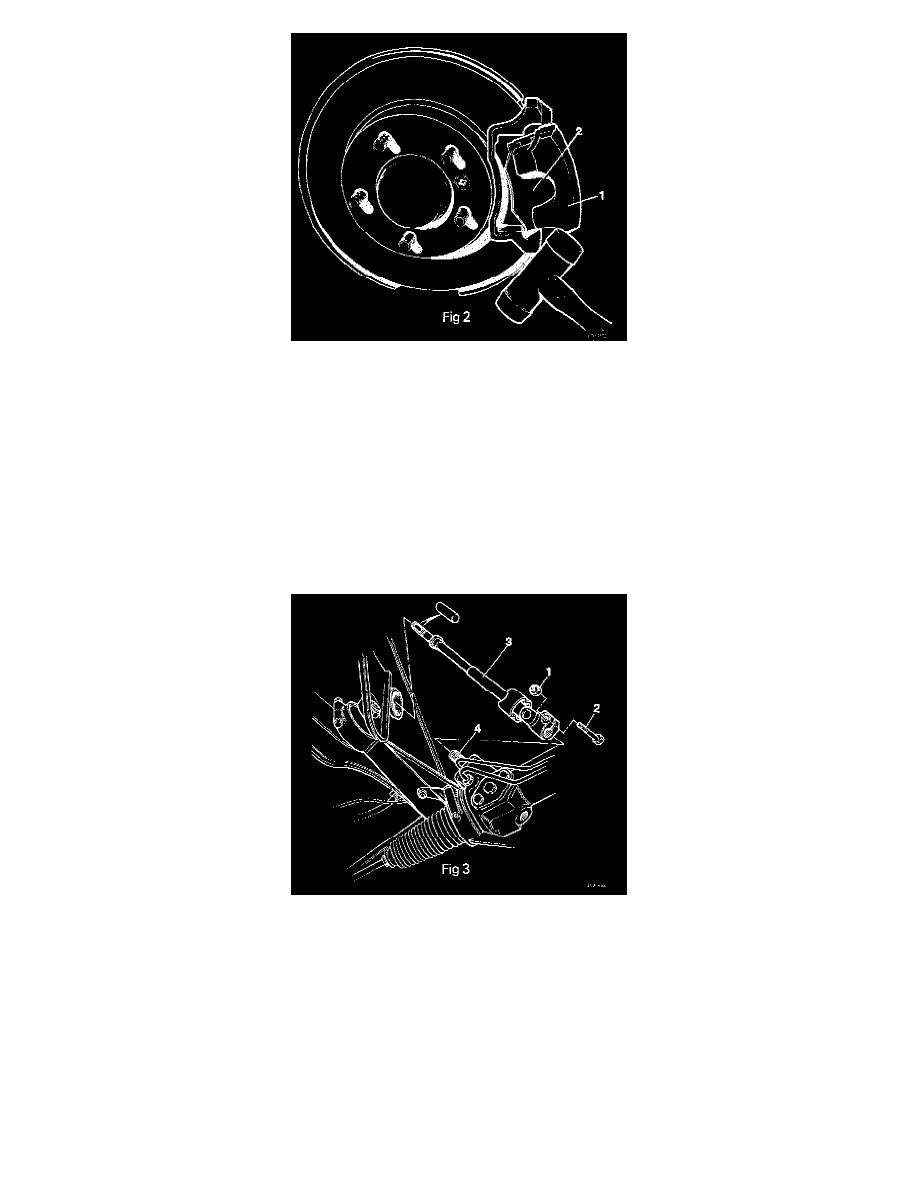
- Remove the lower guide pin bolt from the left hand caliper, and pivot the caliper upwards to gain access to the brake pads (Fig 2).
NOTE: Use an open-ended spanner to hold the guide pin during removal. This will prevent damage to the rubber dust cover.
- Remove the brake pads.
- Remove the upper guide pin bolt, remove the caliper, and re-position the caliper away from the suspension area.
- Disconnect the right hand brake pad wear sensor block connector.
- Remove the right hand brake pads and caliper.
- Turn the steering to the straight ahead position. Remove the ignition key.
- Remove the lower column (3, Fig 3) to steering rack securing bolt/nut (1,2, Fig 3).
- Disengage the splines from the rack pinion (4, Fig 3).
NOTE: At this point, the lower column cannot be completely disconnected from the pinion. Remove the P.A.S. pipe to crossmember retaining
clamps and spacing washers.
- Position a drain tray under the front of the vehicle. Disconnect the steering rack return pipe, and drain the system.
- Fit blanking plugs to the pipe and rack. Disconnect the steering rack feed pipe, and drain the system.
- Fit blanking plugs to the pipe and rack. Re-position the pipes away from the suspension area. Remove the drain tray.
- Remove the engine mounting securing nuts.