
Vanden Plas L6-4.0L (1990)
- Remove the spacer tool.
- Fit No 7 cap. Fit but do not tighten the cap securing bolts.
- Finally tighten Nos 1 and 7 cap securing bolts in sequence.
- Remove No 4 cap cylinder head bolt and remove the spacer tool.
- Lubricate and fit No 4 cap.
- Fit and tighten No 4 cap securing bolts.
- Fit and tighten No 4 cap cylinder head bolt.
- Repeat the procedure for Nos 2, 3, 5 and 6 caps, LH camshaft.
- Set the LH camshaft to TDC.
- Repeat the procedure for the RH camshaft.
- Fit and align the camshaft sprockets to the chain and the camshafts.
- Move all the slack to the tensioner side.
Timing Chain Tensioner Tool
- Fit upper chain tensioner tool 18G 1436. Fit and tighten the bolts.
- Tension the cam chain.
Camshaft Sprocket
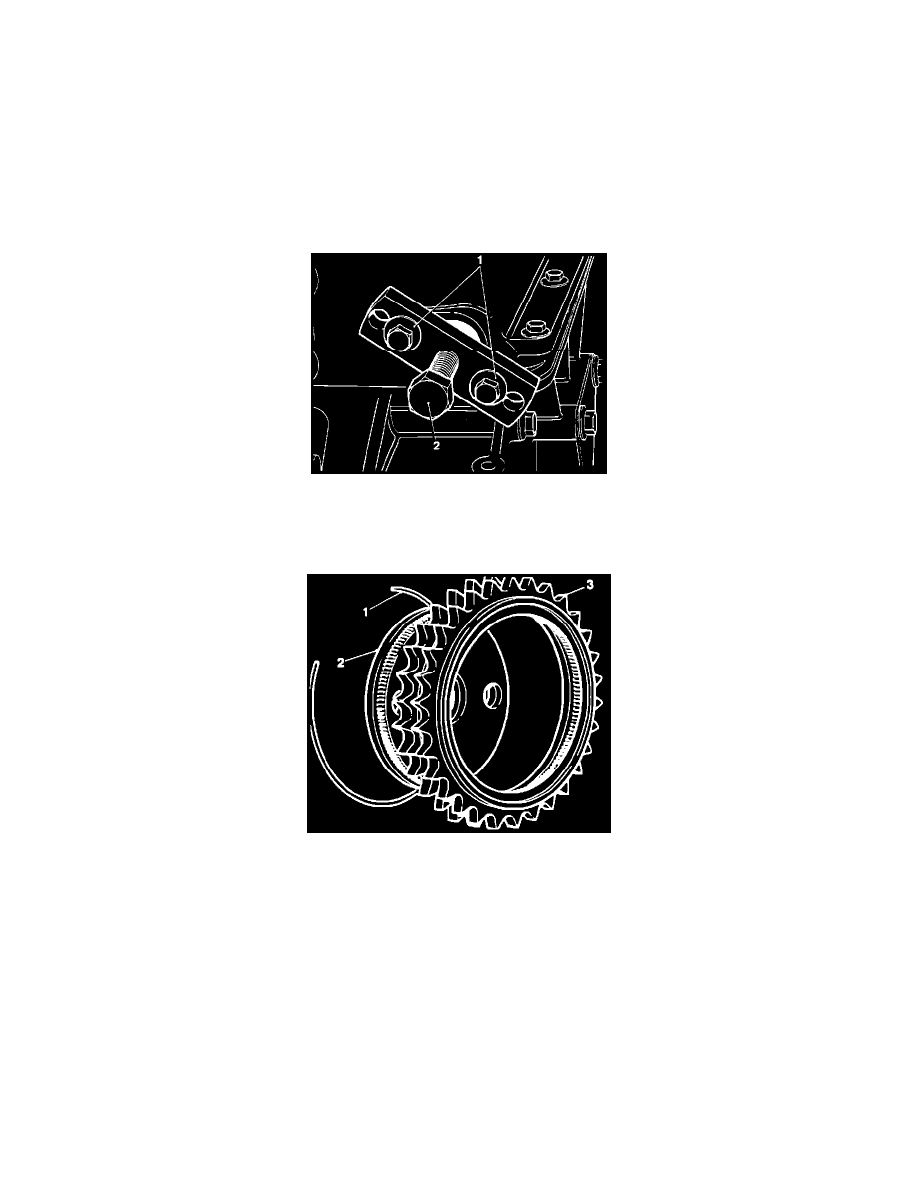
- Remove the inner sprocket spring clip (1).
- Remove the inner sprocket (2) from the outer sprocket (3) and align the securing bolt holes.
- Fit the tab washers. Fit and tighten the securing bolts.
- Lock over the tabs.
- Refit the inner sprocket securing clip.
- Repeat the procedure for the other sprocket.
- Loosen the chain tensioner tool bolts.
- Remove the tensioner tool.
- Clean the tensioner assembly and gasket faces.
- Fit a new housing gasket. Fit a new O-ring. Lubricate the O-ring.
- Fit the tensioner assembly to the cylinder head.
- Fit and tighten the tensioner securing bolt.
- Fit but do not tighten the valve clamp bolt.
- Clean the valve assembly and fit new O-rings.
- Lubricate the tensioner valve.