
Vanden Plas L6-4.0L (1990)
(3 Fig. 2).
-
Fit and tighten the tool handle ensuring that the extractor cones (4 Fig. 2) line up with the link pins. Extract the link.
-
Slacken the tool carefully ensuring that no components fall into the oil pan. Remove the oil pump chain.
-
Remove the lower timing chain from the sprockets.
-
Using a suitable drift, remove the crankshaft sprocket.
-
Remove the power assisted steering pump assembly.
-
Remove the bolt securing the drive-plate. Remove the drive-plate.
-
Remove the auxiliary shaft oil seal. Using right-angled snap-ring pliers, displace and remove the drive shaft snap-ring.
-
Remove the drive shaft.
-
Remove the drive shaft rear thrust washer.
-
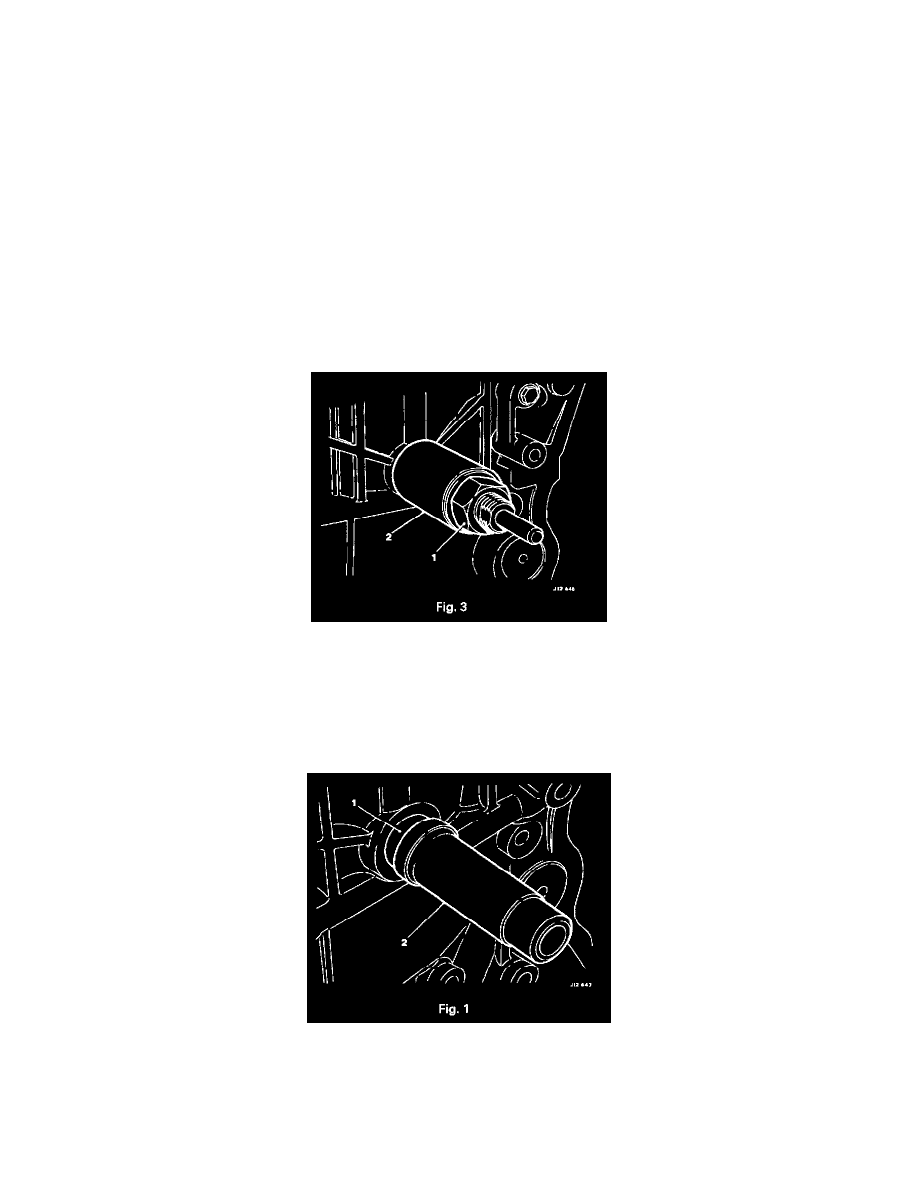
Fit Service Tool 18G 1434 to the bearing situated in the front of the cylinder block (2 Fig. 3). Locate the center peg. Tighten the tool nut to
withdraw the bearing shell (1 Fig. 3).
-
Remove the tool and shell assembly. Slacken off the tool nut and withdraw the center peg. Remove and discard the shell. Remove the blanking
plate from the timing cover.
-
Repeat the procedure to remove the timing cover and drive shaft housing bearing shells.
-
Clean all component parts and check for wear or damage, renew worn or damaged components as necessary. Check for wear and renew the
auxiliary shaft bushes (1 Fig. 1) using Service Tool 18G 1434 (2 Fig. 1).
-
Lubricate all bearing shells. Refit all shells using 18G 1434.