
Vanden Plas L6-4.0L (1990)
Expansion Valve: Service and Repair
Removal
1. Depressurize the air conditioning system. Remove the battery for access.
2. Remove the clamp securing the receiver/dryer to expansion valve pipe.
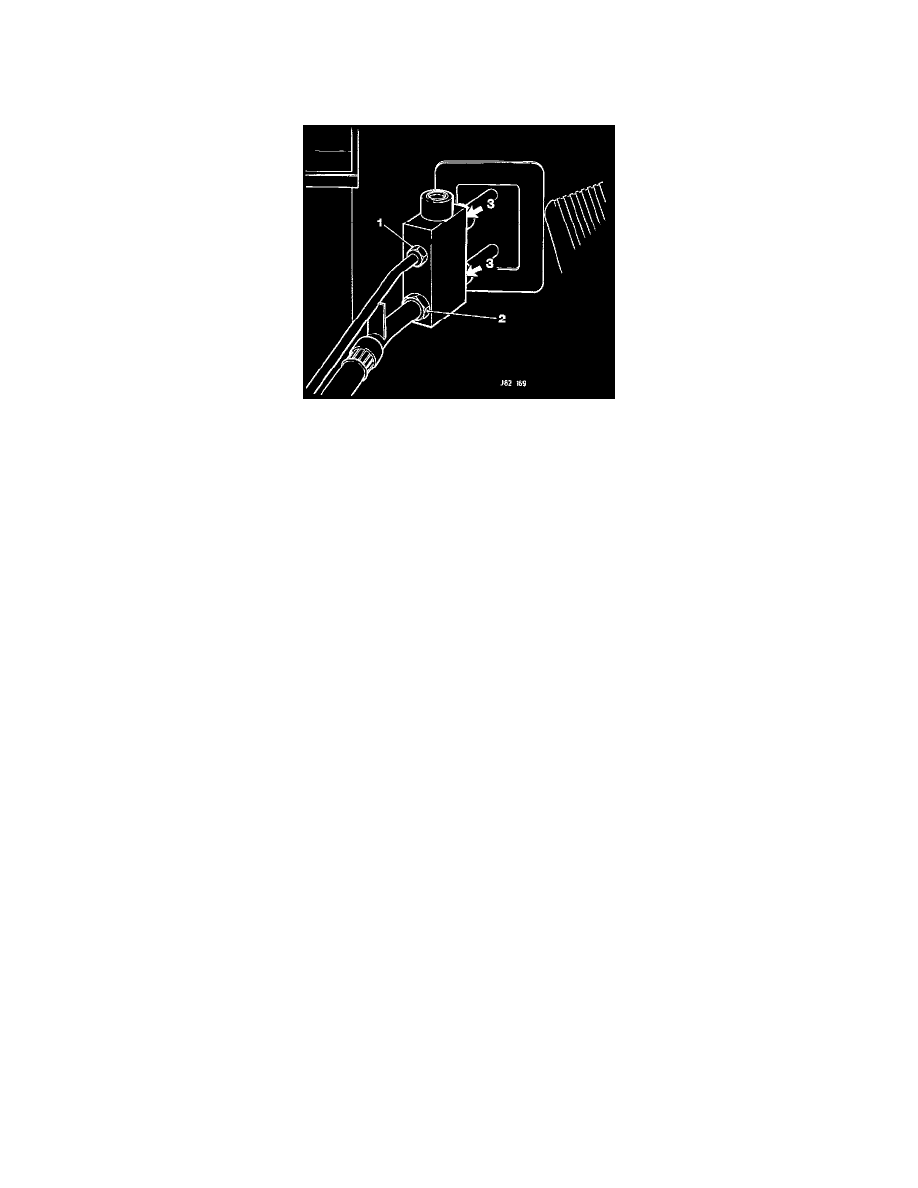
3. Loosen the top pipe union nut and disconnect the pipe from the expansion valve (1). Tighten to 20-27 Nm (14.7-19.9 ft lb).
4. Fit a protective cap to the pipe.
5. Loosen the lower hose union nut and disconnect the hose from the expansion valve (2). Tighten to 28-37 Nm (20.6-27.2 ft lb).
6. Fit a protective cap to the hose.
7. Remove the "0" ring seals and discard.
8. Loosen the union nuts on the evaporator stub pipes (3). Tighten to 28-37 Nm (20.6-27.2 ft lb).
9. Remove the expansion valve, remove and discard the "0" ring seals.
10. Fit protective caps to the evaporator stub pipes.
NOTE:
- Installation is the reverse order of the removal procedure.
- On fitting new expansion valve ensure new "0" rings are fitted.
- Ensure the union nuts are tightened to the correct torque.
- Flush the system, fit new receiver/dryer, evacuate and recharge the system.