
Vanden Plas L6-4.0L (1990)
Hose/Line HVAC: Service and Repair
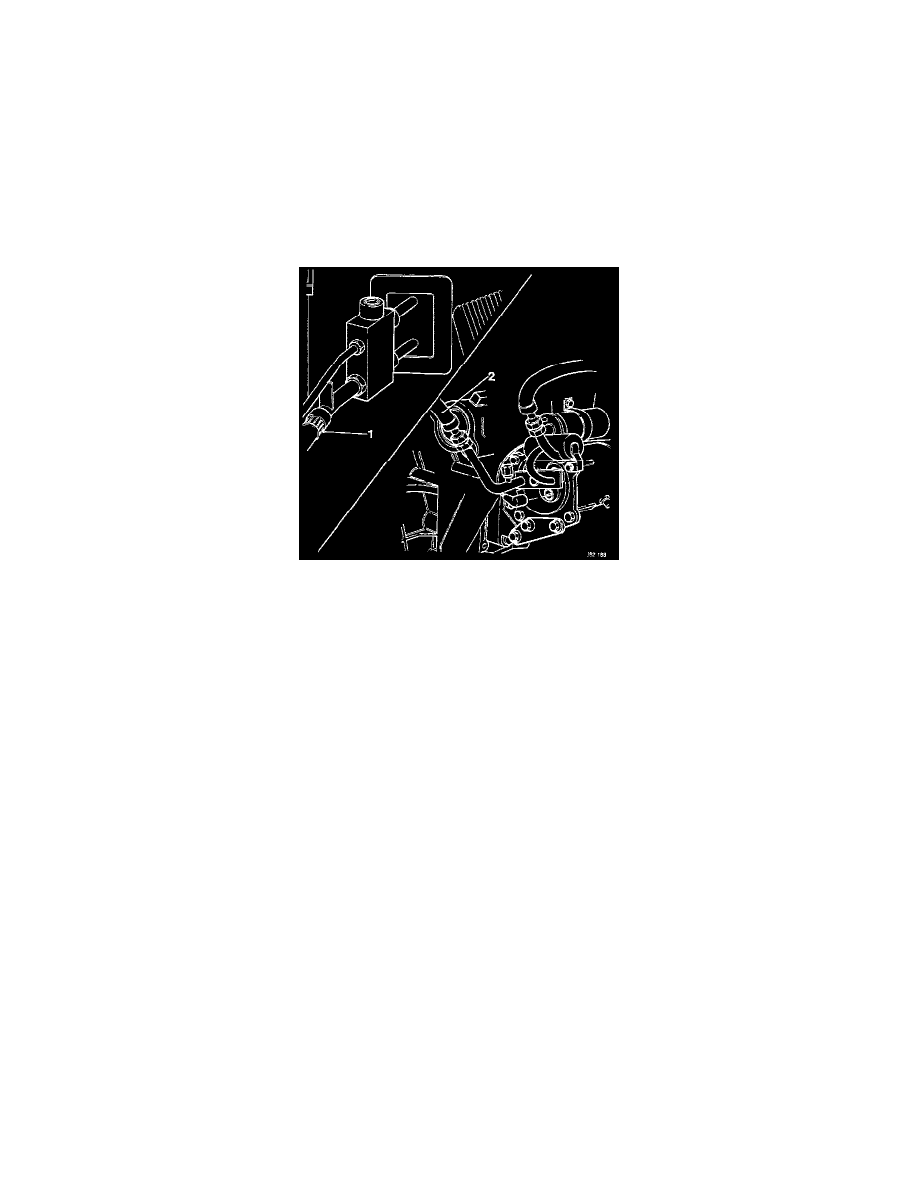
Compressor Inlet to Expansion Valve
Compressor Inlet to Expansion Valve
Removal
CAUTION: It is essential that a second backing spanner is always used when loosening or tightening all hose joints. This will minimise distortion
or strain on pipes. Before renewing any hose or component ensure that suitable clean, dry, sealing plugs are on hand. The protective sealing plugs
or caps must remain on all replacement components until immediately before making connection. The dryer bottle must be renewed whenever the
system has been opened.
1. Depressurize the air conditioning system.
2. Loosen the union nut securing the lower hose to the expansion valve and disconnect the hose (1). Tighten to 28-37 Nm (20.6-27.2 ft lb).
3. Fit a protective cap to the expansion valve orifice.
4. Remove and discard the "0" ring seal.
5. Loosen the union nut connecting the evaporator hose to the compressor inlet pipe and disconnect the hose (2). Tighten to 28-37 Nm (20.6-27.2 ft
lb).
6. Remove and discard the "0" ring seal.
7. Fit a protective cap to the compressor inlet pipe.
Installation
NOTE:
-
Installation is the reverse of the removal procedure.
-
Ensure that new "0" rigs are fitted and the protective caps are not removed until the last possible moment before the hose is connected.
-
Ensure the union nuts are tightened to the correct torque.
-
Flush the system, fit a new dryer bottle, evacuate and recharge the system.