
Vanden Plas L6-4.0L (1990)
Ball Joint: Service and Repair
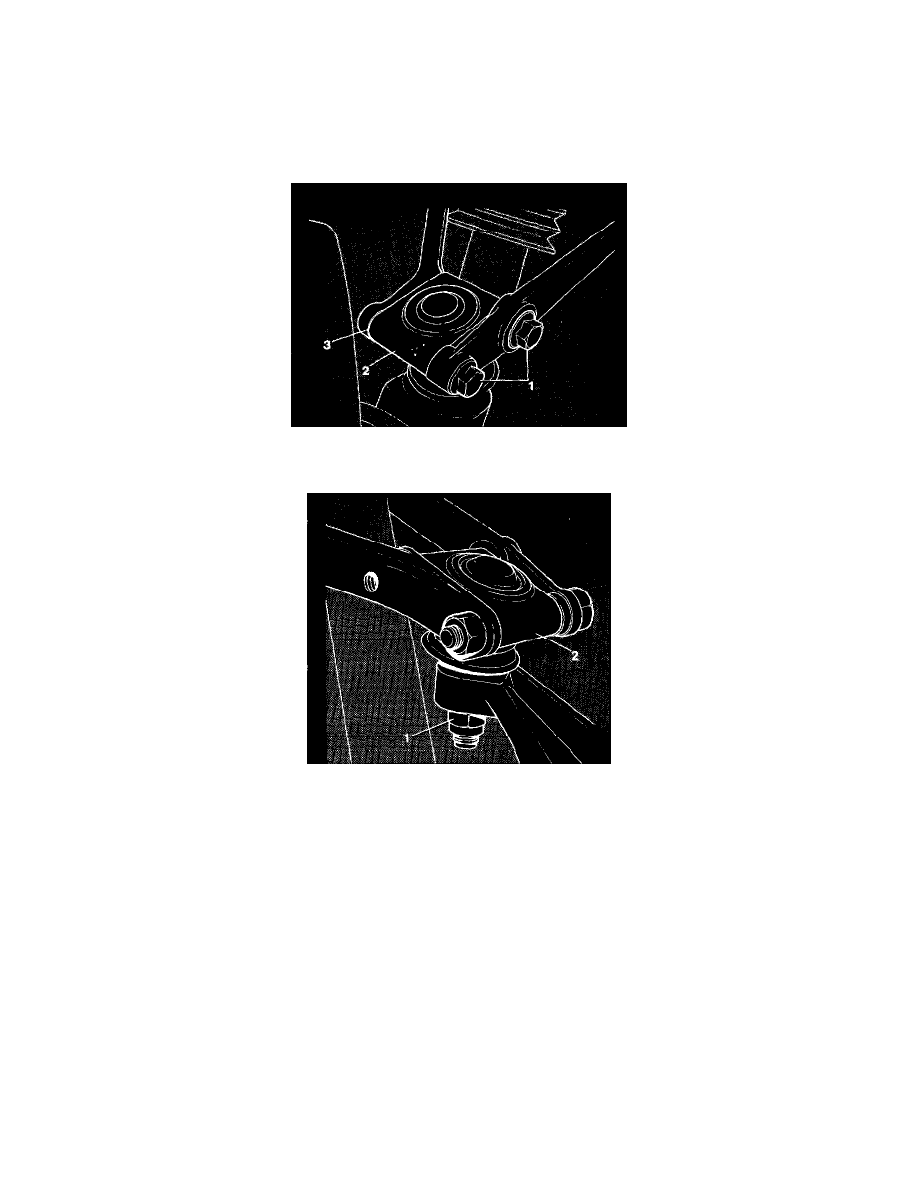
Ball Joint-Upper
-
Slacken off the RH road wheel nuts 1/4 turn each.
-
Jack up the front of the vehicle and support with axle stands.
-
Remove one wheel nut, mark the wheel relative to the stud, and remove the remaining wheel nuts.
-
Remove the road wheel and tire assembly.
-
Remove the upper ball joint (2) securing bolts (1), note the position and collect the castor shims (3).
-
Displace the upper wishbones for access.
-
Remove the upper ball joint securing nut (2), fit Service Tool JD100 and break the taper.
-
Remove the ball joint (2) and tool.
-
Clean the mating faces and shims.
-
Fit the new ball joint assembly.
-
Fit and tighten the ball joint securing nut.
-
Fit the ball joint securing bolts.
-
Do not tighten at this stage.
-
Refit the castor shims.
-
Finally tighten the ball joint securing bolts.
-
Refit the road wheel.
-
Lower the vehicle to the ground.
-
Carry out steering geometry check using suitable equipment.
DATA
-
Camber angle 0 to 0.50°
-
Castor angle 3.5 to 4.5°
-
Wheel alignment Parallel to 1.6mm toe in (inclusive)
-
Measurements to be taken with the underside of the front crossbeam 150.8mm above the ground.
SERVICE TOOLS
-
JD 100 Ball joint remover