
Vanden Plas L6-4.2L (1982)
6.
The flange which had been welded to the intrusion member must now be straightened so that the bracket can be secured to the vertical face of the
intrusion member, Illustration Z.
7.
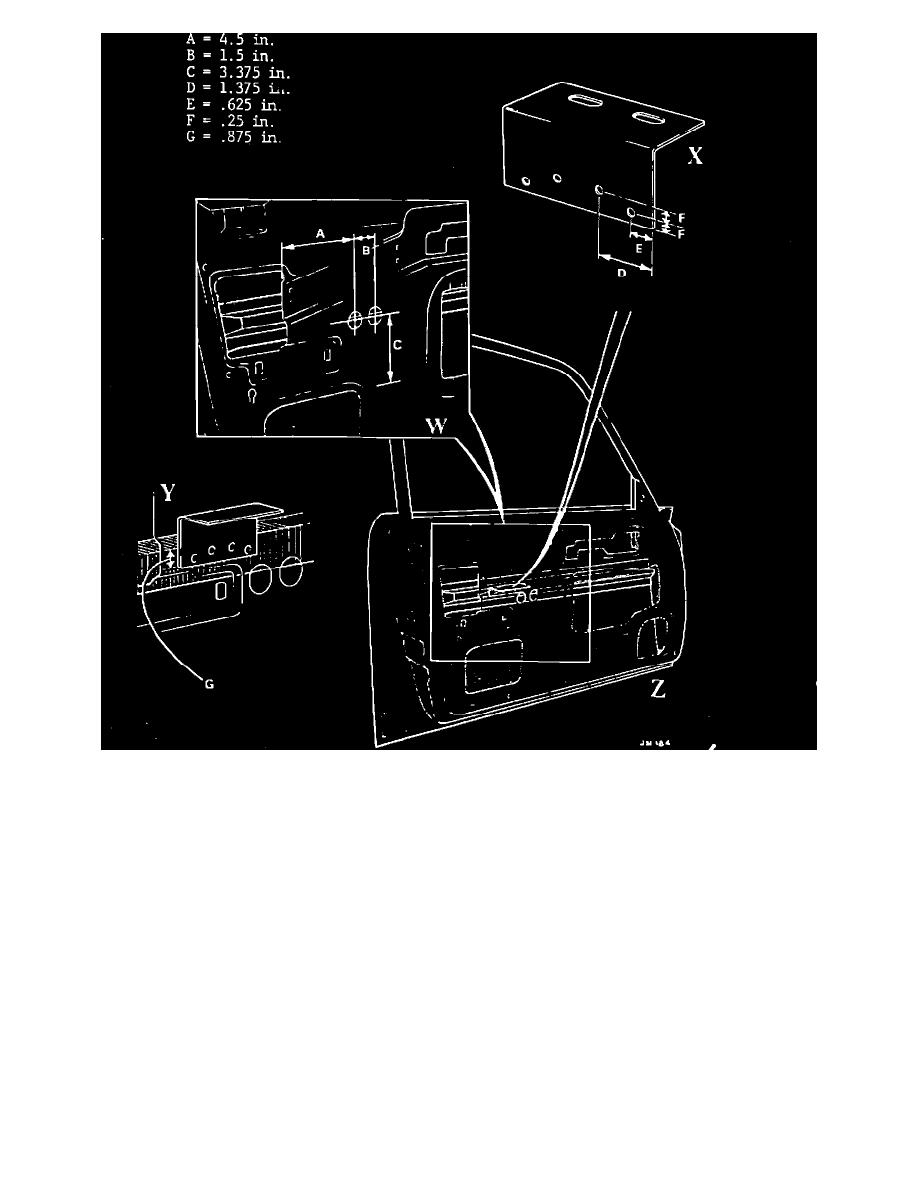
Mark out and drill 4 holes 3/16" through the bracket, Illustration X.
8.
Mark out and drill 2 holes 1.1/8" through the inner door skin to give access for drilling the intrusion member, Illustration W.
9.
Using the impression left on the horizontal surface of the intrusion member as a guide, position the bracket against the vertical surface of the
intrusion member, Illustration Y. Support by hand and drill through one of the holes in the bracket and into the intrusion member using a 9/64"
extended drill.
10.
De-burr and degrease the bracket and intrusion member. Apply a quick setting metal to metal adhesive to both mating surfaces. Mount the
bracket and secure with one self-tapping screw, P/N GHF 425, into the hole previously drilled.
11.
Drill through the remaining holes and insert 3 screws, P/N GHF 425, and secure.
12.
Cover the 2 access holes with a suitable masking tape.
13.
Refit the solenoid 86-25-32.
14.
Refit the glass and trim pane.
The repair operation time for this rectification is 2.4 hours.