
Vanden Plas L6-4.2L (1982)
Brake Master Cylinder: Service and Repair
Master Cylinder
NOTE: Operation of the servo when the master cylinder is not in place can cause its mechanism to travel past its normal limit; this can damage the servo
beyond repair.
Before the master cylinder is removed, press and release the brake pedal at least 10 times. This is to be sure that no vacuum exists to operate
the servo.
REMOVE
1. Remove reservoir cap and switch assembly.
2. Detach two spring clips and withdraw two retaining pins )
3. Place suitable container in position to catch fluid Pull reservoir vertically away from master cylinder. Fit closing plugs to grommets in master
cylinder ports.
4. Disconnect master cylinder fluid delivery pipes, plug pipes to prevent ingress of dirt. Remove nuts and washers securing master cylinder to servo
unit.
5. Lift master cylinder from mounting studs.
NOTE:Overhaul of the master cylinder should be carried out with the work area, tools and hands in a clean condition.
DISASSEMBLE
1. Carefully pry reservoir hose adaptors from sealing grommets.
2. Using suitable screwdriver lever sealing grommets from master cylinder.
3. Press primary piston into bore of cylinder and withdraw secondary piston stop pin from forward grommet housing.
4. Remove circlip.
5. Tap flange end of cylinder on wooden block to remove primary piston and spring, secondary piston and spring. it may prove necessary to feed
compressed air into cylinder front delivery port.
NOTE: Once piston assemblies are withdrawn appropriate piston and spring must be kept together. In event of springs being mixed, the secondary
piston spring can be easily identified, it being slightly thicker and longer than the primary spring.
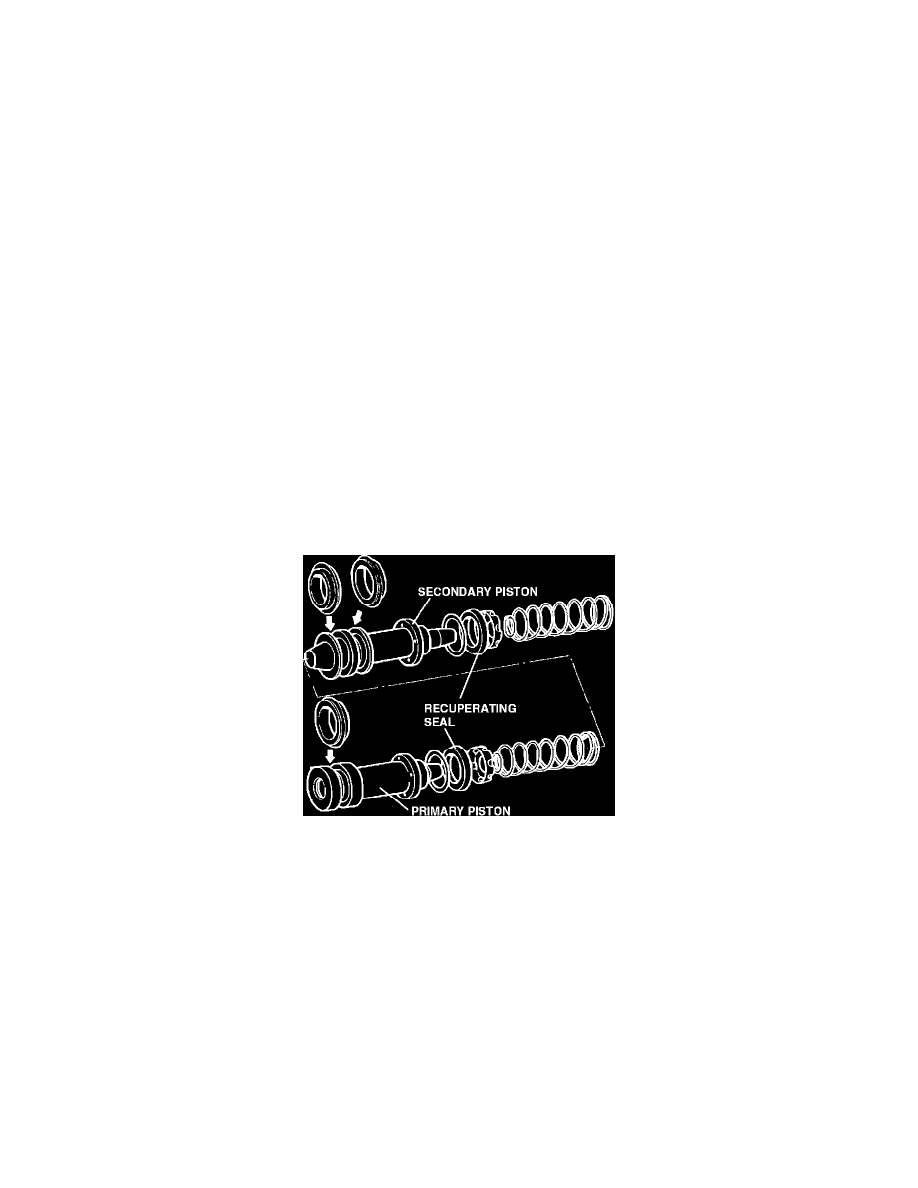
Master Cylinder Pistons
6. Remove spring, spring seat, recuperating seal and washer from secondary piston.
7. Carefully pry seals from rear of secondary piston.
8. Remove spring, spring seat, recuperating seal and washer from primary piston.
9. Carefully pry seal from rear of primary piston.
10. Discard all old seals and associated items that will be replaced by those contained within service kit.
INSPECTION
1. Clean all parts with Girling cleaning fluid and dry with lint-free cloth.
2. Examine piston and bore of cylinder for visible score marks and corrosion. If doubt exists as to condition of components replace suspect item.
WARNING: To help prevent damage it is essential that generous amounts of clean brake fluid are used at all stages of seal assembly.
REASSEMBLE
1. Carefully fit inner seal of secondary piston in locating groove. Be sure lip faces forwards.
2. Fit remaining seal in locating groove, be sure seal lip faces towards primary piston, i.e. in opposite direction of seal fitted in operation 1.
3. Fit washer, recuperating seal, spring seat and spring over forward end of secondary piston.