
Vanden Plas L6-4.2L (1982)
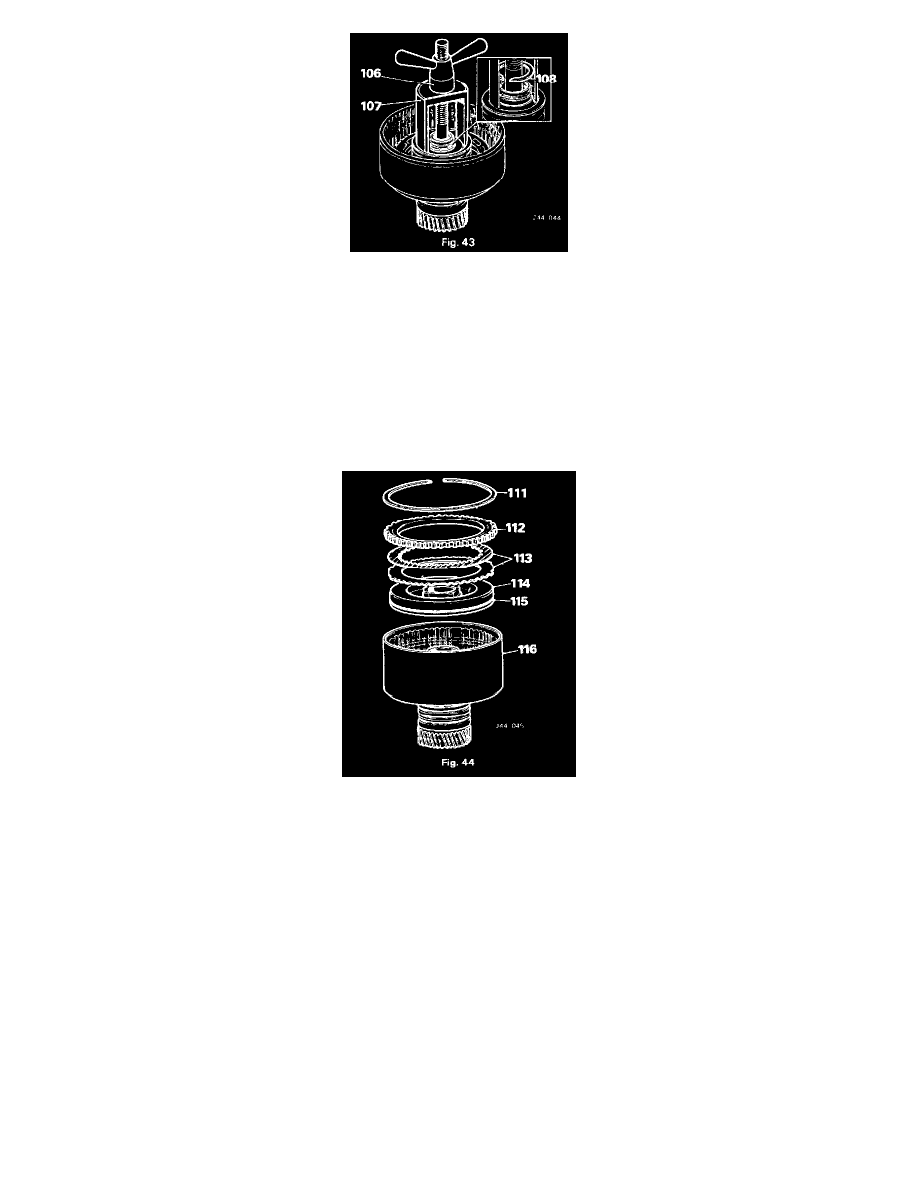
Fig. 43
106. Place the rear clutch assembly over the central spindle of the clutch spring compressor 18G 1016 reverse the sun gear down (Fig. 43).
107. Fit spring compressor over spindle (Fig. 43).
108. Compress the spring and remove the snap ring (Fig 43).
109. Slowly release the pressure and remove the compressor.
110. Remove the retainer and spring.
Fig. 44
111. Remove the snap-ring retaining pressure plate (Fig. 44).
112. Remove the pressure plate (Fig. 44).
113. Remove the inner and outer clutch plates (Fig. 44).
NOTE:
Five outer and five inner clutch plates are fitted
114. Remove the piston by applying air pressure to the supply hole in the clutch housing pedestal (Fig 44).
115. Remove and discard the piston seal (Fig. 44).
Inspection
116. Check clutch drum and bearing surfaces for scores or burrs, replace drum if damaged (Fig. 44).
117. Check the fluid passage for obstructions, clear passages with compressed air only.