
Vanden Plas L6-4.2L (1982)
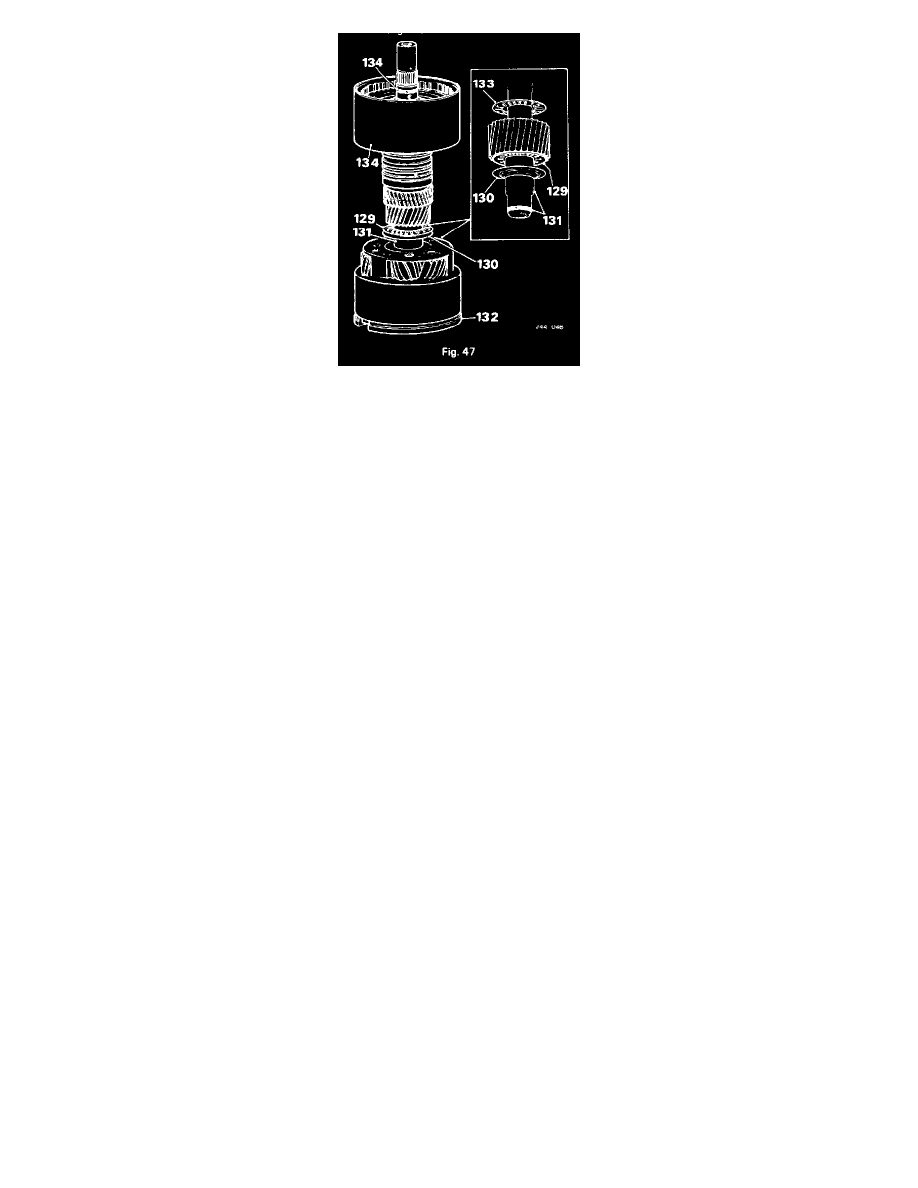
Fig. 47
129. Smear the large needle bearing with petroleum jelly and position it on output end of forward sun gear shaft (Fig. 47).
130. Position the backing washer. flange leading in planet carrier (Fig. 47).
131. Insert the forward sun gear shaft in the planet carrier. fit new fibre sealing ring on Output end of shaft (Fig. 47).
132. Position the centre support in the planet carrier (Fig. 47).
133. Smear the small needle-roller bearing with petroleum jelly and position it on the forward sun gear shaft (Fig. 47).
134. Position the rear clutch assembly on the forward sun gear shaft; fit new sintered sealing rings on the input end of the shaft (Fig. 47). Ensure that
gaps in sealing rings are staggered.
CAUTION: Do not remove the rear clutch assembly and forward sun gear shaft from the planet carrier.
FRONT CLUTCH
Overhaul
Dismantling