
Vanden Plas L6-4.2L (1982)
Extension Housing: Service and Repair
BORG WARNER 66
REAR EXTENSION HOUSING
Remove and refit
Service tool: Torque wrench CBW 547 B-75; engine support tool MS 53A
Removing
Disconnect the battery.
Position service tool MS 53A across rear engine lifting eye and set the hook to support the engine.
Remove the nut at the centre of the mounting and recover the plain washer. Remove the nuts and washers securing the forward end of the tie-plate to the
rear of the transmission casing. Remove the fastenings securing the heat shield. Locate the jack to support the mounting plate and release the four
setscrews and washers.
Lower the jack and remove the mounting plate.
Recover the spring washers, spacers and rubber rings.
Remove the screws securing the intermediate heat shield; withdraw the shield.
Remove the screws securing the rear heat shield to the rear engine mounting support plate.
Remove the six bolts and special washers securing the rear engine mounting support plate to the floor pan.
Remove the bolts and special washers securing the rear engine mounting support plate to the transmission tunnel.
Remove the self-locking nuts and bolts securing the propeller shaft to the gearbox output flange; swing the propeller shaft to one side.
NOTE: This operation will be greatly facilitated if one rear wheel (both wheels if "Powr-Lok" differential is fitted) is raised and the gear selector placed
in "N" (Neutral), thereby enabling the propeller shaft to be rotated.
WARNING: Chock both front wheels to prevent the vehicle moving.
Using engine support tool lower the rear of the engine slightly.
CAUTION: Ensure that the engine does not foul the heater water valve.
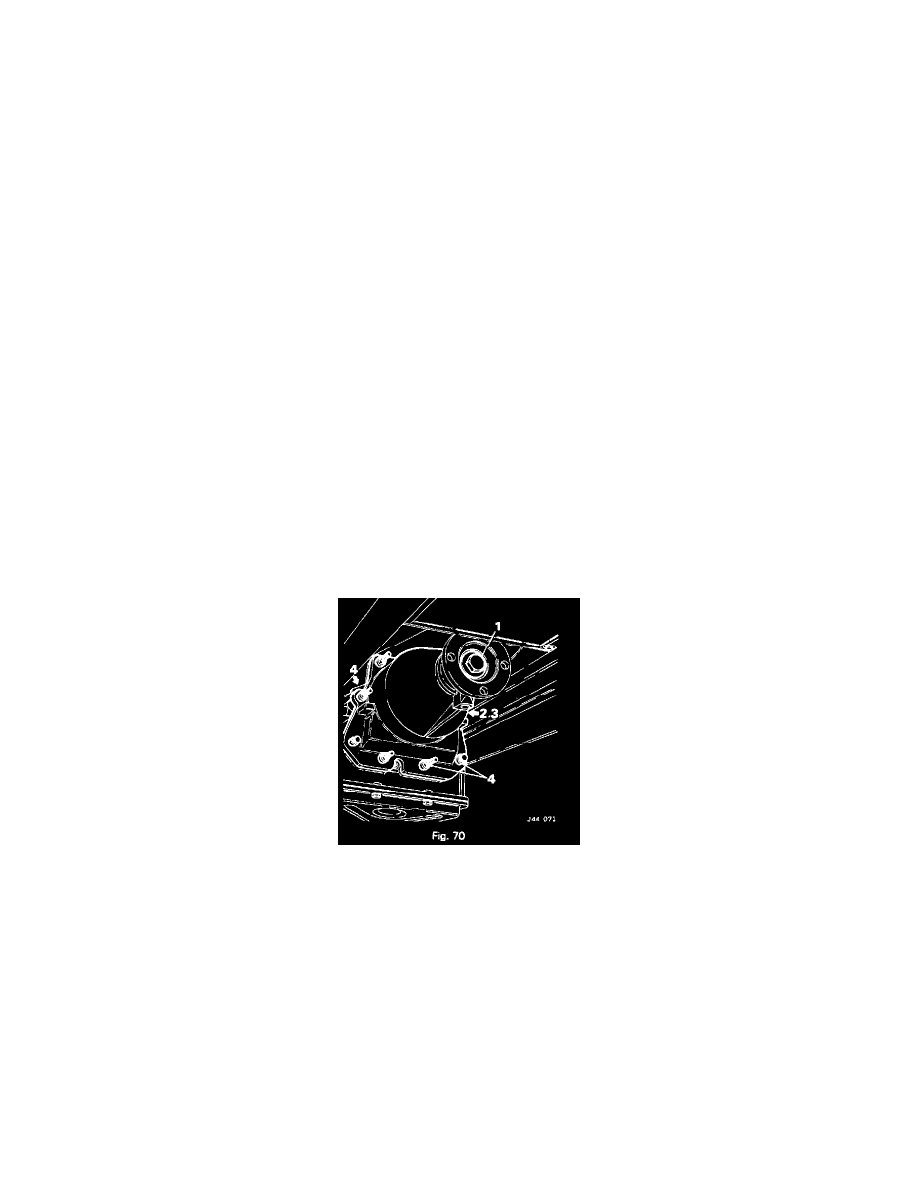
Fig. 70
Place the selector lever in "P" (Park).
Remove the bolt and plain washer (1, Fig. 70) securing the gearbox output flange; withdraw the flange.
Disconnect the speedometer right-angle drive (early models)
On later models slacken knurled nut securing transducer and withdraw from speedometer drive retaining plate.
Remove the bolts (2, Fig. 70) securing the speedometer drive retaining plate; withdraw the plate.
Withdraw the speedometer driven gear (3. Fig. 70); remove and discard the "O" ring.
Remove the bolt securing the selector cable trunnion to the mounting bracket.
Note the fitted position of the stud bolts, bolts and nuts 14, Fig. 70). Remove these fixings, withdraw the trunnion mounting bracket and remove two
further stud bolts and spacers.
Withdraw the rear extension; remove and discard the gasket.
Prise the oil seal out of the rear extension housing; discard the oil seal.
Refitting