
XJ-6 L6-3.6L (1989)
^
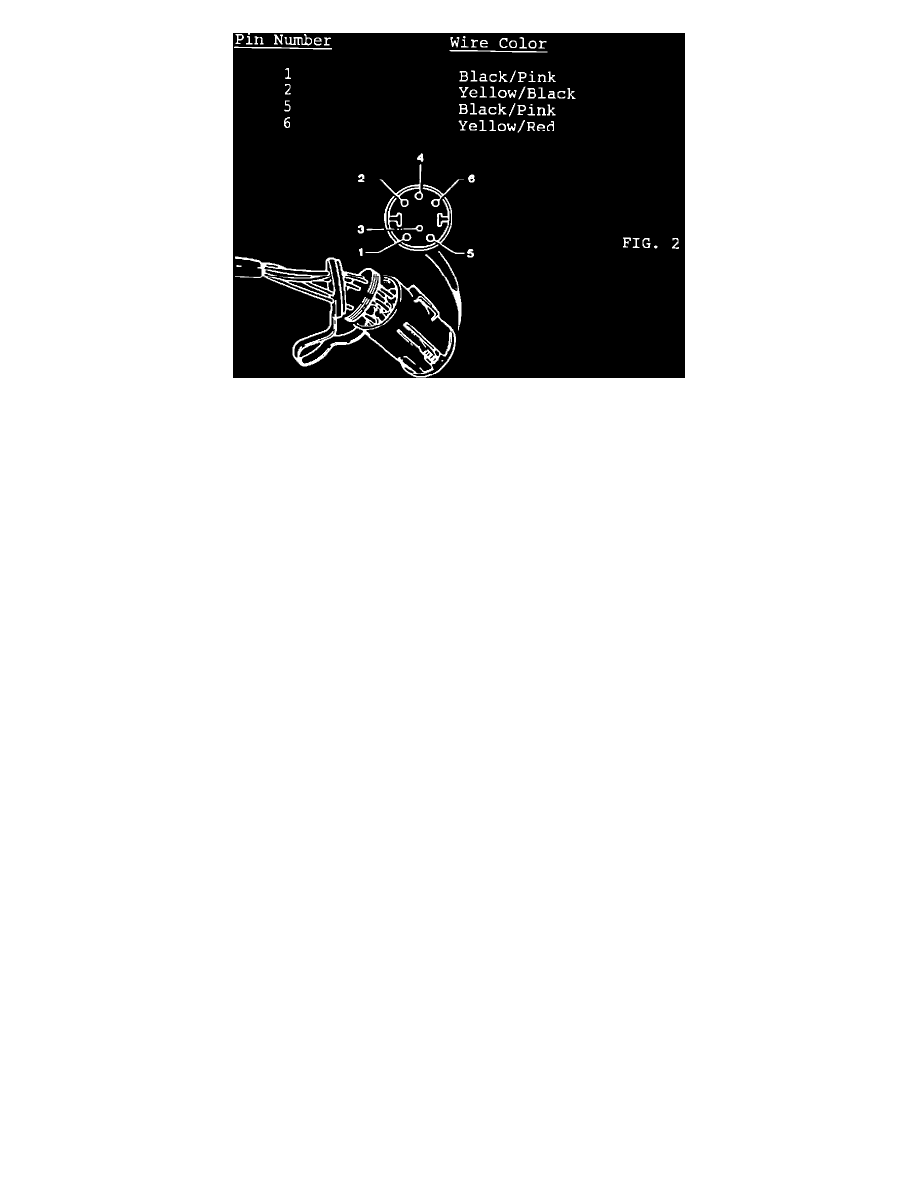
Position the harness pins through the anti-back-out plate and seal. Fully install the pins into their correct positions in the multi-plug (refer to chart
and Fig. 2 below)
^
Fully seat the seal and anti-back-out-plate into the multi-plug socket.
^
Using insulating tape, tape the two switch harnesses together.
^
Feed the accumulator harness up through the engine compartment to the socket.
NOTE:
Make sure that the plug and socket pin connections are clean and free from any oil contamination before connecting them together.
^
Lower the vehicle and connect RS25 plug and socket. Secure using a tie wrap.
^
Start the engine and allow the hydraulic system to pressurize. Check the system for any leaks.
^
Check and top up the hydraulic system if necessary. Use only the recommended HSMO and do not overfill the reservoir.
Torque Specification:
Accumulator Vessel:
21-26 ft.lbs. (28-36 N-m)
Accumulator Clamp Bolts:
16-20 ft.lbs. (22-28 N-m)
Accumulator Switches:
23-28 ft.lbs. (31-39 N-m)
Pipe Unions:
7-8 ft.lbs. ( 9-11 N-m)
Parts Information:
Accumulator Vessel -
JLM 10546
Accumulator Vessel Seal -
JLM 10547 (included with Vessel)
Charge Switch -
JLM 1562
Low Pressure Switch -
JLM 1563
Accumulator Body -
JLM 10779
Warranty Information:
Fault Code:
6FB (all operations)
Description
R.O. Number
Time Allowance
Accumulator Vessel-
66.91.18
0.50 hrs.
renew
Low pressure switch - renew
66.30.11
0.70 hrs.