
XJ-6 L6-3.6L (1989)
Brake Master Cylinder: Service and Repair
Overhaul
Dismantling
NOTE: The use of a small screwdriver with a rounded polished end is recommended to assist in the removal of the seals. Before proceeding, be sure that
the master cylinder, work area, tools and hands are clean.
- To remove the fluid reservoir withdraw the roll pin, and carefully pull the reservoir off the master cylinder.
- Carefully lever out the reservoir seals, from the master cylinder body.
- Remove the end cap/retainer, taking care not to damage the mounting flange face.
NOTE: The secondary return spring loads the piston assemblies against the end cap/retainer.
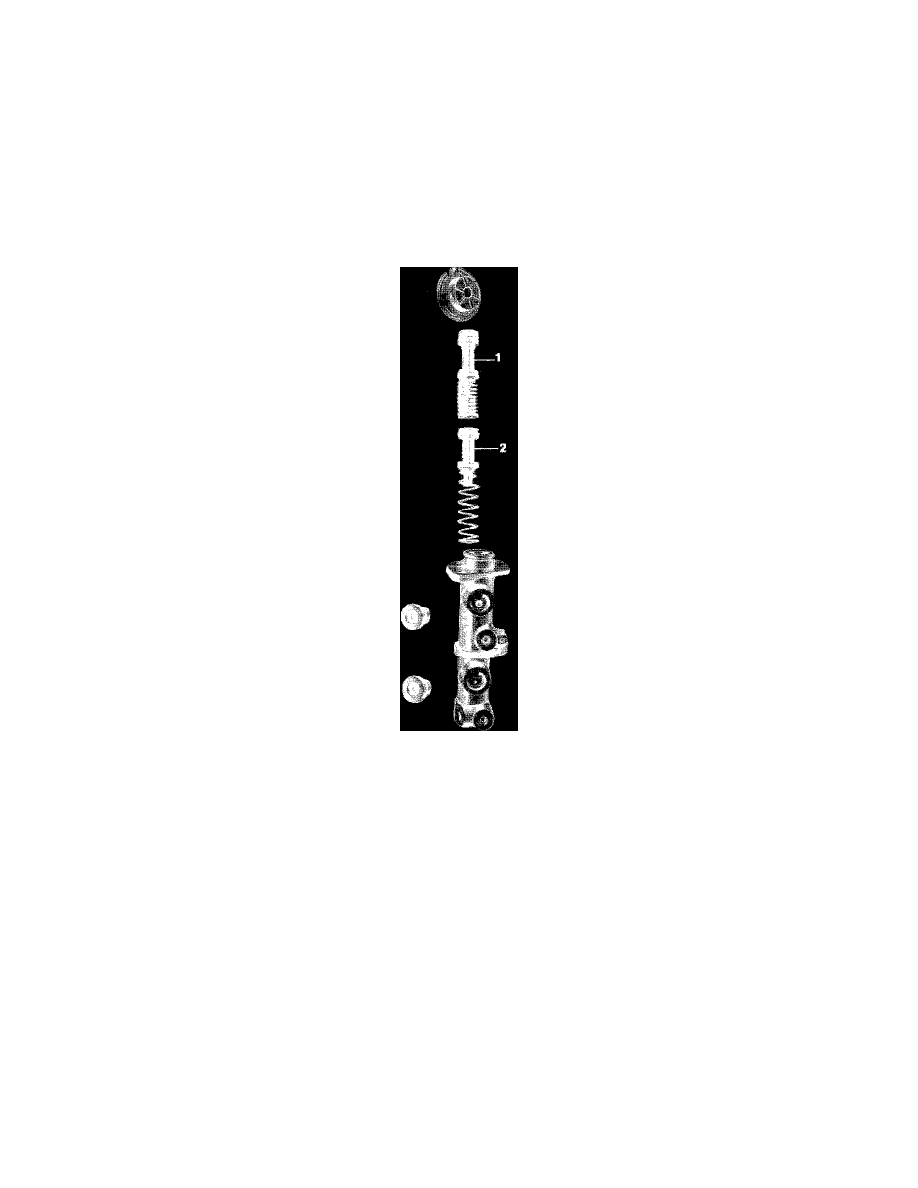
Brake Master Cylinder
- Withdraw the primary piston assembly from the bore of the master cylinder, and discard. Gently tap the cylinder on a soft or wooden surface, to
remove the secondary piston. It may be necessary to lubricate the cylinder bore with new unused Castrol Girling Brake Fluid, to ease removal. In very
difficult cases, carefully feed compressed air into the master cylinder front delivery port. Remove the spring, seal retainer, recuperating seal and
washer, from the front end of the secondary piston. Taking care not to damage the piston, remove the remaining seal from the rear of the secondary
piston. Discard all the old seals and associated items which will be replaced by those contained within the service kit.
- The service kit also contains a new primary piston assembly, and the old one should be discarded.
Inspection
- Examine the secondary piston and the bore of the master cylinder for visible signs of scoring, ridges and corrosion. If any doubt exists as to the
condition of any component, then it must be renewed, or a replacement master cylinder fitted.
Assembly
- The components to be re-used should be cleaned in unused Castrol-Girling Brake fluid and placed on a sheet of clean paper, ready for assembly.
CAUTION: To help prevent damage, it is essential that generous amounts of clean brake fluid are used at all stages of seal fitting.
- Carefully fit the rear seal in its groove in the secondary piston; be sure that the lip of the seal faces towards the primary piston.
NOTE: When fitting seals, only use thumb and finger pressure. Squeeze the seal between the finger and thumb, into a ellipse, then press the raised part