
XJ-6 L6-3.6L (1989)
Timing Cover: Service and Repair
1.
Remove cylinder head as described under CYLINDER HEAD.
2.
Remove bolts securing pump to timing cover, then disconnect top hose electrical connectors from thermostat housing.
3.
Disconnect water pump and expansion hoses from thermostat housing.
4.
Remove spoiler/under tray to inner wheel arch cover, then the nuts securing fan clutch unit to water pump.
5.
Remove fan cowl securing clips, then lift out cowl and fan clutch unit as an assembly.
6.
Remove hydraulic pump from timing cover, pump drive plastic coupling and driveplate center securing bolt.
7.
Using a pry bar, remove driveplate from shaft.
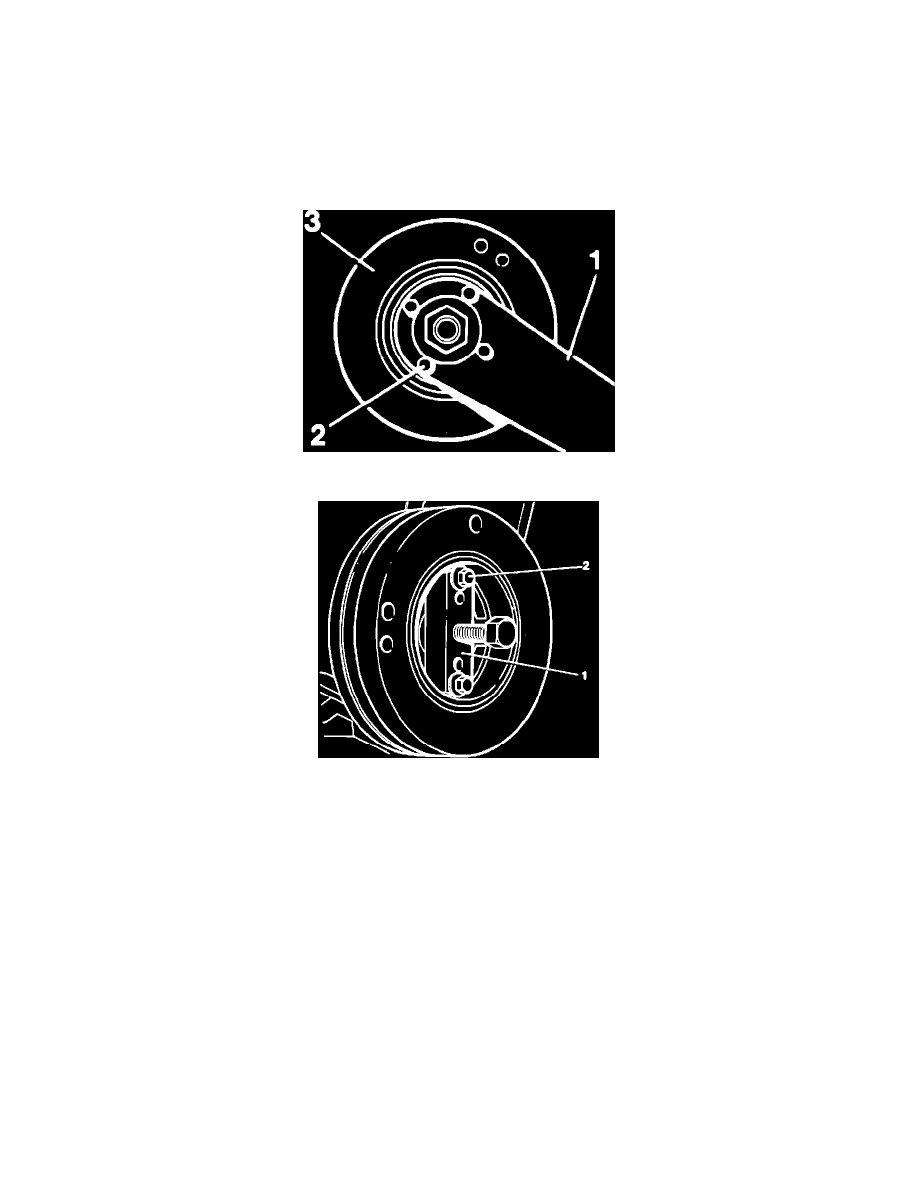
Fig. 8 Crankshaft Pulley Retainer Tool
Fig. 9 Crankshaft Pulley Removal
8.
Remove distributor, then the alternator belt.
9.
Install retainer tool No. 18G-1437 or equivalent, to crankshaft pulley and tighten bolts. Fig. 8.
10.
Loosen crankshaft center securing bolt, then remove tool and bolt.
11.
Install puller tool No. 18G-1437 or equivalent, through crankshaft pulley and tighten bolts. Fig. 9.
12.
Tighten center bolt of tool and remove pulley.
13.
Remove crankshaft speed sensor bolts and position speed sensor away from timing cover.
14.
Disconnect all hoses from water pump.
15.
Remove water pump from timing cover, then alternator link arm assembly.
16.
Remove timing cover securing bolts, then the pointer, damper Woodruff key and oil seal space from crankshaft.
17.
Remove oil seal from timing cover.
18.
Reverse procedure to install. Tighten to specifications.