
XJ-6 L6-3.6L (1989)
Accumulator: Service and Repair
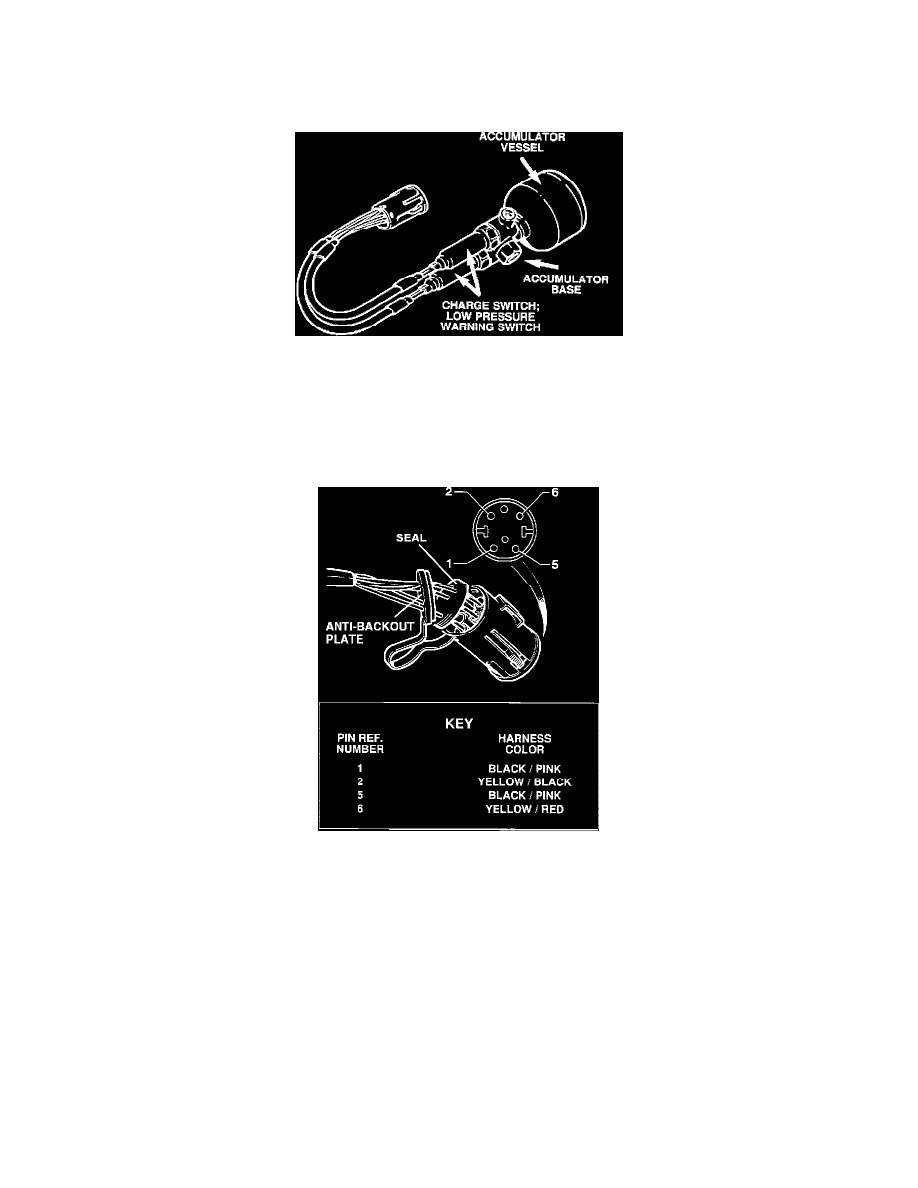
Charge Switch / Low Pressure Switch
This operation is the same for either switch. The charge switch is identified by wire colors Y/B (yellow / black) and B (black). The low pressure switch
is identified by wire colors Y/R (yellow / red) and B (black).
Accumulator And Switches
1.
Depressurize brake boost circuit.
2.
Remove tie wraps securing wiring harness connector and disconnect connector.
3.
Feed harness down through engine compartment.
4.
Raise car on lift.
5.
Cut and remove heat shrink sleeve surrounding switch harnesses.
Harness Connector
6.
Remove anti-backout plate and seals from connector.
7.
Remove required pins from connector using Jaguar tool JD 137 or equivalent.
8.
Clean accumulator and surrounding area. Protect against escaping fluid.
9.
Remove switch from accumulator base.
10.
Fit new switch to base and tighten to:
23 - 28 ft lb (31 - 39 Nm)
11.
Refit pins to electrical connector and install seal and anti-backout plate.
12.
Wrap wires together with insulating tape.
13.
Lower car and reconnect wiring connector.
14.
Start engine and allow system to pressurize.
15.
Check for leaks.
16.
Switch engine OFF.
17.
Top up reservoir.