
XJ-6 L6-4.2L (1983)
Timing Chain: Service and Repair
Remove
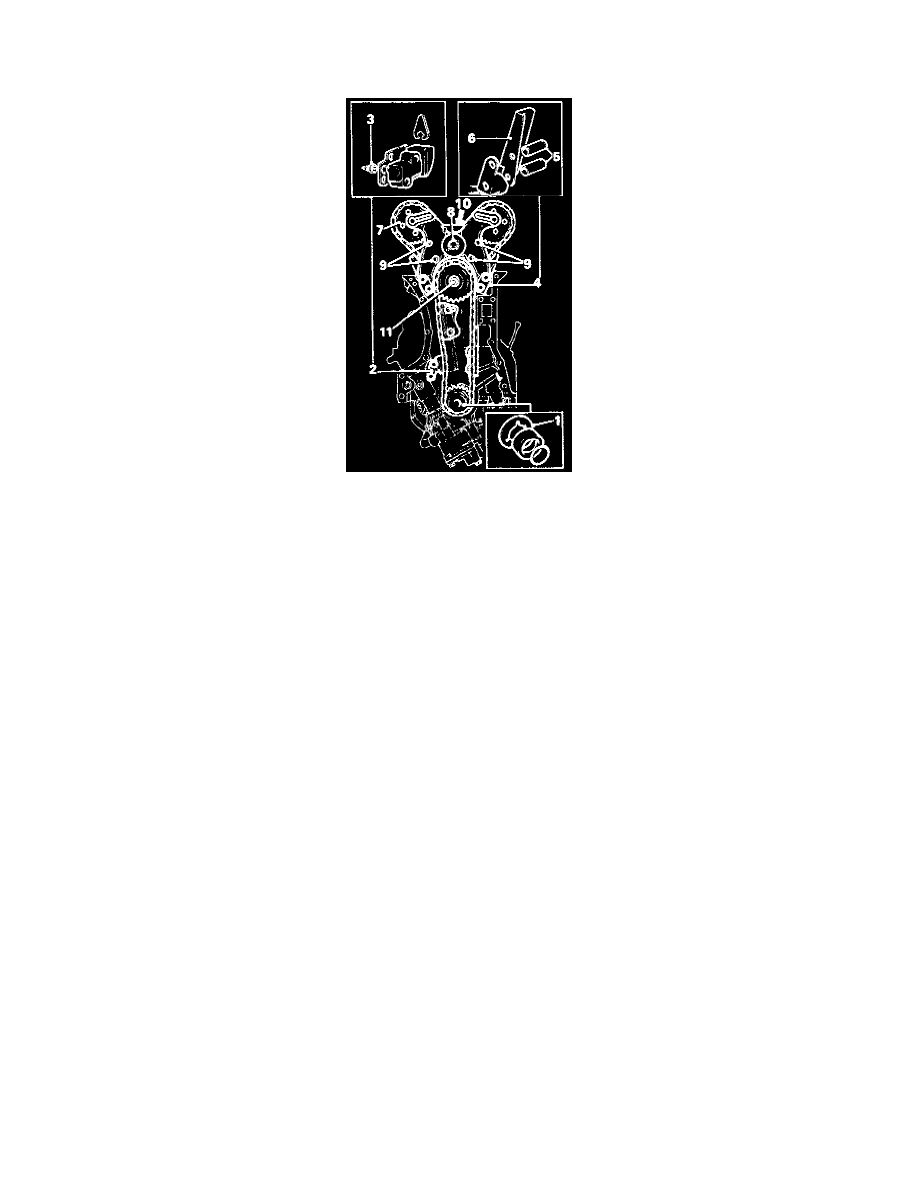
Timing Chains And Components
REMOVE
1. Remove the timing cover.
2. Remove the oil thrower (1) from the crankshaft.
3. Remove the setscrews (2) securing the bottom timing chain tensioner and chain guides. Recover the conical filter (3) behind tensioner.
4. Slacken the four setscrews and shakeproof washers (4) securing the top timing chain assembly. Do not remove the setscrews at this stage.
5. Withdraw the crankshaft timing sprocket and chain assembly. Recover the distance pieces (5), top timing chain dampers 16, and top timing chain
retainer.
6. Disengage the camshaft sprockets (7) from the top chain.
7. Remove the nut and serrated washer (8) from the idler shaft and withdraw the serrated plate, plunger, and spring.
8. Remove the four nuts and serrated washers (9) securing the front mounting bracket to the rear mounting bracket.
9. Separate the brackets.
10. Remove the timing chains from the intermediate and idler sprockets.
11. Draw the idler shaft (10), idler sprocket and bush from the rear mounting bracket.
12. Remove the circlip and press the intermediate shaft from the rear mounting bracket. Recover the intermediate sprockets, bush, and shim.
INSPECTION
13. Examine the timing chains for signs of damage or wear.
14. Examine all sprockets for signs of damage or wear.
15. Examine all dampers and the chain tensioner for signs of damage or excessive wear.
16. Examine the idler sprocket bush and intermediate sprocket bush for signs of wear.
NOTE: If the timing chains or sprockets show signs of excessive wear or are damaged in any way, all sprockets and the chains should be
renewed.