
XJ-6 L6-4.2L (1983)
Wheels: Specifications
Spare Tire
Service and Repair
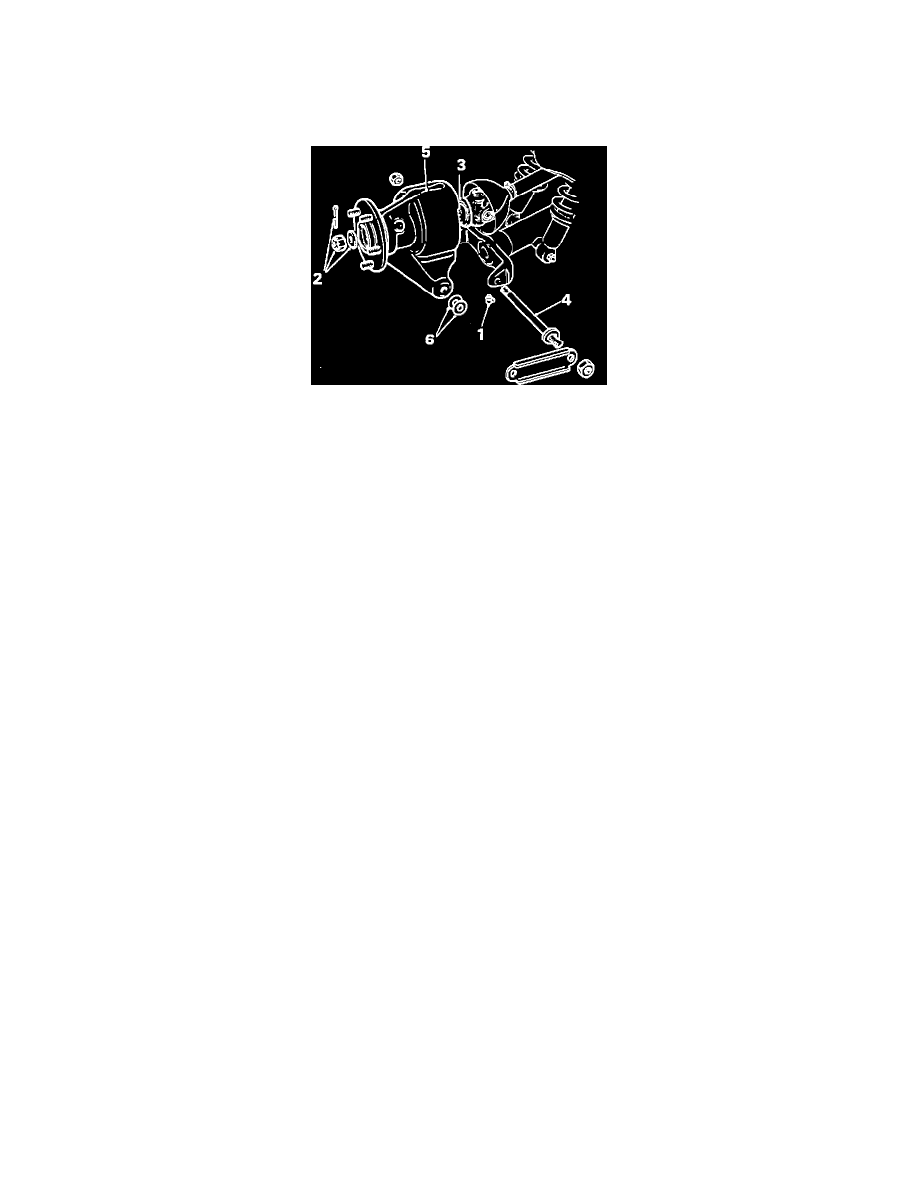
Fig. 1 Rear Hub Carrier Assembly Removal
1.
Raise and support vehicle, then remove wheel assembly.
2.
Remove anti-lock brake sensor from top of hub carrier, if equipped.
3.
Remove grease fitting from hub carrier, then remove cotter pin, nut and washer from end of halfshaft.
4.
Install hub puller tool No. JD-1D or equivalent, to hub and secure with wheel lug nuts. Remove hub and carrier assembly from halfshaft.
5.
Remove hub puller tool, then the spacer from halfshaft.
6.
Remove one self-locking nut securing hub carrier assembly fulcrum shaft to control arm. Drive out fulcrum shaft (4), using a punch.
7.
Remove hub and carrier assembly from vehicle. Temporarily secure retaining washers and shims using adhesive tape.
8.
Reverse procedure to install, using a small amount of Loctite on halfshaft splines.
Wheel Seal
1.
Remove rear hub assembly from vehicle as described under HUB CARRIER ASSEMBLY.
2.
Separate hub from carrier using a press.
3.
Place hub carrier in a soft jawed vice. Using a punch, remove bearing tracks out of fulcrum shaft housing.
4.
Drive out hub inner bearing track, seal and bearing from hub carrier.
5.
Drive out hub outer bearing track from hub carrier.
6.
Connect press adapter tool No. JD16C-1 or equivalent, to hub outer bearing. Position assembly in hand press tool No. MS47 or hydraulic press
adapter tool No. MS370 or equivalents, and remove bearing.
7.
Reverse procedure to install. Tighten to specifications and check hub bearing end float.