
XJ-6 L6-4.2L (1983)
Fuel Tank Selector Switch: Testing and Inspection
If a complaint involves fuel tank flooding or fuel transfering to or from one tank to the other, check the following:
Before proceding with testing, open both fuel filler caps, remove air cleaner assembly and remove spare tire and floor board covering fuel pump.
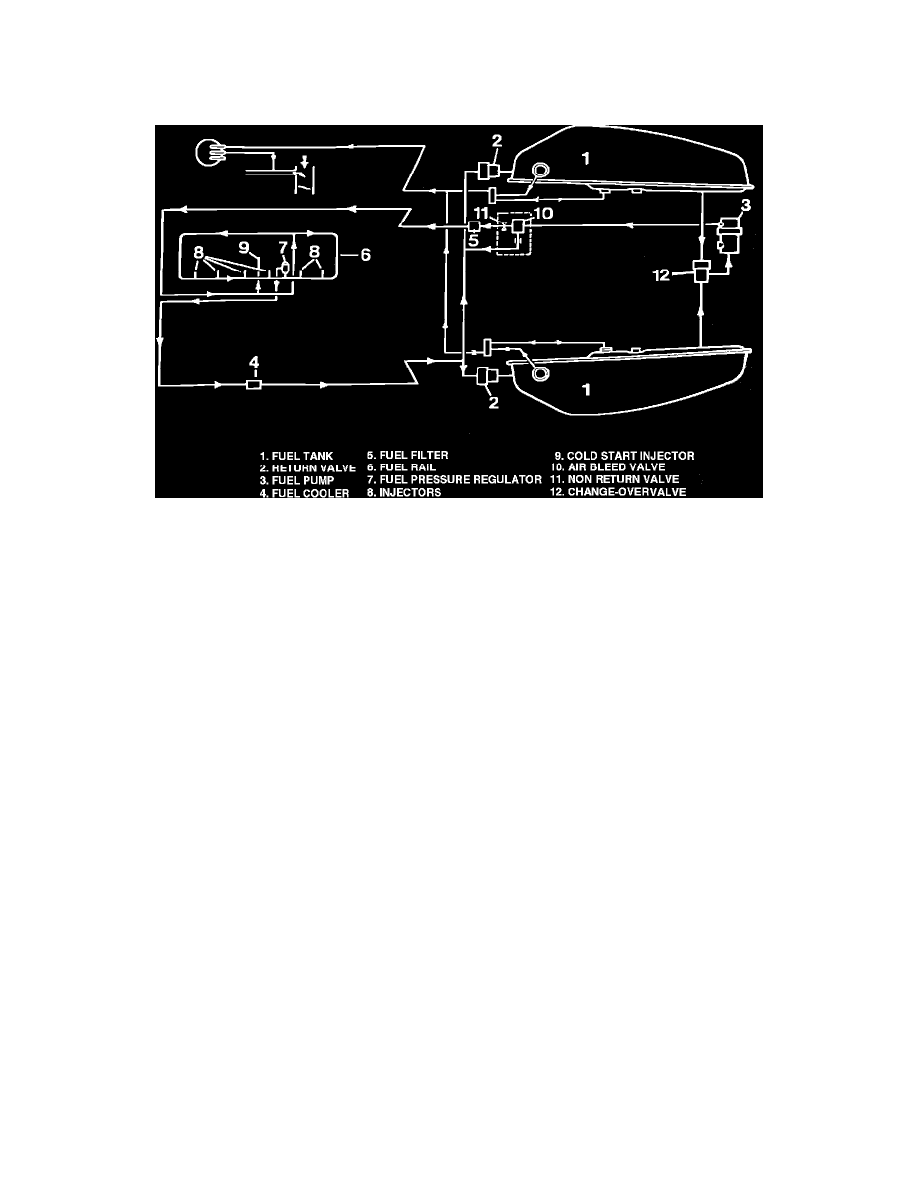
Fuel Supply Delivery
FUEL CHANGE-OVER VALVE
1.
Wedge airflow meter flap open slightly.
2.
Select right fuel tank with fuel tank switch. Switch button should be in OUT position and there should be an "R" visible on the side of switch
button.
3.
Turn on ignition switch but Do not start engine. Fuel pump should now run.
4.
At change-over valve in trunk, MOMENTARILY pinch off fuel hose from right tank to change-over valve. Fuel pump should get noisy if hose is
pinched tight enough to stop fuel flow. If pump noise does not increase, release right tank hose and pinch hose from left tank. If no change in
pump noise, change-over valve is probably drawing fuel from both tanks. Check changeover valve for dirt.
5.
Select left fuel tank with fuel tank switch. Switch button should be retained at IN position.
6.
At change-over valve in trunk, MOMENTARILY pinch fuel hose from left tank to change-over valve. Pump noise should increase. If pump noise
does not increase, pinch hose from right tank. If no change in pump noise, change-over valve is probably drawing fuel from both tanks and should
be replaced.
FUEL RETURN VALVES
Note: Fuel tanks should NOT be full to top; fuel pump should be running as outlined in steps 1-3 above.
1.
Select right tank.
2.
Inside right filler neck, use a long screwdriver to hold spring loaded flap open. Using a flashlight, look into fuel tank. The end of fuel return line
is visible and should have fuel flowing from it. If no flow, check right tank return valve electrical connections:
White/purple wire ....................................................................................................................................................................... Battery Voltage
Black wire .................................................................................................................................................................................................. Ground
3.
Check left filler neck return line. If fuel is flowing, check left return valve for dirt or malfunction.
4.
Select left tank.
5.
Check left filler neck for fuel flow from return line. If not flowing, check left return valve for battery voltage. Should be no voltage. If voltage,
check tank switch.
6.
Check right return line for flow. If flowing, check right return valve for battery voltage. Should be none. If voltage, check tank switch. If flowing
but no voltage, check valve for dirt.