
XJ-6 L6-4.2L (1983)
Front Cross-Member: Service and Repair
Remove and Refit
Service tools: Engine support bracket MS.53A; rack centralising tool 18G 1466.
Removing
- Disconnect battery earth lead and remove air cleaner.
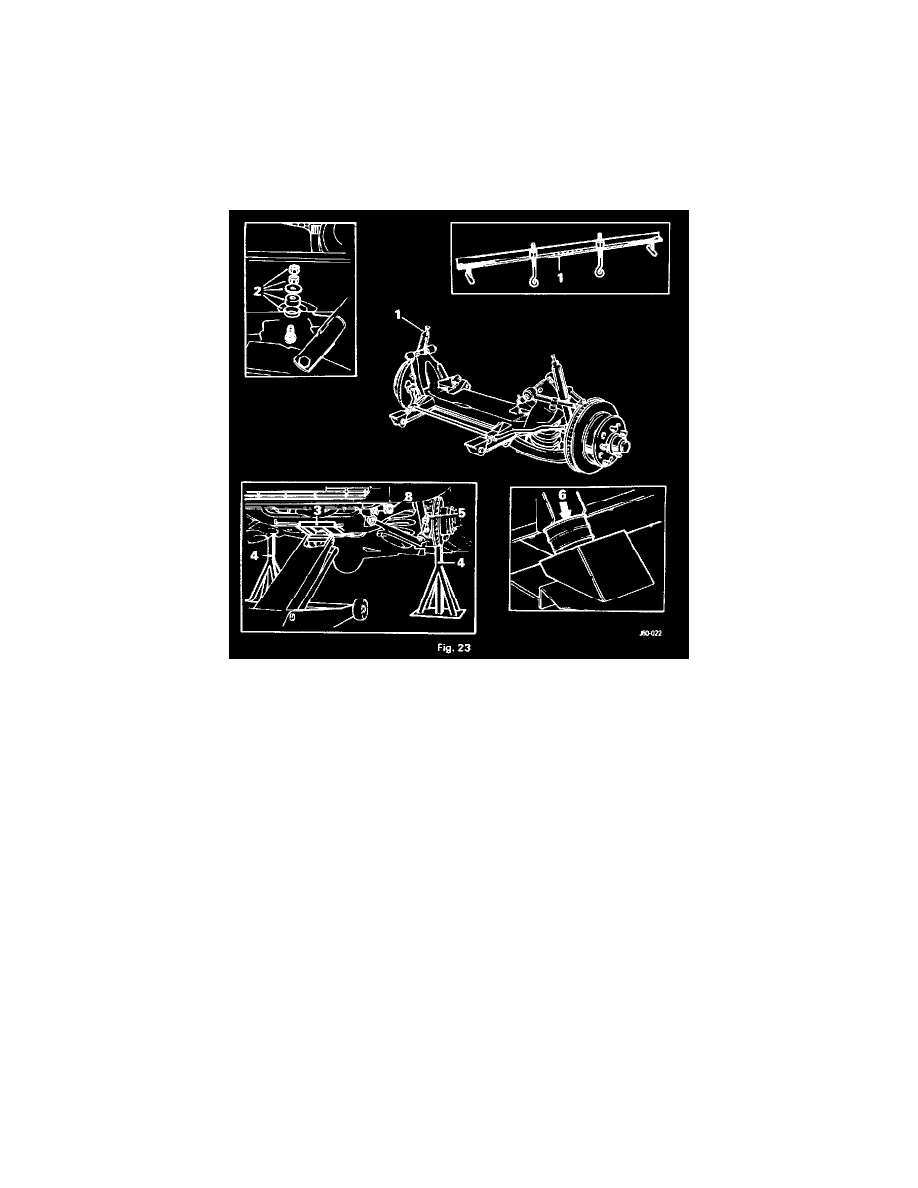
- Fit engine support bracket MS.53A (1, Fig. 23) to engine front lifting eyes. Adjust links until engine is just supported.
- Remove locknut, nut, plain washer, rubber and cup (2, Fig. 23) securing upper end of each damper
- Jack up front of car (3. Fig. 23) place on stands (4, Fig 23) and remove front wheels.
- Remove self-locking nut (5. Fig. 23) securing each anti-roll bar link to anti-roll bar, withdraw cup washers and rubbers.
- Turn steering to full lock and cut locking wire at caliper bolts now accessible. Remove bolts securing caliper and steering lever; remove caliper from
disc and suspend by wire or cord to avoid damage to hose. Collect shims.
- Turn steering to opposite lock and repeat above operation.
- Remove nuts securing engine mountings to mounting brackets (6, Fig. 23).
- Remove nuts securing cross-beam rear mountings (7. Fig. 23).
- Remove steering rack mounting bolts and tie up both ends of rack under engine. Collect packing and rubbers from mountings.
- Place trolley jack under centre of cross-beam and raise to take weight of beam.
Refitting
- Reverse removal procedure, fitting front crossbeam mountings first. then jacking up beam to align rear mountings.
- Check that towing brackets are in position and all spacers fitted before lowering engine. Ensure that washers and rubbers are correctly in position on
damper stems, and fit upper washers, rubbers and nuts as shown in removal instructions. Connect anti-roll bar links, and replace steering rack; check
correct centralization of single lug.