
XJ-S V12-5.3L (1982)
4.
Remove safety wire, loosen bolt C.
5.
Remove bolts A & B securing caliper to stub axle carrier.
6.
Remove caliper.
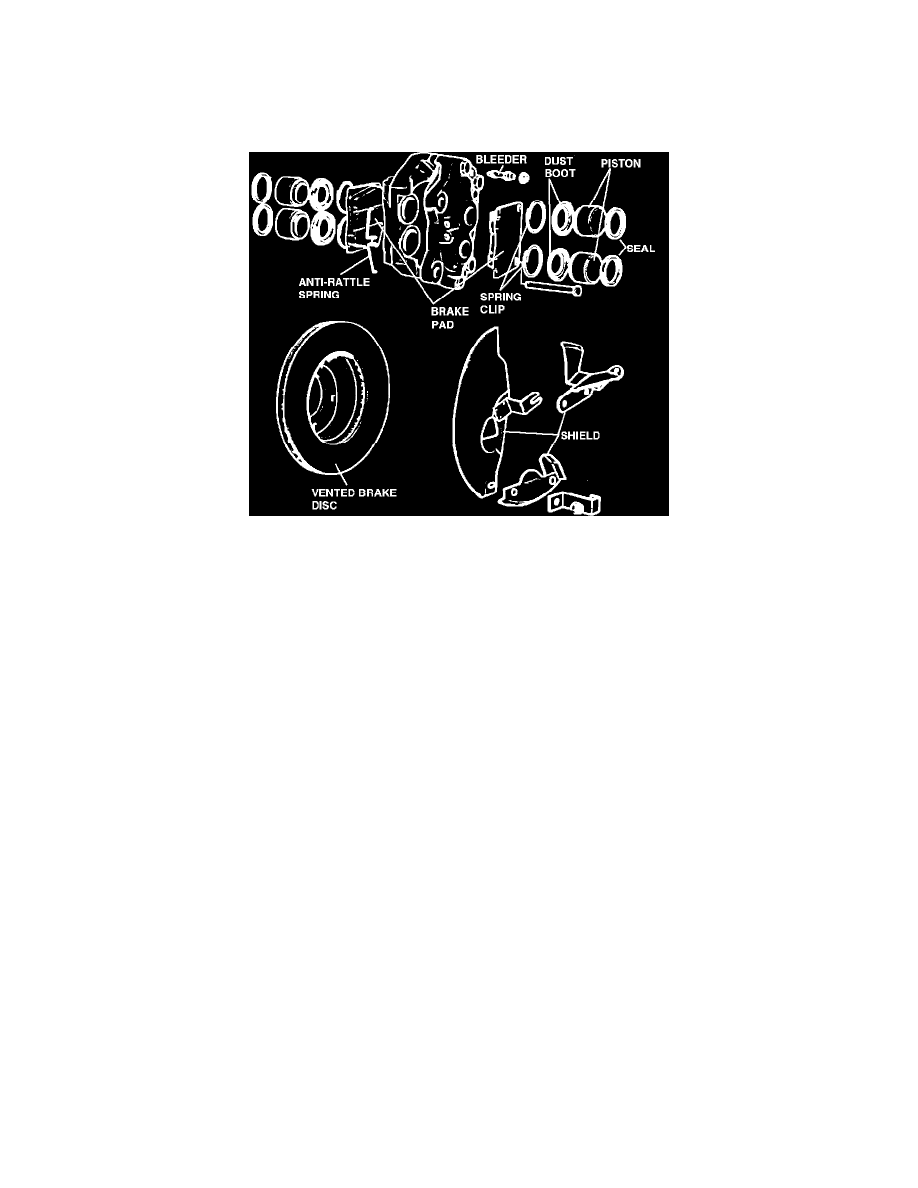
OVERHAUL
Front Brake
NOTE:Do not remove or attempt to remove bolts securing halves of caliper together.
1.
Remove spring clips retaining piston dust covers AND Remove dust covers.
2.
Carefully feed compressed air into caliper brake line port. Remove pistons from caliper.
3.
Carefully pry each seal from recess in each piston cylinder bore.
4.
Thoroughly clean all components using brake cleaning fluid.
5.
Examine pistons and cylinder bores for signs of abrasion, scuffing, scratches or corrosion. If any of above conditions are evident, a new caliper
must be use.
6.
Coat new seals with brake lubricant, or new clean brake fluid.
7.
Install new seals into recesses in cylinder bores. Lubricate pistons and install into cylinder bores.
8.
Install new dust covers over pistons and locate dust cover lip in outer groove of piston.
9.
Push pistons in fully and locate dust cover in outer grooves of cylinder bores.
10.
Install dust cover spring clips and tighten bleed screws.
REFIT
1.
Reverse procedure to install.
2.
When reassembling, torque caliper mounting bolts to:
55 ft. lbs. (7.5 kg/m).
3.
Fit new safety wire to drilled bolts.