
Cherokee L4-150 2.5L VIN U 1-bbl (1984)
Fusible Link: All Technical Service Bulletins
Fuel Gauge - Registers Empty With Fuel In Tank
MARCH 1986 000 992
1984-1986 CHEROKEE/WAGONEER MODELS
16E
ELECTRICAL
Attention: Workshop, Parts Department
FUEL GAUGE REGISTERS EMPTY WITH FUEL IN TANK
The fuel gauge on some 1984-1986 Cherokee/Wagoneer vehicles may register empty or below when there is fuel in the tank. If the vehicle is a 1986
model with a 2.46L engine, this may be accompanied by a no start condition.
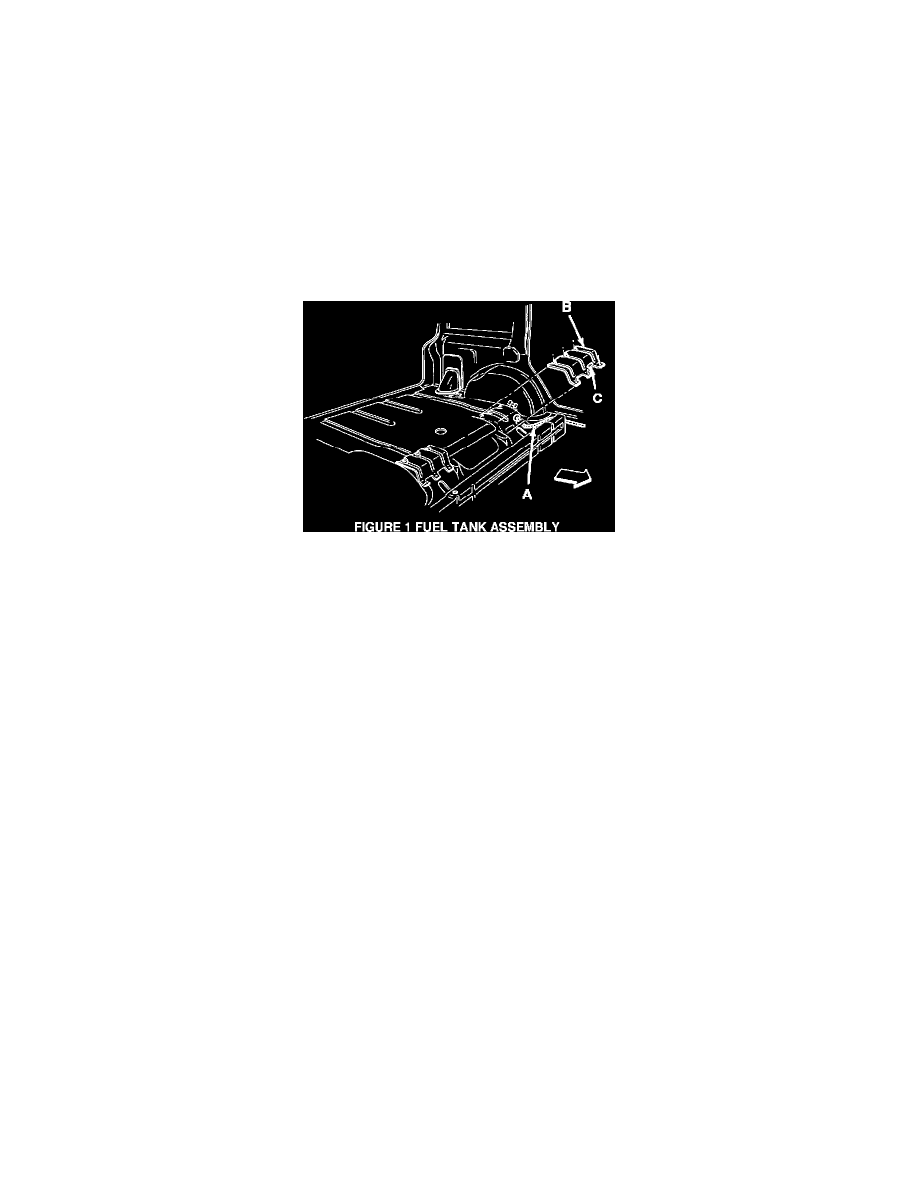
This may be due to the body harness (A) breakout that routes through the floor grommet grounding out against the rear floor cover support (B). Service
correction involves repairing the wiring and modifying the rear floor cover support.
Figure 1 - Fuel Tank Assembly
PROCEDURE
1.
Remove the three front mounting screws from the rear floor cover support (B).
2.
Make two 6 mm (1/4-in) deep cuts between the two left mounting tabs and bend the sheet metal forward and back against itself (C).
3.
Repair any damaged wires.
4.
Ensure that the floor grommet is completely seated.
5.
Install rear floor cover support mounting screws.
6.
If the vehicle is a 1986 model equipped with a 2.46L engine, visually check the fuse link K and confirm electrical conductivity using pin No. 5 of
the Diagnostic Connector D1.
NOTE:
Refer to page 16 and 109 of the 1986 Cherokee/Wagoneer Electrical Troubleshooting Manual (ETM).
7.
If the fuse link is damaged, remove the negative battery cable and install a new fuse link, PN 3210989, and a fuel pump relay, PN 5758912.
8.
Connect the negative battery cable.
PARTS
DESCRIPTION
QUANTITY
PART NUMBER
FUSE LINK
1
3210989
RELAY, FUEL PUMP
1
5758912
NOTE:
Applies only to 1986 vehicles equipped with 2.46L engines.
SRT/TIC INFORMATION
OPERATION DESCRIPTION
NUMBER
TIME
TIC