
Cherokee 2WD L4-150 2.5L VIN H TBI (1988)
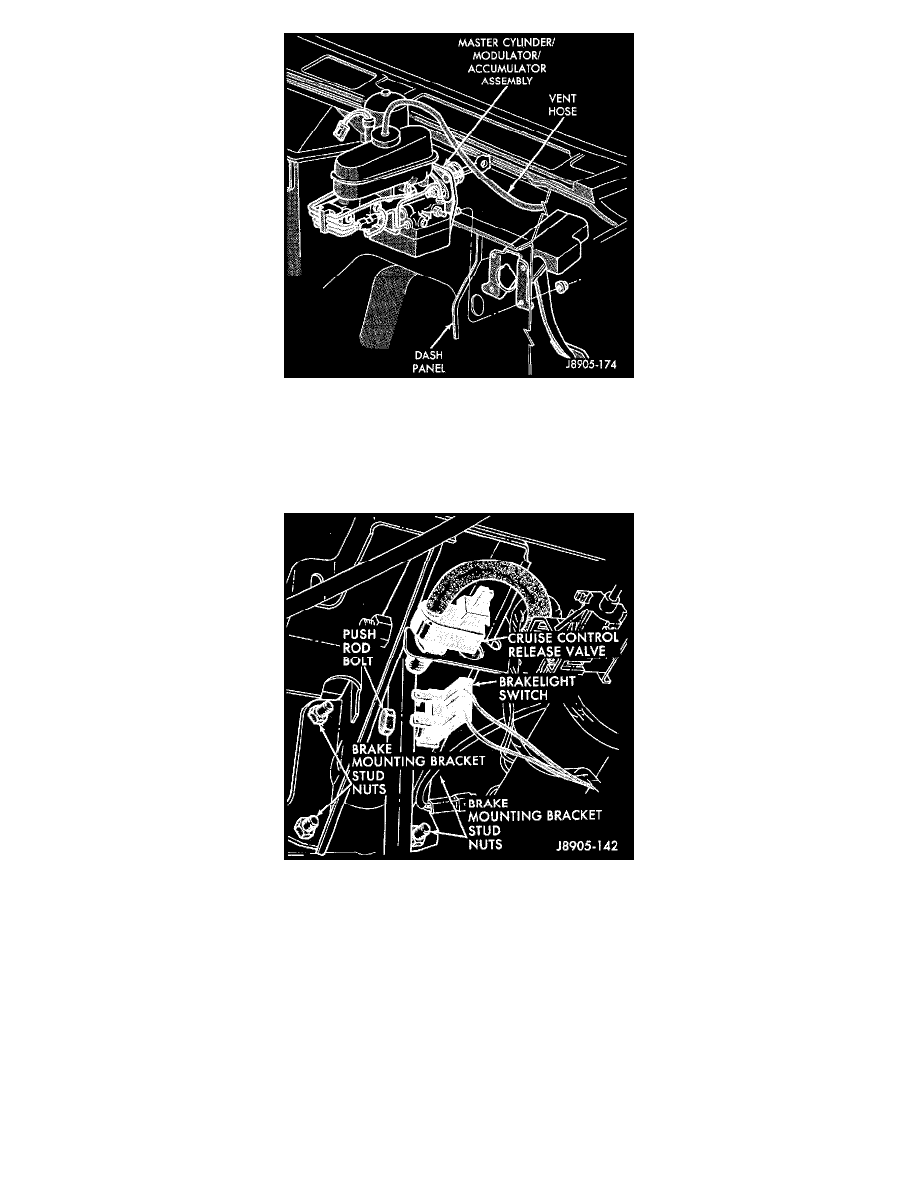
Fig.36 R&R Modulator Assembly
2. Position master cylinder/modulator/accumulator assembly on dash panel. Tighten mounting bracket stud nuts to 36 Nm (27 ft. lbs.) torque.
3. Connect harness wires to pressure modulator, low pressure switch, differential switch (on proportioning valve) and the low fluid and boost
pressure switches.
Fig.35 Brake Light Switch Location
4. In passenger compartment, install nuts on mounting bracket studs. Tighten nuts to 42 Nm (31 ft. lbs.) torque.
5. Align brake pedal, brake light switch, master cylinder push rod and install the push rod bolt.
CAUTION: The push rod bolt must be installed correctly to avoid interference with the dash bracket. The bolt must be installed with the bolt
head at the left side of the pedal as shown.
6. Install new nuts on push rod bolt. Tighten inner lock nut to 34 Nm (25 ft. lbs.) torque. Tighten outer jam nut to 8.5 Nm. (75 in. lbs) torque.
7. Connect brake light switch wires.