
Cherokee 2WD L4-150 2.5L VIN H TBI (1988)
Timing Chain: Service and Repair
Timing Chain Cover Replacement
Fig. 11 Timing Case Cover Alignment Tool
Fig. 12 Installing Front Seal
1.
Disconnect battery ground cable.
2.
Remove drive belts, then the vibration damper and pulley.
3.
Remove cooling fan and hub assembly, then the fan shroud.
4.
Remove A/C compressor (if equipped) and alternator bracket assembly from cylinder head, and position aside.
5.
Remove oil pan to cover retaining screws and cover to cylinder block retaining bolts.
6.
Remove timing case cover, front seal and gasket.
7.
Cut off oil pan side gasket end tabs and front seal tabs until they are flush with front face of cylinder block.
8.
Clean timing case cover, oil pan and cylinder block sealing surfaces, then remove front crankshaft seal from timing cover.
9.
Apply sealing compound to both sides of timing case cover gasket, then position gasket onto cylinder block.
10.
Cut off end tabs from replacement oil pan side gaskets, then cement tabs to corresponding points on oil pan.
11.
Coat front cover seal end tab recesses with RTV sealant, then position seal on timing case cover.
12.
Apply engine oil to seal/oil pan contact surface, then position timing case cover onto cylinder block.
13.
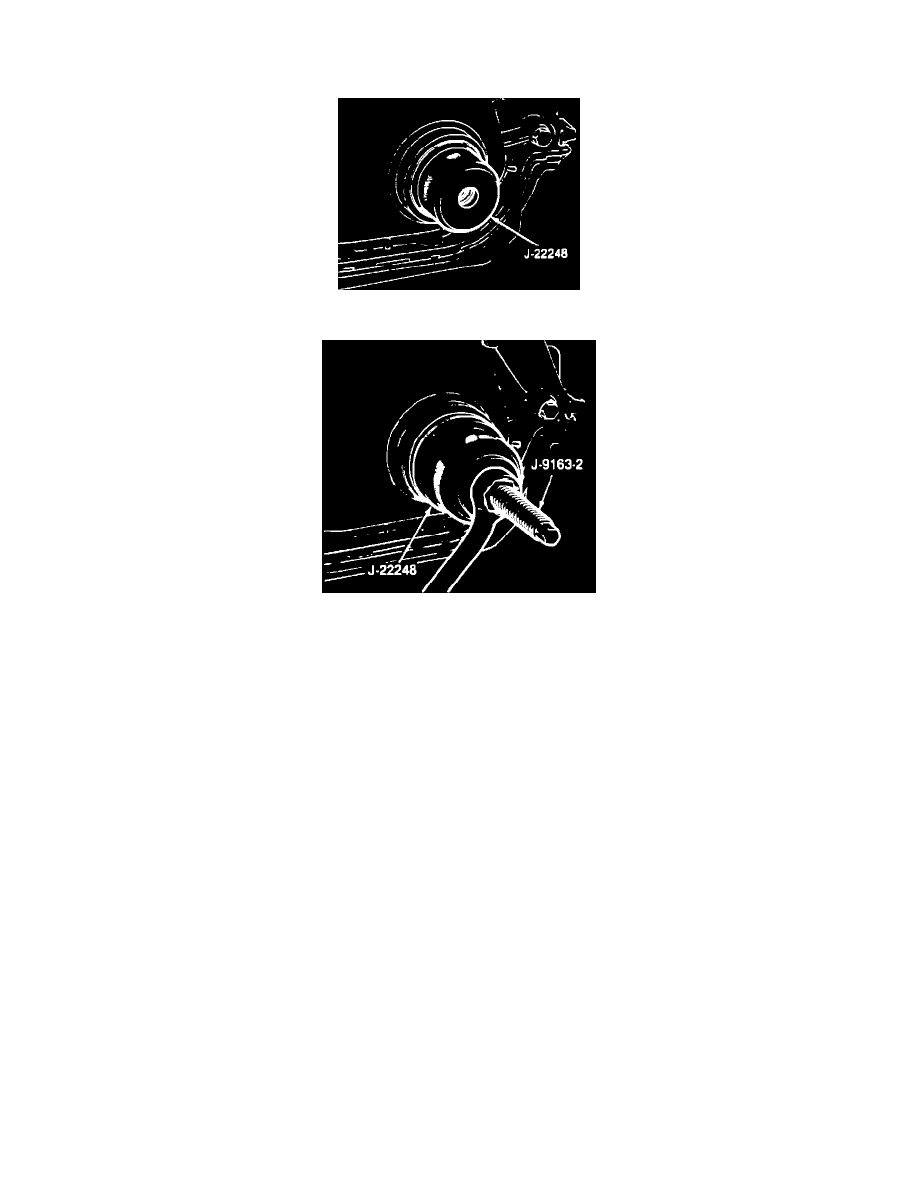
Install timing case cover alignment tool J-22248 or equivalent into opening in timing case cover as shown, Fig. 11.
14.
Install cover-to-cylinder block retaining bolts and oil pan-to-cover retaining screws. Torque retaining bolts to 5 ft. lbs. and retaining screws to 11
ft. lbs.
15.
Remove alignment tool, then position a new crankshaft seal onto tool, ensuring lip on seal faces outward. Apply a light coat of sealing compound
to outside diameter of crankshaft seal, then coat crankshaft snout with engine oil.
16.
Position alignment tool and seal over crankshaft snout, then insert installation tool J-9163-2 or equivalent into alignment tool as shown, Fig. 12.
Tighten nut on installation tool until alignment tool contacts timing cover. Remove tool.
17.
Install vibration damper and pulley. Tighten vibration damper retaining nut to specifications. If engine is equipped with a serpentine drive belt,
the pulley is integral with the vibration damper.
18.
Install A/C compressor (if equipped) and alternator bracket assembly, then the cooling fan, hub, and fan shroud.
19.
Install drive belts, then reconnect battery ground cable.