
Cherokee 2WD L4-150 2.5L VIN H TBI (1988)
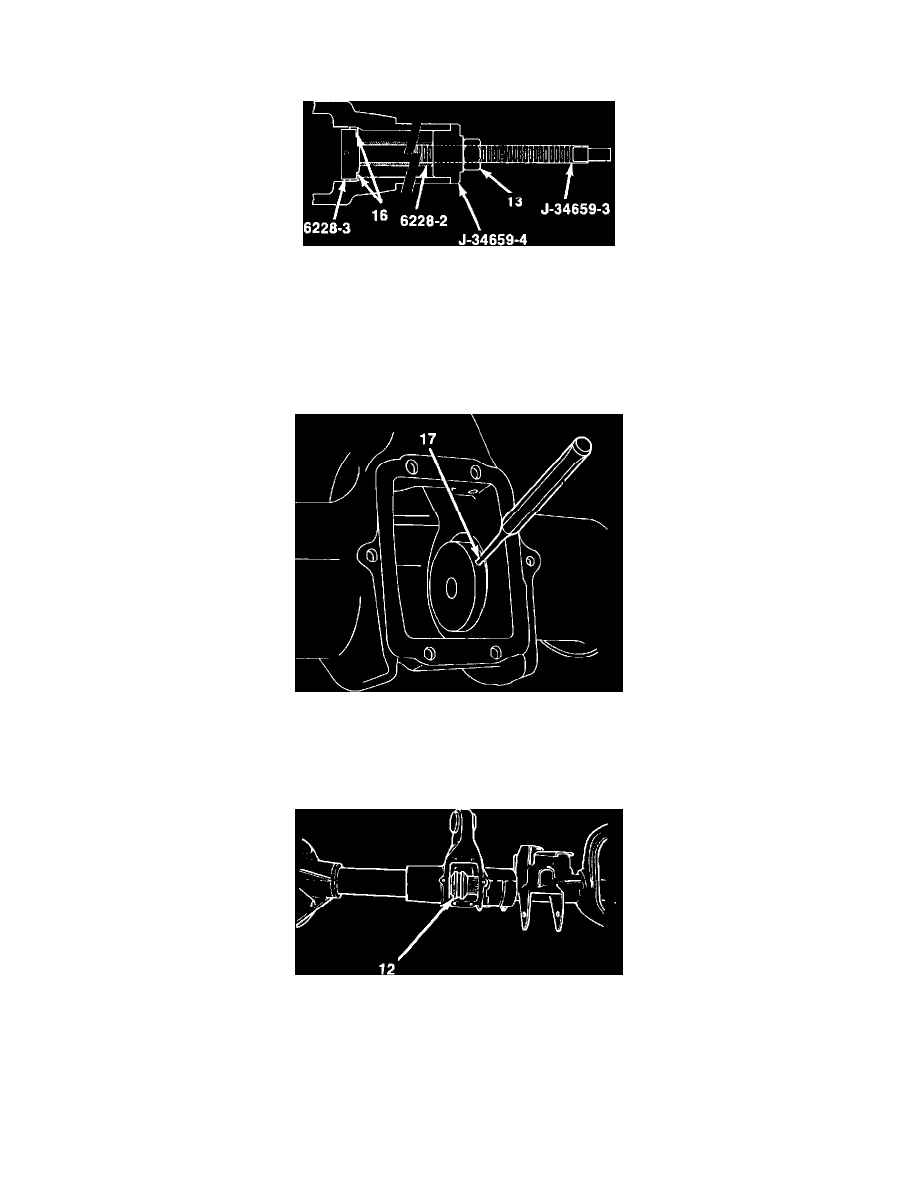
on rod J- 34659-3 for final seal installation.
CAUTION: TO CORRECTLY POSITION THE NEW SEAL DURING FINAL SEAL INSTALLATION, GAUGING SLEEVE 6228-2 MUST BE
INSTALLED ON ROD J-34659-3.
FIGURE 9
30.
Thread rod J-34659-3 into final installer 6228-3. To ensure correct seal installation, final installer 6228-3 must be threaded tightly onto rod J-
34659-3.
31.
Center final installer 6228-3 into back of seal (16).
32.
With open-end wrench, hold rod J-34659-3 in place and tighten nut (13) until it stops.
FIGURE 8
33.
Loosen nut (13) on rod J-34649-3.
34.
Insert a drift punch into hole in edge of installer 6228-3. Hold punch and unscrew rod J-34659-3 (Refer to Fig. 8). Remove seal installation tools.
FIGURE 10
35.
Slide vacuum shift motor collar (12) over intermediate axle shaft. Slide collar all the way to the left.
NOTE:
COAT THE SPLINES ON THE RIGHT FRONT AXLE SHAFT WITH JEEP/EAGLE. ALL PURPOSE LUBRICANT GREASE
TO PROTECT THE NEW SEAL FROM DAMAGE WHEN THE AXLE SHAFT IS INSTALLED.
36.
Install right front axle shaft into axle tube until end slides through shift collar. Be sure that the end of the intermediate axle shaft pilots into the
needle bearing at the end of the right front axle shaft.