Cherokee 2WD L4-150 2.5L VIN P MFI (1991)

Timing Chain: Service and Repair
Timing Chain & Sprockets Replacement
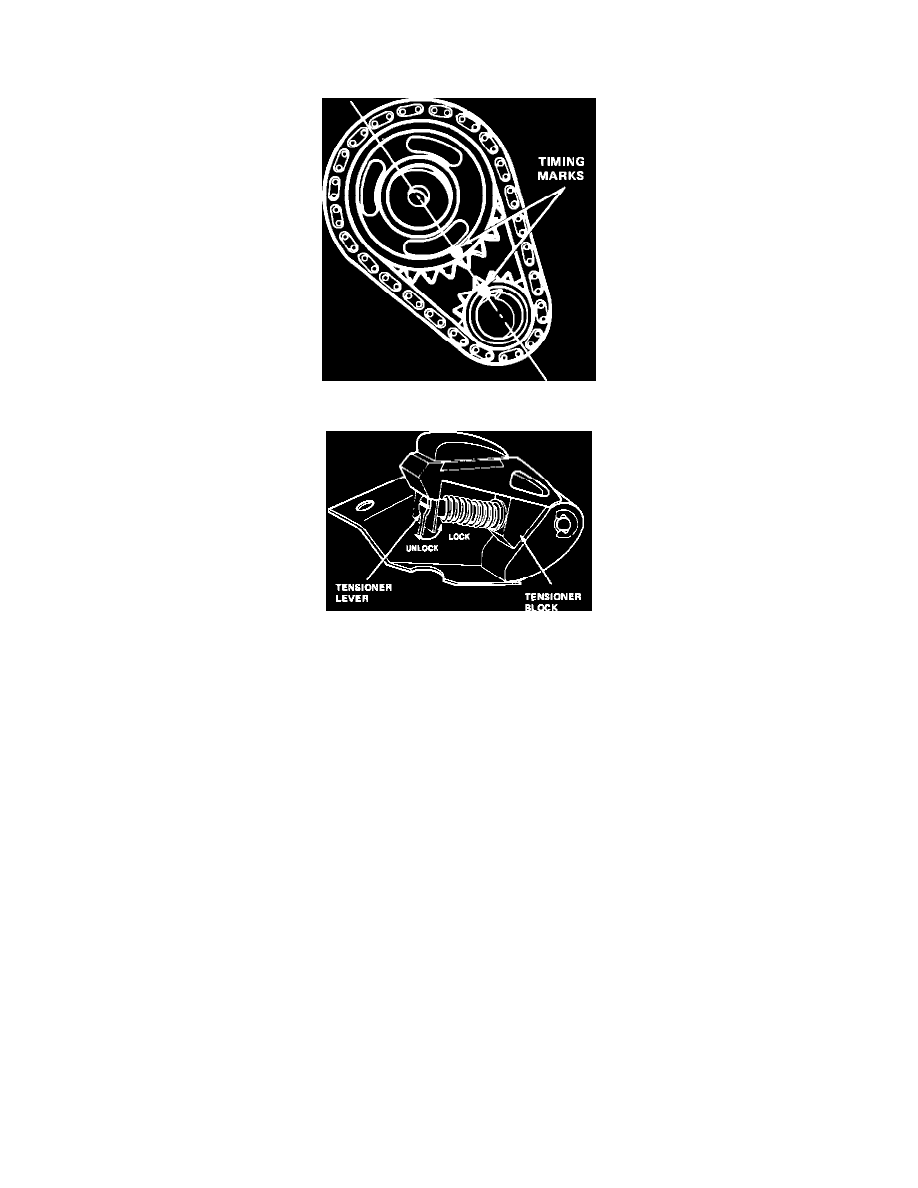
Fig. 13 Aligning Valve Timing Marks
Fig. 14 Timing Chain Tensioner. 2.5L/4-150
1.
Remove timing case cover as previously outlined.
2.
Rotate crankshaft until timing marks on camshaft and crankshaft sprockets align as shown.
3.
Remove oil slinger from crankshaft snout.
4.
Remove camshaft sprocket retaining bolt, then lift off sprockets and timing chain as an assembly.
5.
On 2.5L/4-150 engines, turn timing chain tensioner lever, to its unlocked position, then pull tensioner block towards lever, to compress spring.
While holding tensioner block in this position, lock tensioner lever as shown.
6.
On all engines, install timing chain and sprockets, ensuring timing marks are properly aligned.
7.
Install camshaft sprocket retaining bolt and tighten to specifications. To verify correct installation of timing chain, rotate crankshaft until
camshaft sprocket timing mark is in one o'clock position. This should place crankshaft sprocket timing mark in three o'clock position.
Count number of chain pins between timing marks. If valve timing is correct, there should be 20 chain pins between timing marks of both
sprockets on 2.5L/4-150 engines or 15 chain pins between timing marks of both sprockets on 4.0L/6-243 engines.
8.
Install oil slinger, then the timing case cover.
