
Cherokee 2WD L6-4.0L VIN S (1998)
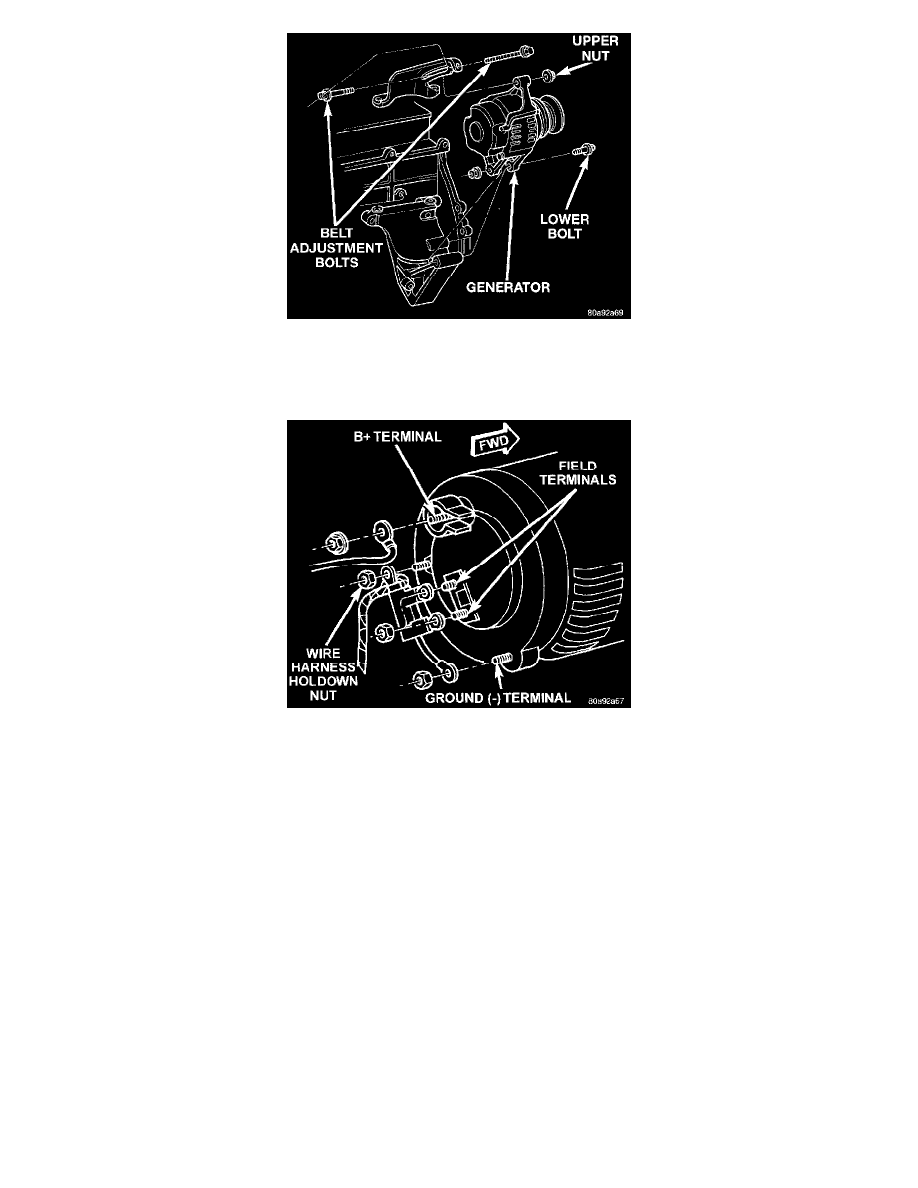
Fig. 5 R+R Generator RHD
4. Right Hand Drive (RHD) Vehicles Only: Remove upper nut (generator adjustment nut) and both belt adjustment bolts. Remove generator lower
nut/bolt. Position generator for access to wire connectors.
Fig. 6 R+R Generator Connectors (Typical)
5. Remove nuts from harness hold-down, battery terminal, ground terminal and 2 field terminals. Remove wire connectors. A typical generator wiring
harness is shown. Wiring harness routing as shown may be slightly different depending on vehicle model and/or engine.
6. Remove generator from vehicle.
INSTALLATION
1. Position generator to engine and install wiring to rear of generator. Tighten all wiring fasteners as follows:
-
Battery terminal nut - 8.5 N.m (75 in. lbs.)
-
Ground terminal nut - 8.5 N.m (75 in. lbs.)
-
Harness hold-down nut - 8.5 N.m (75 in. lbs.)
-
Field terminal nuts - 2.8 N.m (25 in. lbs.)
2. LHD Vehicles: Install generator fasteners and tighten as follows:
-
Generator upper mounting bolt - 55 N.m (41 ft. lbs.)
-
Generator lower pivot bolt/nut - 55 N.m (41 ft. lbs.)
CAUTION:
1. Never force a belt over a pulley rim using a screwdriver. The synthetic fiber of the belt can be damaged.
2. When installing a serpentine accessory drive belt, the belt MUST be routed correctly. The water pump will be rotating in the wrong
direction if the belt is installed incorrectly, causing the engine to overheat. Refer to belt routing label in engine compartment, or refer to
Belt Schematics.
3. LHD Vehicles: Install generator drive belt.
4. RHD Vehicles: Install upper nut (generator adjustment nut) and both belt adjustment bolts. Install generator lower nut/bolt.
5. RHD Vehicles: On vehicles equipped with RHD, the generator is used to adjust the serpentine belt.