
Cherokee 4WD L6-4.0L VIN S (1998)
28.
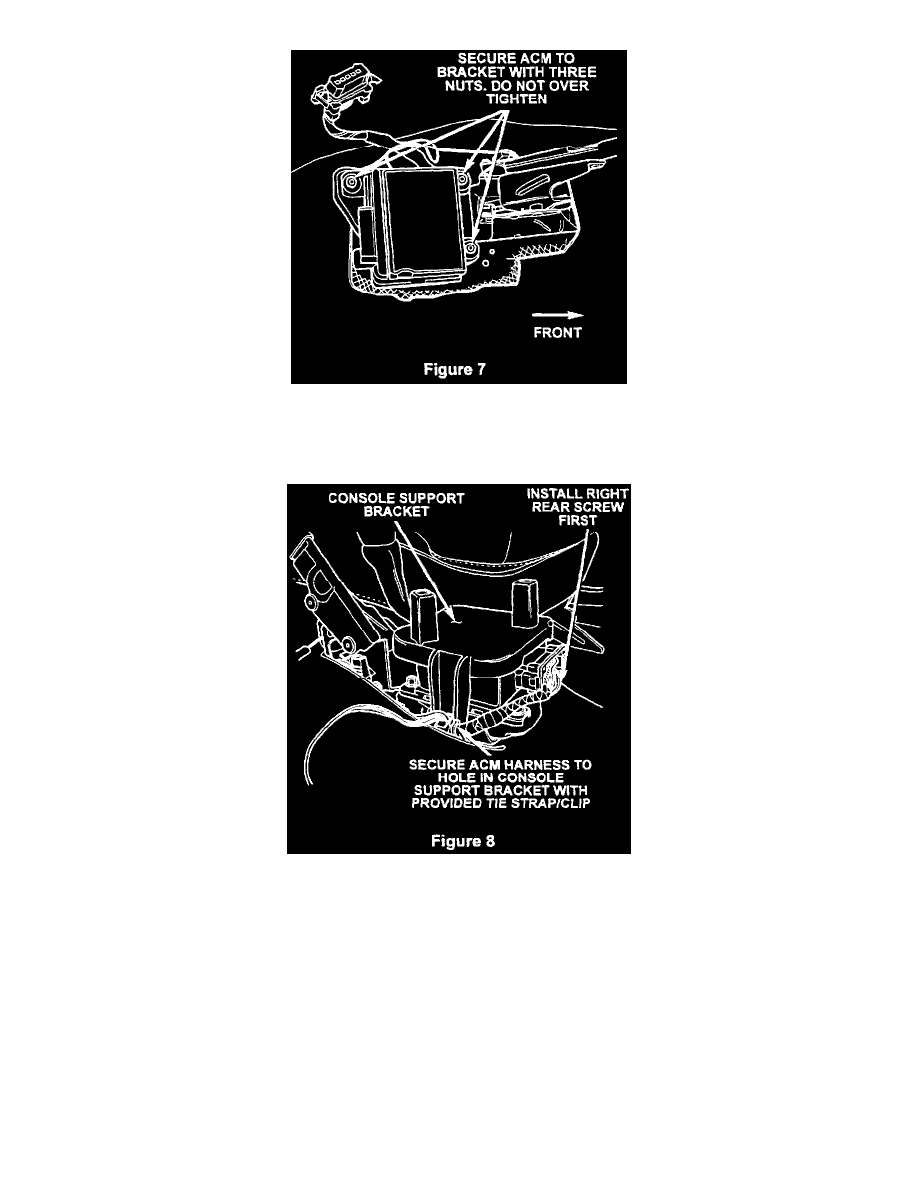
Attach the new ACM to the ACM bracket with the three (3) supplied ACM nuts (Figure 7). Tighten the ACM nuts to 65 in-lbs (7.3 Nm).
IMPORTANT:
Use only HAND tools when tightening the ACM nuts. Do NOT use power tools. Overtightening may damage the ACM.
29.
Install the new console support bracket over the ACM (Figure 8). Make sure that the ACM harness is routed outside of the console support
bracket. Secure the bracket to the center tunnel with the three (3) provided screws (use the one larger screw on the left side and the two smaller
screws on the right side).
NOTE:
Due to vehicle variability, there may be some interference between the right rear leg of the console support bracket and the ACM module. To ease
installation, install the right rear support bracket screw first, then the right front screw, followed by the left center screw.
30.
Connect the ACM harness to the ACM. Make sure that the connector locking tabs are secure.
31.
Using the original ground screw, attach the ACM ground eyelet to the ACM bracket at the hole that was drilled in Step 27. Tighten the screw
securely.
32.
Using the provided tie strap/clip, secure the ACM harness and ground wire to the console support bracket leg (Figure 8). Pull any excess harness
length forward but do not use excessive force. Remove any excess tie strap length.