
Cherokee 4WD LHD L6-4.0L VIN S (2001)
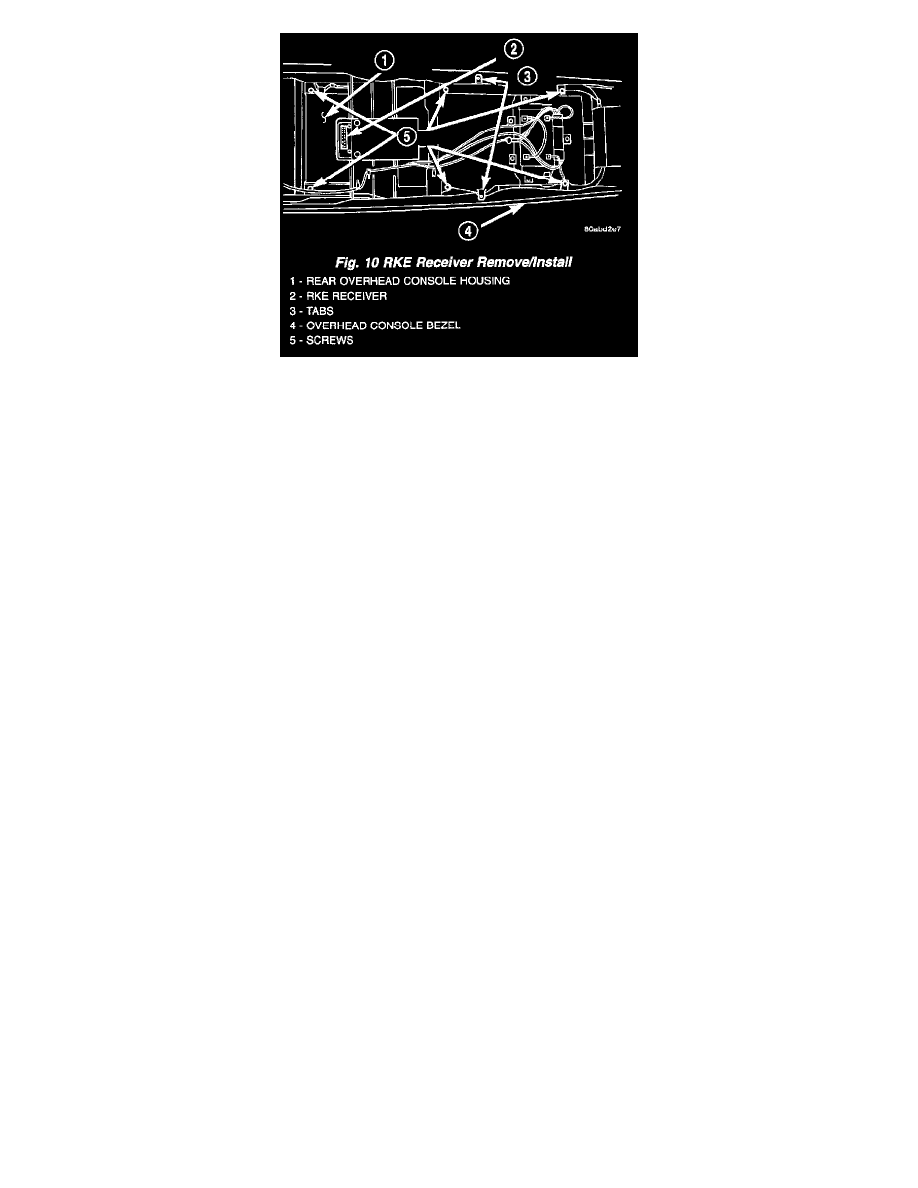
Fig.10 RKE Receiver Remove/Install
3. Remove the six screws that secure the rear overhead console housing to the overhead console bezel.
4. Gently flex the sides of the overhead console bezel outward far enough to clear the tabs on the rear console housing and remove the housing from
the bezel.
5. Remove the two screws that secure the RKE module circuit board to the rear overhead console housing.
6. Remove the RKE module circuit board from the rear overhead console housing.
INSTALLATION
Mini-Dome Mounted
1. Position the RKE mini-dome housing and module to the headliner as a unit.
2. Reconnect the wire harness connector for the RKE module to the module connector receptacle.
3. Position the RKE mini-dome unit into the headliner opening and slide it rearward to engage the rear mounting tab to the headliner.
4. Install and tighten the two screws that secure the RKE mini-dome housing to the roof panel reinforcement. Tighten the screws to 2.8 Nm (24
in.lbs.).
5. Reconnect the battery negative cable.
Overhead Console Mounted
1. Position the RKE module circuit board to the rear overhead console housing.
2. Install and tighten the two screws that secure the RKE module circuit board to the rear overhead console housing. Tighten the screws to 2.2 Nm
(20 in.lbs.).
3. Gently flex the sides of the overhead console bezel outward far enough to clear the tabs on the rear console housing and install the housing onto
the bezel.
4. Install and tighten the six screws that secure the rear overhead console housing to the overhead console bezel. Tighten the screws to 2.2 Nm (20
in.lbs.).
5. Reinstall the overhead console onto the headliner. (Refer to OVERHEAD CONSOLE - INSTALLATION)
6. Reconnect the battery negative cable.