
CJ-7 L4-150 2.5L VIN U 1-bbl (1983)
Vacuum Advance Unit: Service and Repair
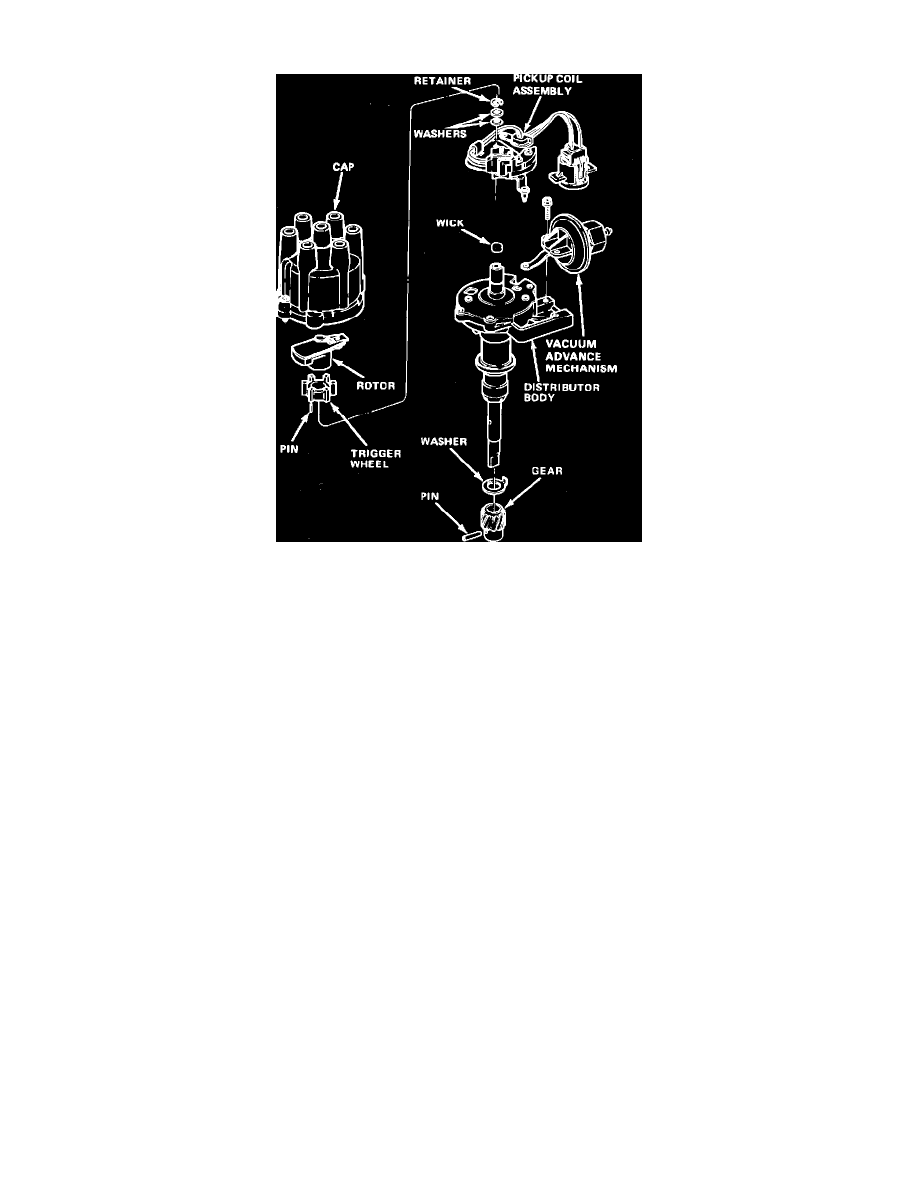
Fig. 4 Exploded view of distributor assembly. 6-258 shown, 4-150 & V8-360 similar
TRIGGER WHEEL &/OR PICK UP COIL, REPLACE
1.
Remove distributor cap and rotor, Fig. 4. Do not remove silicone dielectric compound rotor blade tip.
2.
Using puller J-28509 or equivalent, remove trigger wheel. Use flat washer to prevent puller from contacting inner shaft. If puller is not available,
use two screwdrivers to pry alternately on trigger wheel.
3.
Remove trigger wheel pin.
4.
On 4-150 and 6-258 engines, remove pick up coil retainer and washers from base plate pivot pin.
5.
On V8-360 engines, remove pick up coil snap ring from shaft, then remove retainer securing vacuum advance lever to pick up coil drive pin and
position lever aside.
6.
Remove ground screw from harness tab, then lift pick up coil assembly from distributor housing.
7.
Reverse procedure to install. When installing trigger wheel, position long portion of teeth upward and install on shaft using hand pressure. Use a
small hammer and suitable drift and tap trigger wheel pin into locating groove. If distributor is removed from engine, support shaft when installing
trigger wheel pin. If a replacement rotor is to be installed, apply a thin coat of silicone dielectric compound to rotor blade tip prior to installation.
VACUUM ADVANCE UNIT
1.
Disconnect vacuum hose from vacuum advance unit, Fig. 4.
2.
On 4-150 and 6-258 engines, remove attaching screws, then tilt vacuum advance unit to disengage link from pick up coil pin. On some units, it
may be necessary to loosen base plate retaining screws to provide clearance for vacuum advance unit removal.
3.
On V8-360 engines, remove distributor cap, then remove retainer securing vacuum advance unit to pick up coil pin. Remove vacuum advance unit
attaching screws and lift unit from distributor.
4.
Reverse procedure to install. If a replacement unit is to be installed, insert a suitable allen wrench into vacuum hose opening of the unit which was
removed. Rotate adjusting screw clockwise, counting the number of turn necessary to bottom screw. Rotate adjusting screw of replacement
vacuum advance unit clockwise unit it bottoms, then rotate adjusting screw counterclockwise the same amount of turns noted.