
Comanche 4WD L4-150 2.5L VIN E TBI (1989)
Brake Shoe: Service and Repair
Brake Shoe Removal and Installation
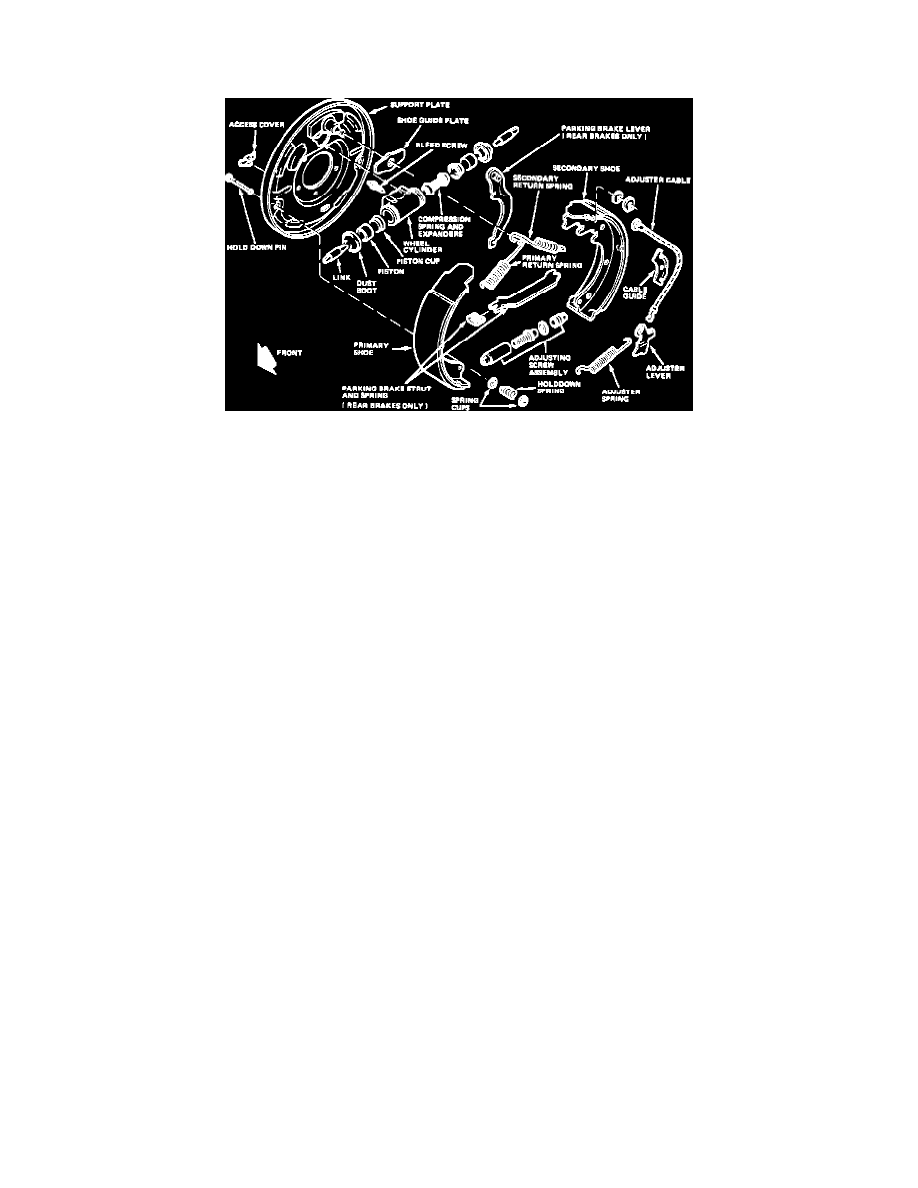
Fig. 2 Drum brake assembly.
REMOVE
1.
Raise and support vehicle.
2.
Remove wheel and tire assemblies, then the brake drums.
3.
Remove U-clip and washer (1) from parking brake lever pivot pin, and discard clip.
4.
Using suitable tool, remove primary and secondary return springs (2).
5.
Remove spring retainers, hold-down springs, and retaining pins (8).
6.
Install suitable clamps over ends of wheel cylinders.
7.
Remove adjuster lever, adjuster screw, and spring (4) from brake shoes (5).
8.
Remove brake shoes.
INSTALLATION
1.
Using suitable lubricant, lubricate support plate ledges, anchor pins, adjuster cable guides, adjuster screw and pivot, and parking brake lever and
lever pivot pin.
2.
Attach parking brake lever (6) to secondary brake shoe and secure with washer and new U-clip.
3.
Remove clamps from wheel cylinders.
4.
Install brake shoes and secure with hold-down springs, pins, and retainers.
5.
Install parking brake lever strut and spring (7).
6.
Install guide plate and adjuster cable (8) on anchor pin (9).
7.
Install primary and secondary return springs with cable guide.
8.
Install adjuster screw, spring, and lever, then connect adjuster cable at adjuster lever.
9.
If any hydraulic lines were opened, bleed brake system.
10.
Install drums.
11.
Install wheel and tire assemblies, and lower vehicle.
12.
Check master cylinder fluid level, filling as necessary.
13.
Check brake pedal for proper feel and return, then road test vehicle.