
Commander 2WD V6-3.7L (2009)
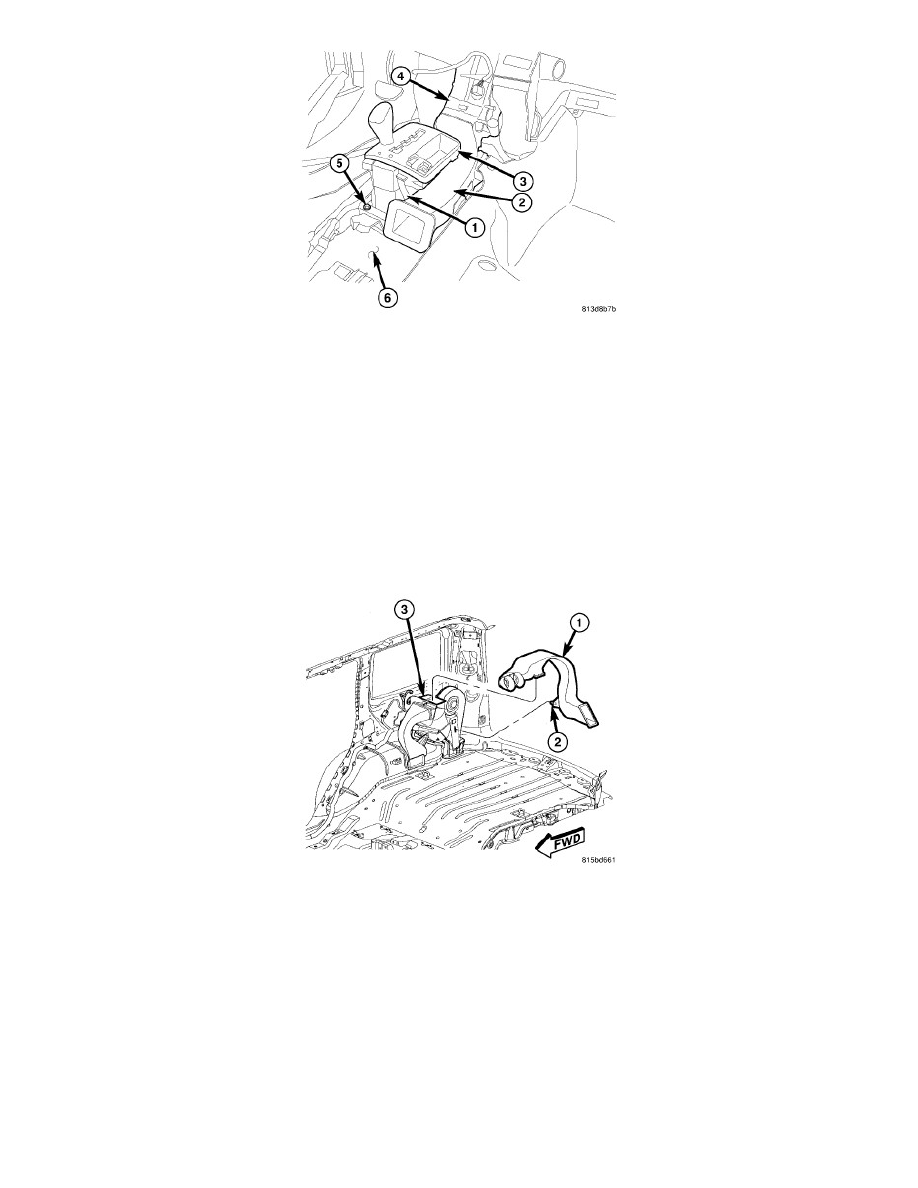
5. Position the gear selector (3) to its installed location on the floor panel (6) and securely install the retaining screws (5).
6. Connect the front console duct (2) to the air distribution housing (4) and engage the retainer (1) to the gear selector.
7. Install the front seats See: Body and Frame/Seats/Service and Repair/Seat, Front/Seat - Installation.
8. Install the floor console duct See: Floor Console Duct - Installation
9. Install the floor console See: Body and Frame/Interior Moulding / Trim/Console/Service and Repair/Floor Console - Installation.
Rear
INSTALLATION
UPPER DISTRIBUTION DUCT
NOTE: Right side upper distribution duct shown in illustration. Left side duct similar.
1. Position the upper distribution duct (1) to the top of the rear HVAC housing (3) or the left upper air outlet, depending on application and connect
the duct to the housing or outlet.
2. Engage the retainer (2) or install the screws that secure the upper distribution duct to the rear HVAC housing or left interior quarter trim panel,
depending on the duct being serviced.
3. Install the interior quarter trim panel See: Body and Frame/Interior Moulding / Trim/Trim Panel/Service and Repair/Luggage Compartment
Trim/Quarter Trim Panel - Installation.
LOWER DISTRIBUTION DUCT