
Commander 2WD V6-3.7L (2009)
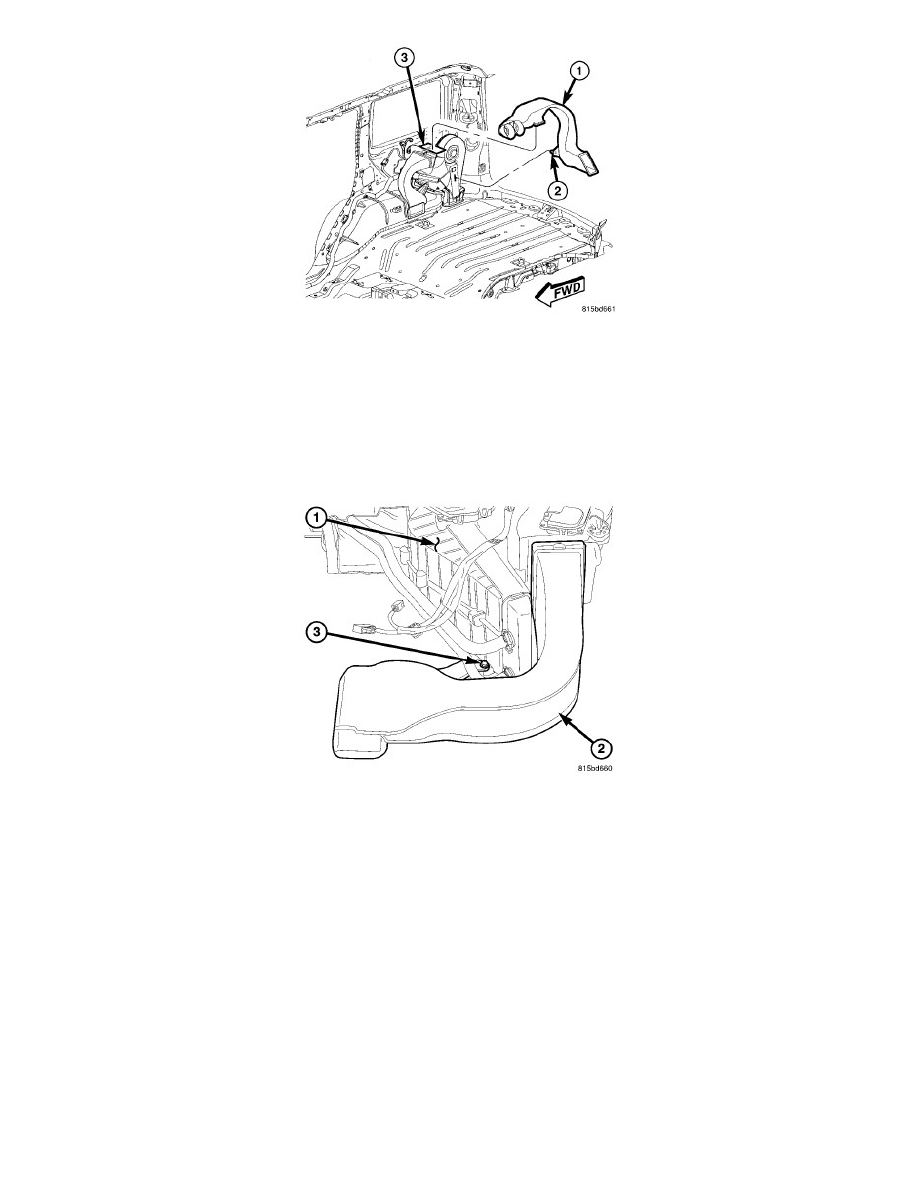
1. Position the upper distribution duct (1) to the top of the rear HVAC housing (3) or the left upper air outlet, depending on application and connect
the duct to the housing or outlet.
2. Engage the retainer (2) or install the screws that secure the upper distribution duct to the rear HVAC housing or left interior quarter trim panel,
depending on the duct being serviced.
3. Install the interior quarter trim panel See: Body and Frame/Interior Moulding / Trim/Trim Panel/Service and Repair/Luggage Compartment
Trim/Quarter Trim Panel - Installation.
LOWER DISTRIBUTION DUCT
1. Position the lower distribution duct (2) to the rear HVAC housing (1) and connect the duct to the front of the housing.
2. Install the screw (3) that secures the lower distribution duct to the rear HVAC housing. Tighten the screw to 2 Nm (17 in. lbs.).
3. Install the rear HVAC housing .
Instrument Panel Duct - Removal
REMOVAL
WARNING: Disable the airbag system before attempting any steering wheel, steering column, or instrument panel component diagnosis or
service. Disconnect and isolate the negative battery (ground) cable. Wait two minutes for the airbag system capacitor to discharge
before performing further diagnosis or service. This is the only sure way to disable the airbag system. Failure to take the proper
precautions may result in accidental airbag deployment and possible serious or fatal injury.
NOTE: The air ducts for the instrument panel and demisters outlets are integral to each other and cannot be serviced separately.
NOTE: Take the proper precautions to protect the face of the instrument panel from cosmetic damage while performing this procedure.