
Commander 2WD V8-4.7L (2008)
CAUTION: Be certain to adjust the refrigerant oil level when servicing the A/C refrigerant system See: Service and Repair/Refrigerant Oil
Level. Failure to properly adjust the refrigerant oil level will prevent the A/C system from operating as designed and can cause serious A/C
compressor damage.
NOTE: When replacing multiple A/C system components, refer to the Refrigerant Oil Capacities chart to determine how much oil should be
added to the refrigerant systemSee: Service and Repair/Refrigerant Oil Level.
NOTE: Replacement of the refrigerant line O-ring seals and gaskets is required anytime a refrigerant line is opened. Failure to replace the
rubber O-ring seals and metal gaskets could result in a refrigerant system leak.
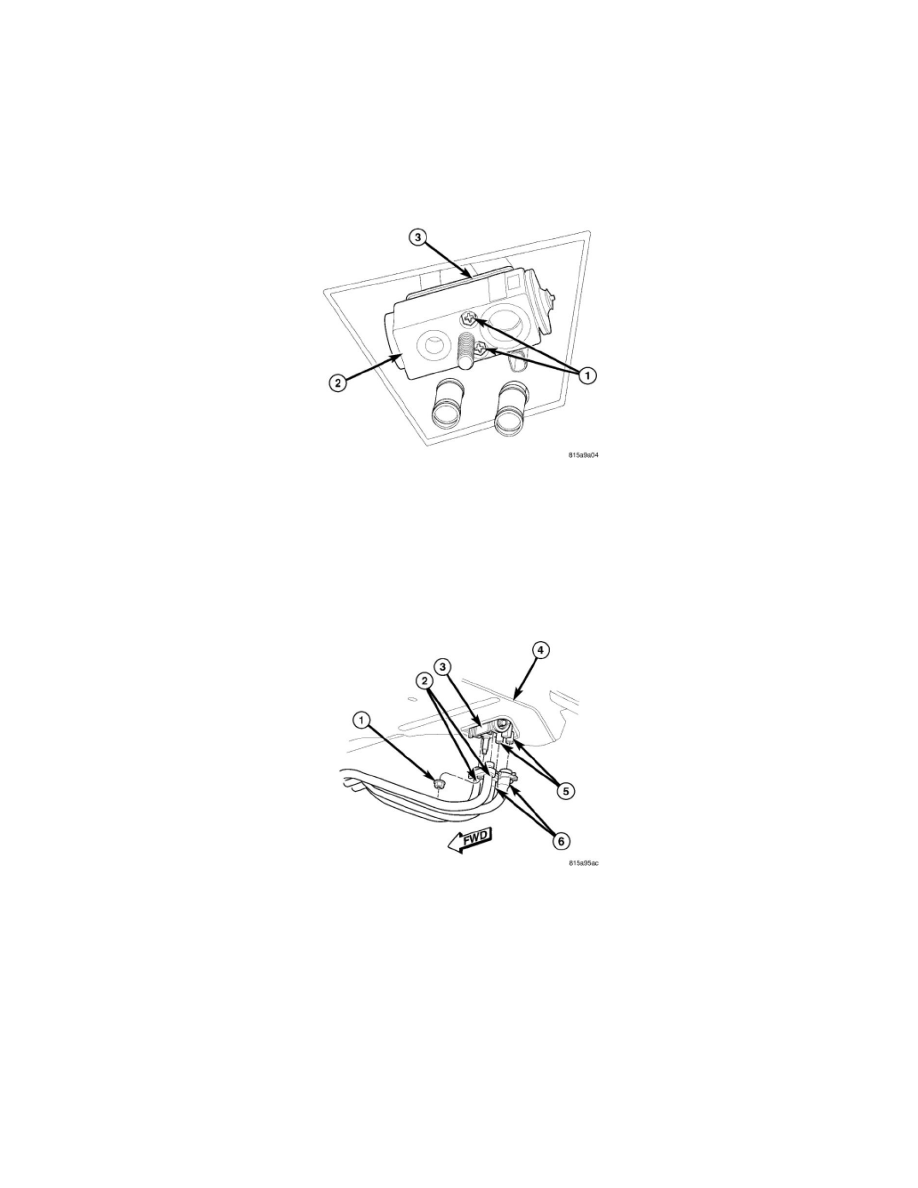
NOTE: Illustration shown with heater hoses and foam seal removed for clarity.
1. Remove the tape or plugs from the opened underbody refrigerant line and rear evaporator tube fittings and all rear expansion valve ports.
2. Lubricate new rubber O-ring seals with clean refrigerant oil and install them onto the rear evaporator tube fittings. Use only the specified O-rings
as they are made of a special material for the R-134a system. Use only refrigerant oil of the type recommended for the A/C compressor in the
vehicle.
3. Install the rear A/C expansion valve (2) onto the rear evaporator tube tapping block (3) which extends through the rear floor panel behind the right
rear wheel housing and install the two bolts (1). Tighten the bolts to 11 Nm (97 in. lbs.).
NOTE: Illustration shown with rear body cradle removed for clarity.
4. Lubricate new rubber O-ring seals with clean refrigerant oil and install them onto the rear underbody refrigerant line fittings. Use only the
specified O-rings as they are made of a special material for the R-134a refrigerant system. Use only refrigerant oil of the type recommended for the
A/C compressor in the vehicle.
5. Connect the underbody refrigerant lines (2) to the rear A/C expansion valve (3) and install the nut (1). Tighten the nut to 11 Nm (95 in. lbs.).
6. Connect the rear heater hoses (6) to the rear heater core tubes (5) which extend through the rear floor panel (4) behind the right rear wheel housing
and install the heater hose clamps securely.
7. Install the right rear quarter liner and right rear tire and wheel assembly See: Body and Frame/Fender/Front Fender/Front Fender Liner/Service and
Repair/Installation.
8. Lower the vehicle.
9. Reconnect the negative battery cable.
10. Fill the engine cooling system See: Engine, Cooling and Exhaust/Cooling System/Service and Repair.
11. Evacuate the refrigerant system See: Service and Repair/Refrigerant System Evacuate.
12. Adjust the refrigerant oil level See: Service and Repair/Refrigerant Oil Level.