
Commander 2WD V8-4.7L (2008)
NOTE: Illustration shown with rear axle removed for clarity.
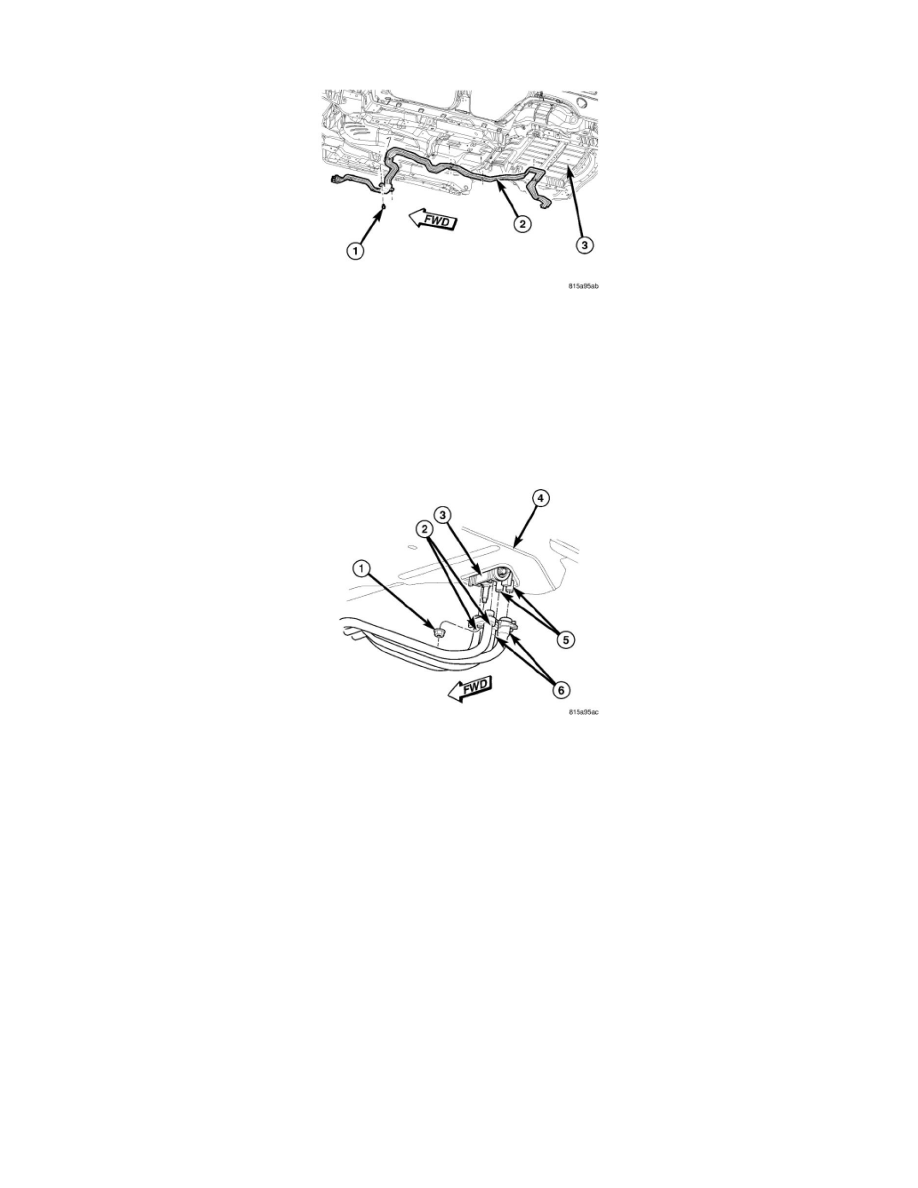
1. Route the underbody line assembly (2) over the rear axle and position the line assembly to the vehicle underbody (3).
2. Engage the five mounting brackets that secure the underbody line assembly to the vehicle underbody.
3. Install the two screws (1) that secure the underbody line assembly to the front of the underbody. Tighten the screws securely.
4. Install the heat shields as required to the vehicle underbody.
5. Install the muffler and tail pipe as an assembly See: Engine, Cooling and Exhaust/Exhaust System/Muffler/Service and Repair/Muffler -
Installation.
6. Install the rear body cradle See: Body and Frame/Frame/Cross-Member/Rear Cross-Member/Service and Repair.
NOTE: Illustration shown with rear body cradle removed for clarity.
7. Remove the tape or plugs from rear underbody refrigerant line fittings and rear expansion valve ports.
8. Lubricate new rubber O-ring seals with clean refrigerant oil and install them onto the rear underbody refrigerant line fittings. Use only the
specified O-rings as they are made of a special material for the R-134a refrigerant system. Use only refrigerant oil of the type recommended for the
A/C compressor in the vehicle.
9. Connect the underbody refrigerant lines to the rear A/C expansion valve (3) which extend through the rear floor panel (4) behind the right rear
wheel housing.
10. Install the nut (1) that secures the underbody refrigerant lines to the to the rear A/C expansion valve. Tighten the nut to 11 Nm (95 in. lbs.).
11. Connect the rear heater hoses (6) to the rear heater core tubes (5) and install the heater hose clamps securely.