
Commander 2WD V8-4.7L VIN P Flex Fuel (2007)
3. Partially drain the engine cooling system.
4. Raise and support the vehicle.
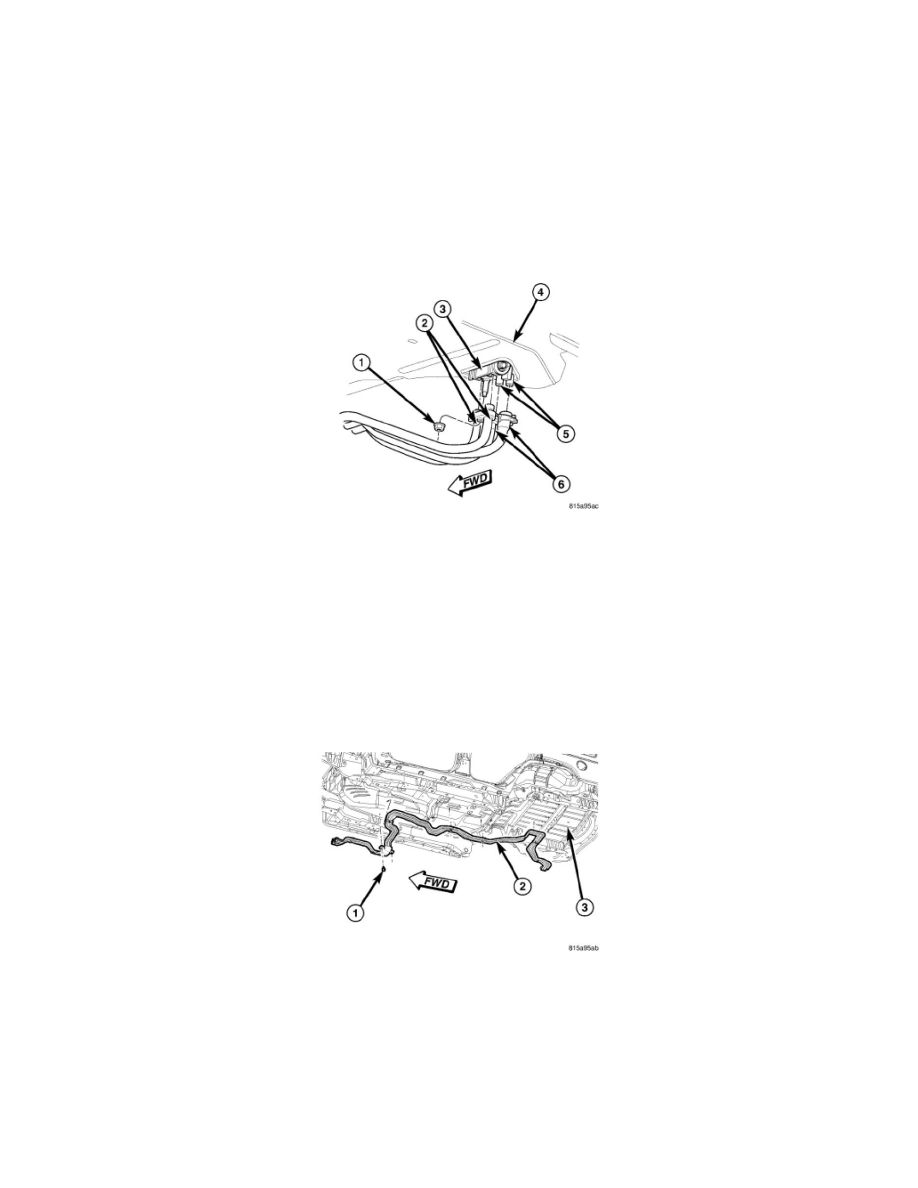
5. Remove the two nuts (1 and 4) that secure the liquid line extension tube (2) and the suction line extension tube (3) to the underbody refrigerant
lines (6).
6. Disconnect the liquid and suction line extension tubes from the underbody refrigerant lines and remove and discard the O-ring seals.
7. Install plugs in, or tape over the opened refrigerant line fittings.
8. Disconnect the heater hoses from the underbody heater lines (5).
NOTE: Illustration shown with rear body cradle removed for clarity.
9. Remove the nut (1) that secures the underbody refrigerant lines (2) to the rear A/C expansion valve (3) which extends through the rear floor panel
(4) behind the right rear wheel housing.
10. Disconnect the rear underbody refrigerant lines from the rear A/C expansion valve and remove and discard the O-ring seals.
11. Install plugs in, or tape over the opened underbody refrigerant line fittings and rear expansion valve ports.
12. Disconnect the rear heater hoses (6) from the rear heater core tubes (5) which extends through the rear floor panel.
NOTE: Illustration shown with rear axle removed for clarity.
13. Remove the rear body cradle.
14. Remove the muffler and tail pipe as an assembly.
15. Remove the heat shields as required from the vehicle underbody.
16. Remove the two screws (1) that secure the underbody line assembly (2) to the front of the vehicle underbody (3).