
Commander 4WD V6-3.7L VIN K (2007)
2. Immerse the piston head and rings in clean engine oil. Position a ring compressor (3) over the piston and rings. Tighten ring compressor (3).
Ensure position of rings do not change during this operation.
3. Position bearing onto connecting rod. Ensure that hole in bearing shell aligns with hole in connecting rod. Lubricate bearing surface with clean
engine oil.
4. Install Special Tool 8507 Connecting Rod Guides (4) into connecting rod bolt threads.
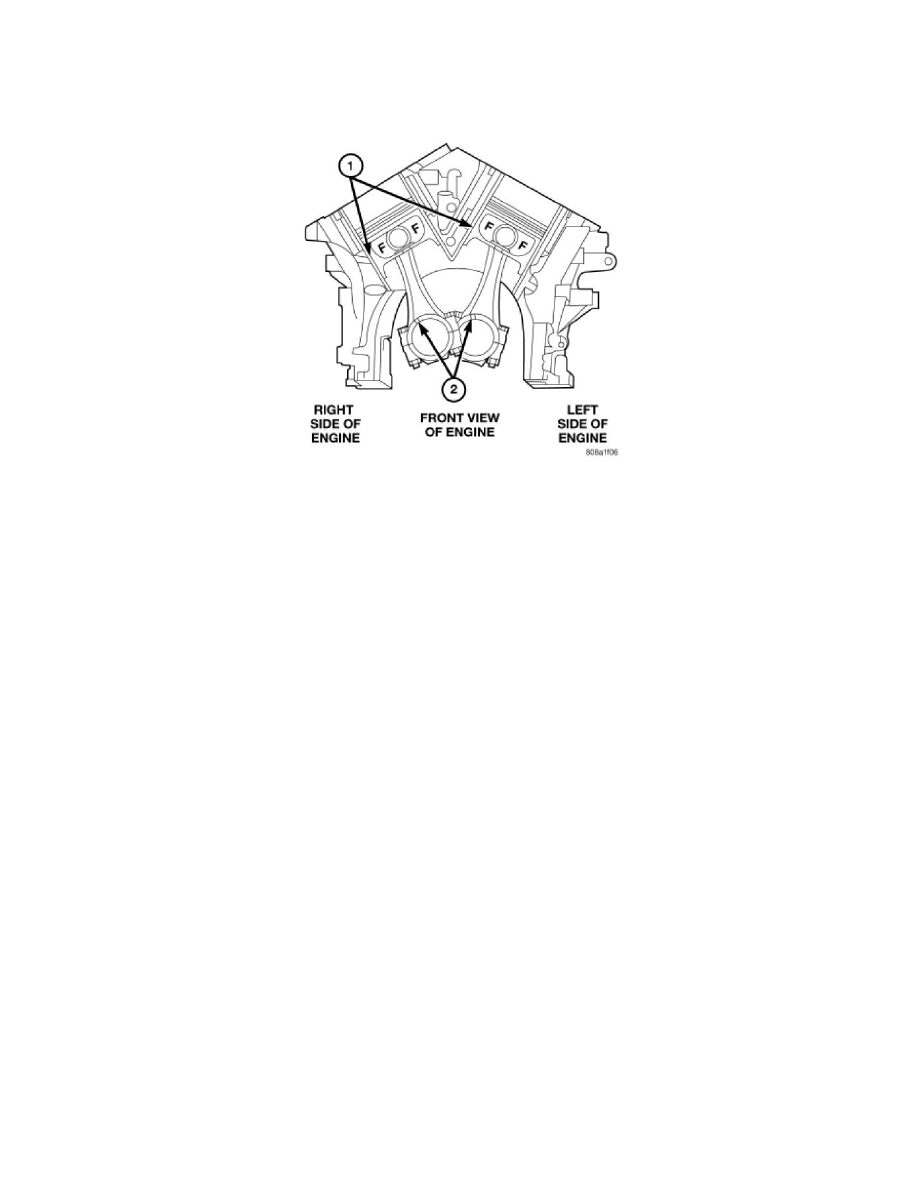
5. The pistons are marked on the piston pin bore surface with a raised "F" (1) indicating installation position. This mark must be pointing toward the
front of engine on both cylinder banks. The connecting rod oil slinger slot faces the front of the engine.
6. Wipe cylinder bore clean and lubricate with engine oil.
7. Rotate crankshaft until connecting rod journal is on the center of cylinder bore. Insert rod and piston into cylinder bore and carefully position
connecting rod guides over crankshaft journal.
8. Tap piston down in cylinder bore using a hammer handle. While at the same time, guide connecting rod into position on rod journal.
CAUTION: Connecting Rod Bolts are Torque to Yield Bolts and Must Not Be Reused. Always replace the Rod Bolts whenever they are
loosened or removed.
9. Lubricate rod bolts and bearing surfaces with engine oil. Install connecting rod cap and bearing. Tighten bolts to 27 Nm (20 ft. lbs.) plus 90°.
10. Install the following components:
-
Cylinder head(s).
-
Timing chain and cover.
-
Cylinder head covers.
-
Oil pan and gasket/windage tray.
11. Fill crankcase with proper engine oil to correct level.
12. Connect negative cable to battery.