
Commander 4WD V6-3.7L VIN K (2007)
Combination Switch: Testing and Inspection
LEFT MULTI-FUNCTION SWITCH
WARNING: To avoid serious or fatal injury on vehicles equipped with airbags, disable the supplemental restraint system before attempting
any steering wheel, steering column, airbag, seat belt tensioner, impact sensor, or instrument panel component diagnosis or service. Disconnect
and isolate the battery negative (ground) cable, then wait two minutes for the system capacitor to discharge before performing further
diagnosis or service. This is the only sure way to disable the supplemental restraint system. Failure to take the proper precautions could result
in accidental airbag deployment.
The left multi-function switch as well as the hard wired inputs and outputs of the switch may be diagnosed using conventional diagnostic tools and
procedures. Refer to the appropriate wiring information. The wiring information includes wiring diagrams, proper wire and connector repair procedures,
details of wire harness routing and retention, connector pin-out information and location views for the various wire harness connectors, splices and
grounds.
However, conventional diagnostic methods will not prove conclusive in the diagnosis of the Steering Control Module (SCM) or the electronic controls or
communication between other modules and devices that provide some features of the interior and exterior lighting systems. The most reliable, efficient
and accurate means to diagnose the SCM or the electronic controls and communication related to SCM operation requires the use of a diagnostic scan
tool. Refer to the appropriate diagnostic information.
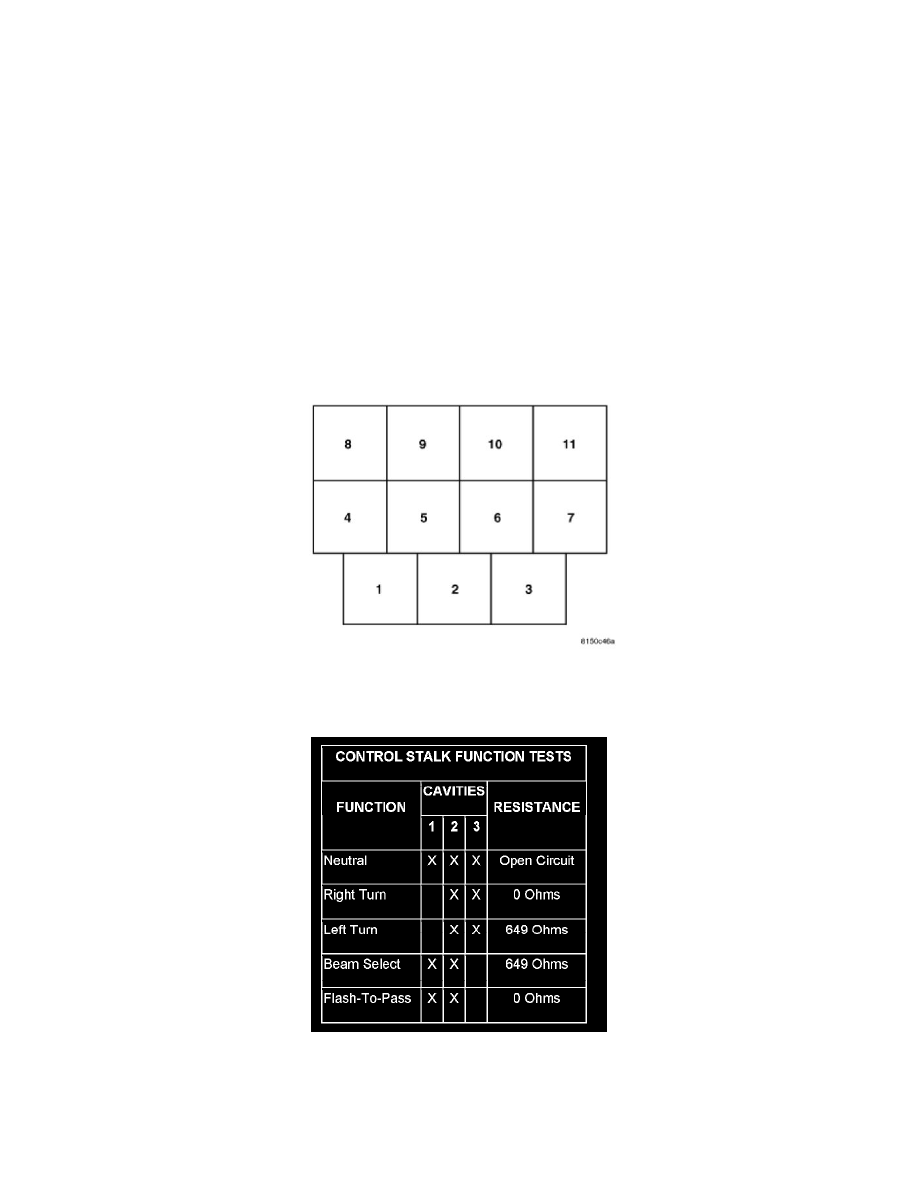
1. Remove the left multi-function switch from the Steering Control Module (SCM).
2. Using an ohmmeter, test the resistance between the terminals of the switch as shown in the three Function Tests tables.