
Commander 4WD V8-4.7L (2008)
8. Size a replacement line, same size diameter and length as the portion of the line(s) removed.
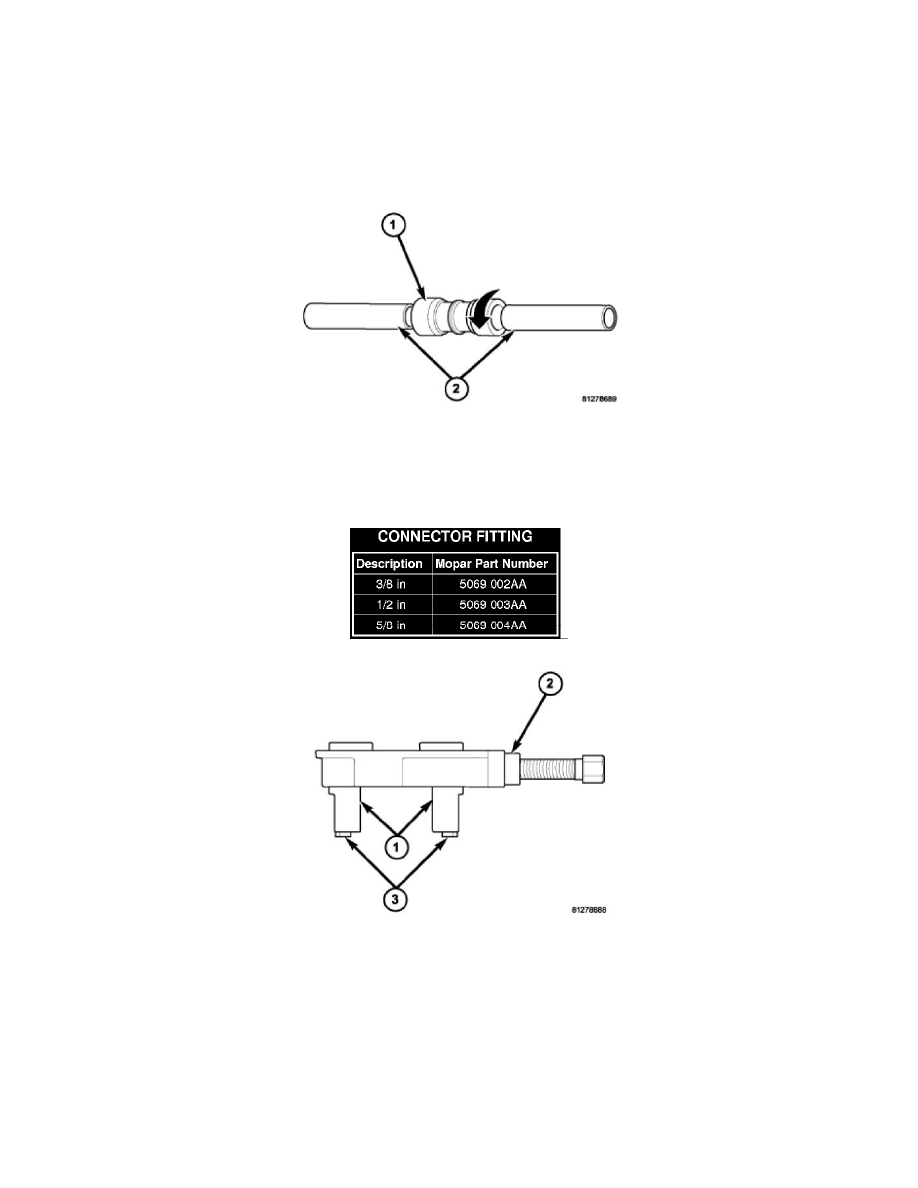
NOTE: A minimum of 28.5 mm (3/4 in) of the line end must be cleaned in order for the connector fitting to properly seal the repair area.
9. Clean the ends of the line(s) a minimum of 28.5 mm (3/4 in) (dimension A) using the Scotch-Bright pad provided with A/C Line Repair Tool Kit
8456-A. Clean the line end(s) with a rotational motion around the line to avoid longitudinal scratches in the line.
10. Select the proper connector fitting (1) for the size of the underbody line being repaired. Refer to the Connector Fitting chart.
11. Apply one drop of Lokprep sealing compound provided with A/C Line Repair Tool Kit 8456-A onto each line end (2).
12. Insert the line ends into the selected connector fitting and rotate the connector fitting a complete turn to evenly distribute the sealing compound.
13. Select the proper size jaws (1) for the line being repaired from the A/C Line Repair Tool Kit 8456-A. Refer to the Jaw Size chart.
14. Assemble the jaws into the tool body (Special Tool 8456-3 in Kit 8456-A) (2).
a. For standard installation, install the jaws with the rubber gripping pads (3) facing outward. Refer to Tube Length chart.
b. For reversed installation, remove the rubber gripping pads and install the jaws with the rubber gripping pad area facing inward. Refer to Tube
Length chart.