
Commander 4WD V8-4.7L (2008)
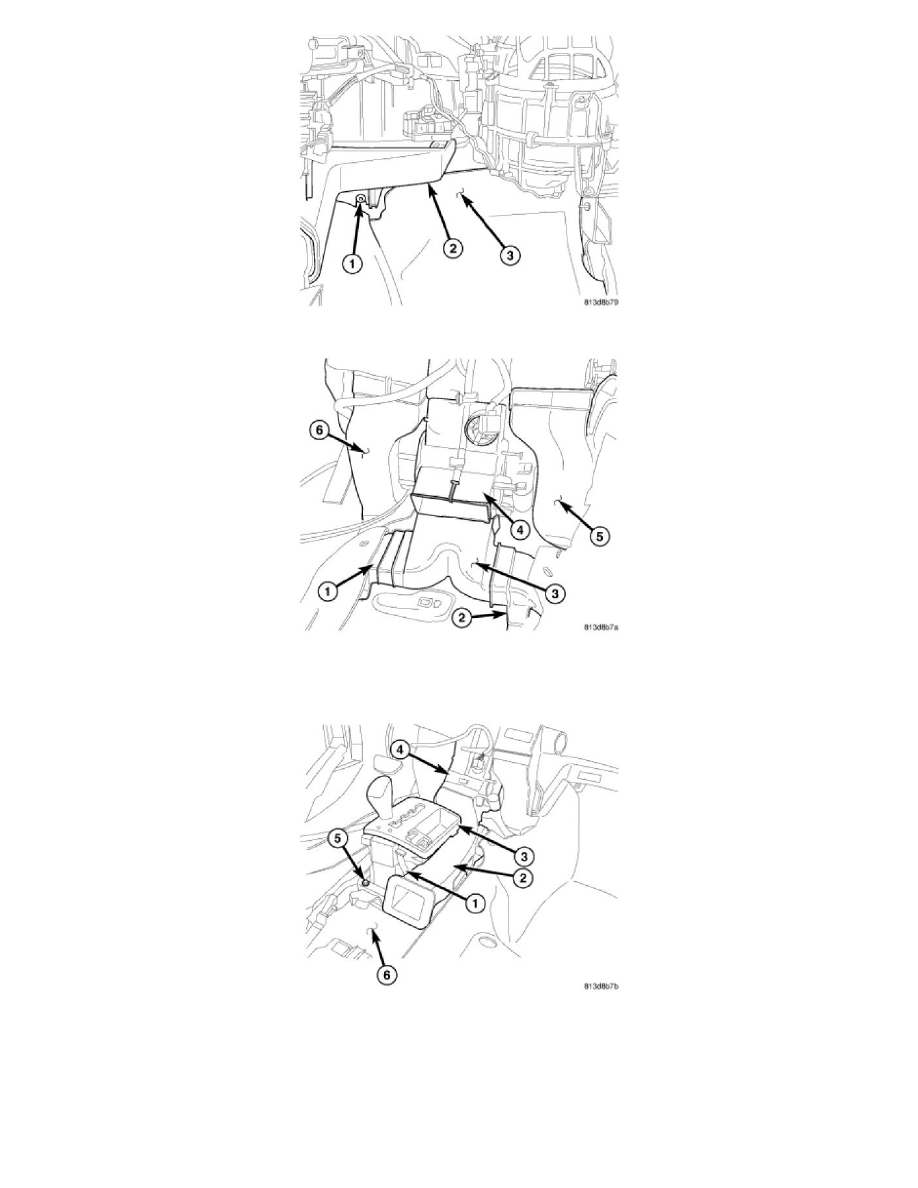
6. Tighten the nut (1) that secures the HVAC housing assembly (2) to the passenger compartment side of the dash panel (3) to 7 Nm (62 in. lbs.).
7. Connect the right front floor duct (5) and left front floor duct (6) to the air distribution housing (4).
8. Connect the rear floor distribution duct (3) to the air distribution housing.
9. Connect the left rear floor duct (1) and the right rear floor duct (2) to the rear floor distribution duct.
10. Position the gear selector (3) to its installed location on the floor panel (6) and securely install the retaining screws (5).
11. Connect the front console duct (2) to the air distribution housing (4) and engage the push-pin retainer (1) to the gear selector.
12. Install the instrument panel See: Body and Frame/Interior Moulding / Trim/Dashboard / Instrument Panel/Service and Repair/Instrument Panel -
Installation.
13. Install the floor console See: Body and Frame/Interior Moulding / Trim/Console/Service and Repair/Floor Console - Installation.
14. Reconnect the negative battery cable.
15. If the heater core is being replaced, flush the cooling system See: Engine, Cooling and Exhaust/Cooling System/Service and Repair.
16. Refill the engine cooling system See: Engine, Cooling and Exhaust/Cooling System/Service and Repair.