
Commander 4WD V8-4.7L Flex Fuel (2009)
7. Install the left quarter trim panel, See: Interior Moulding / Trim/Trim Panel/Service and Repair/Luggage Compartment Trim/Quarter Trim Panel -
Installation.
8. Install the left rear D-pillar trim panel, See: Interior Moulding / Trim/Trim Panel/Service and Repair/Pillar Trim/D-Pillar Trim/Installation.
9. Install the link rod assembly, See: Power Liftgate Link Rod - Installation for the appropriate procedure.
10. Connect the battery negative cable.
11. Using an appropriate scan tool, check and erase any power liftgate control module diagnostic trouble codes.
12. Perform the power liftgate learn cycle, See: Testing and Inspection/Programming and Relearning.
13. Verify power liftgate system operation.
Power Liftgate Drive Unit Motor - Removal
REMOVAL
1. Open the liftgate.
2. Disconnect and isolate the battery negative cable.
3. Remove the power liftgate drive unit assembly from the vehicle, See: Power Liftgate Drive Unit - Removal.
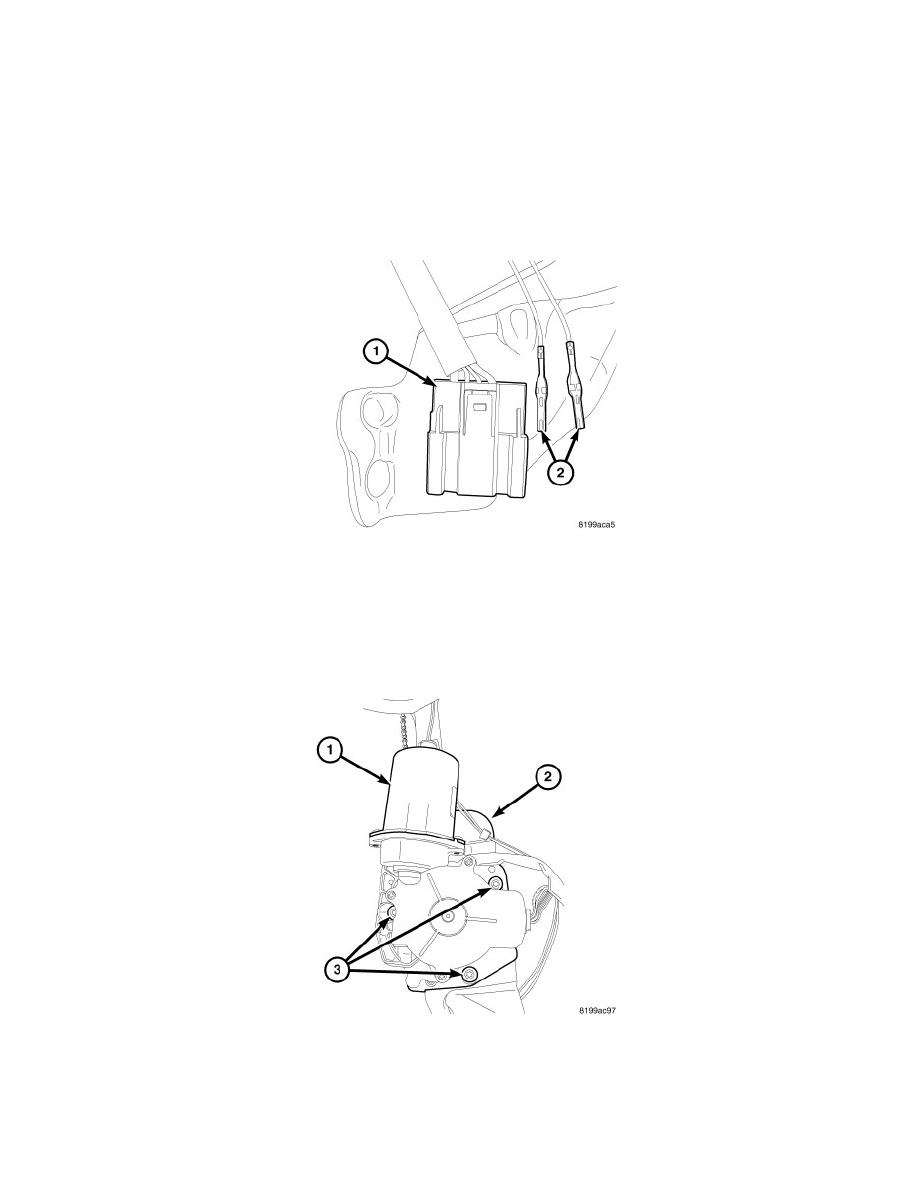
CAUTION: Mark the position of the two full open switch wire terminals (2) in relation to their location in the liftgate drive unit wire
connector (1).
4. Using an appropriate wire terminal tool, carefully remove the full open switch wire terminals (2) from the liftgate drive unit connector (1).
5. Remove the three motor retaining screws (3) and remove the motor (1) from the drive unit assembly (2).
Power Liftgate Drive Unit Motor - Installation
INSTALLATION