
Commander 4WD V8-4.7L Flex Fuel (2009)
Console - Removal.
2. Remove the front seats See: Body and Frame/Seats/Service and Repair/Seat, Front/Seat - Removal.
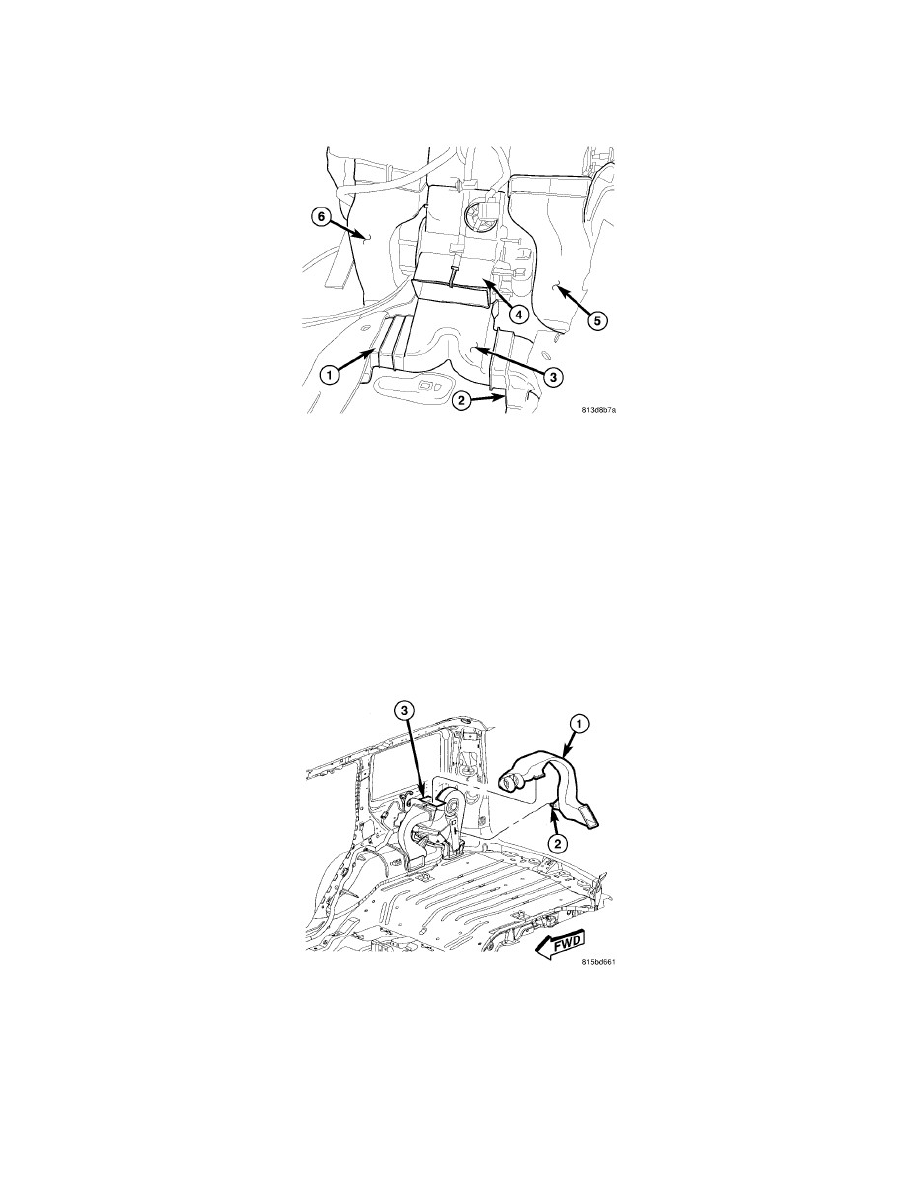
3. Disengage the retainer (1) that secures the front console duct (2) to the gear selector (3).
4. Disconnect the front console duct from the air distribution housing (4) and remove the console duct.
5. Remove the screws (5) that secure the gear selector to the floor panel (6) and position the gear selector out of the way.
6. Roll back the front floor carpet from under the instrument panel toward the rear of the vehicle See: Body and Frame/Interior Moulding /
Trim/Carpet/Service and Repair/Carpet - Removal.
7. Disconnect the left rear floor duct (1) and the right rear floor duct (2) from the rear floor distribution duct (3).
8. Disengage the retainer that secures the rear floor ducts to the floor support and remove the floor ducts.
9. Disconnect the rear floor distribution duct from the air distribution housing (4) and remove the distribution duct.
Rear
REMOVAL
UPPER DISTRIBUTION DUCT
NOTE: Right side upper distribution duct shown in illustration. Left side duct similar.
1. Remove the interior quarter trim panel from the side of the vehicle being serviced See: Body and Frame/Interior Moulding / Trim/Trim
Panel/Service and Repair/Luggage Compartment Trim/Quarter Trim Panel - Removal.
2. Disengage the retainer (2) or remove the screws that secure the upper distribution duct (1) to the rear HVAC housing (3) or the left interior quarter
trim panel, depending on the duct being serviced.
3. Disconnect the upper distribution duct from the rear HVAC housing or left upper air outlet, depending on application and remove the duct from
the vehicle.
LOWER DISTRIBUTION DUCT