
Commander 4WD V8-4.7L VIN N (2006)
Ambient Light Sensor: Service and Repair
RAIN SENSOR MODULE
REMOVAL
1. Disconnect and isolate the battery negative cable.
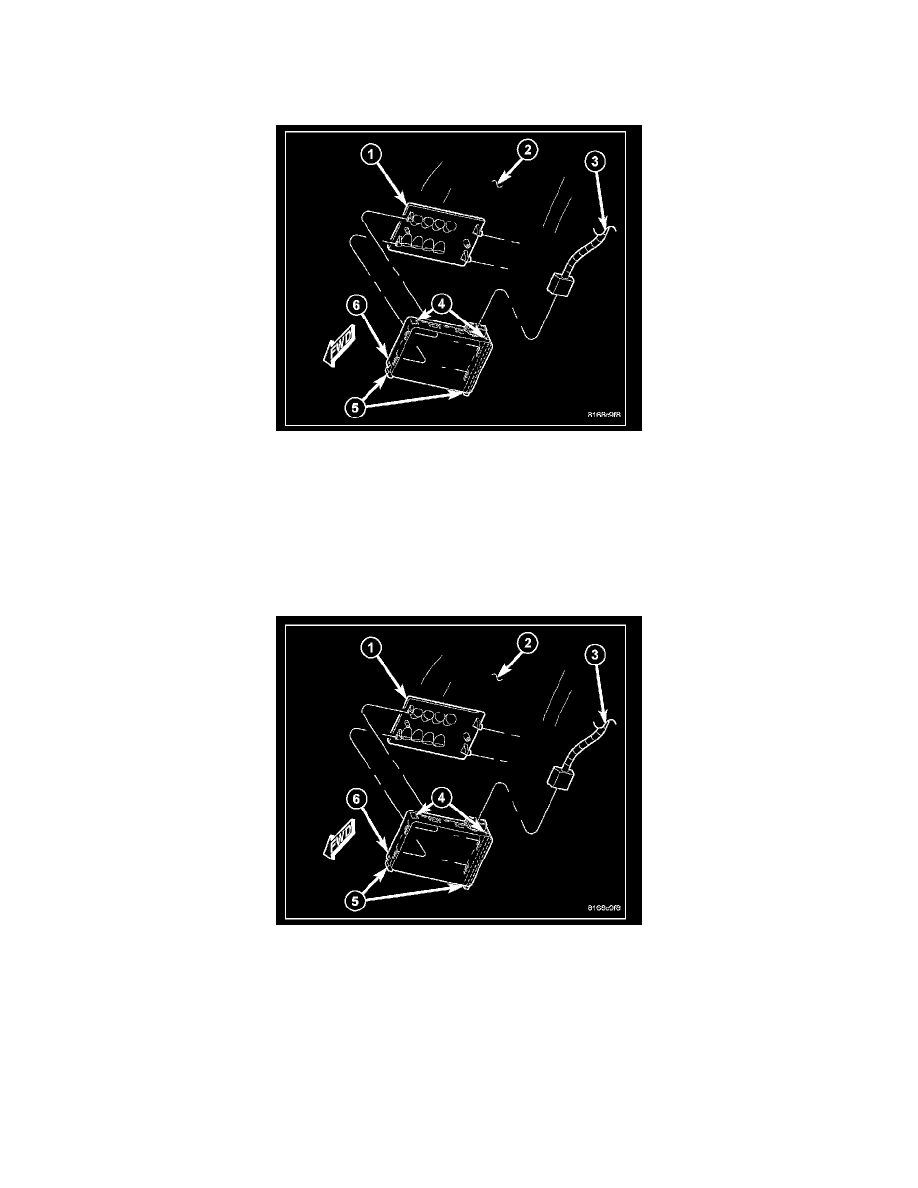
2. From the upper (connector) side of the Rain Sensor Module (RSM) housing (6), use a small screwdriver inserted into the rectangular opening (4)
on each outboard side to depress the two sliding cam locks (5) downward until they protrude from the lower side of the housing.
3. Gently pull each sliding cam lock downward from the bottom of the RSM housing far enough to release them from the mounting bracket (1) on the
windshield glass (2).
4. Remove the RSM from the mounting bracket.
5. Disconnect the overhead wire harness (3) connector from the RSM.
INSTALLATION
1. Be certain that the two sliding cam locks (5) extend downward (installation position) from the lower side (the side opposite the connector) of the
Rain Sensor Module (RSM) housing (6).
2. Reconnect the overhead wire harness (3) connector to the RSM.
3. Position the RSM over the mounting bracket (1) on the windshield glass (2).
4. Push the RSM housing firmly and evenly against the mounting bracket to seat it, then press the two sliding cam locks upward from the lower side
of the housing until they are fully engaged and flush (4) with the top of the housing.
5. Reconnect the battery negative cable.