
Compass 2WD L4-2.4L (2008)
NOTE: Illustration shown with front fascia removed for clarity.
10. Raise and support the vehicle.
NOTE: On gasoline engine equipped models, reach up through the opening in the bottom of the front fascia located in the right front
corner of the vehicle to gain access to the A/C liquid line.
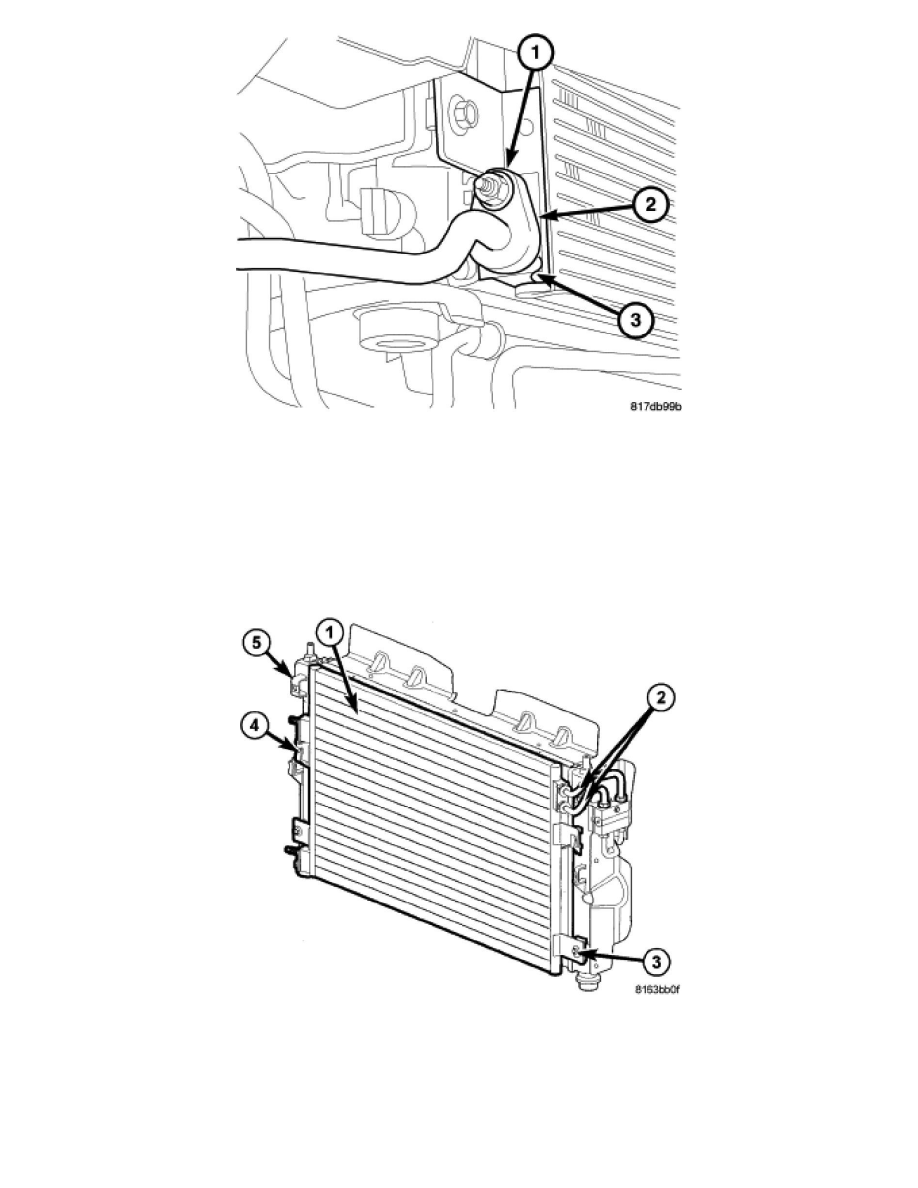
11. Remove the nut (1) that secures the A/C liquid line (2) to the right side of the A/C condenser (3).
12. Disconnect the A/C liquid line from the A/C condenser and remove and discard the O-ring seal and gasket.
13. Install plugs in, or tape over the opened liquid line fitting and the condenser outlet port.
NOTE: Illustration shown with front fascia and diesel engine charge air cooler (CAC) (when equipped) removed for clarity.
14. Remove the two bolts (3) that secure the lower condenser brackets to the radiator (5).
15. Lower the vehicle.
16. If equipped, disconnect the automatic transmission cooler lines (2) from the left side of the A/C condenser (1) See: Transmission and
Drivetrain/Continuously Variable Transmission/Transaxle/Fluid Line/Hose/Service and Repair.
17. If equipped with the 2.0L diesel engine, remove the charge air cooler (CAC) .
18. Carefully lift the A/C condenser straight up and disengage the two upper condenser brackets (4) from the radiator and remove the condenser from