
Compass 2WD L4-2.4L (2008)
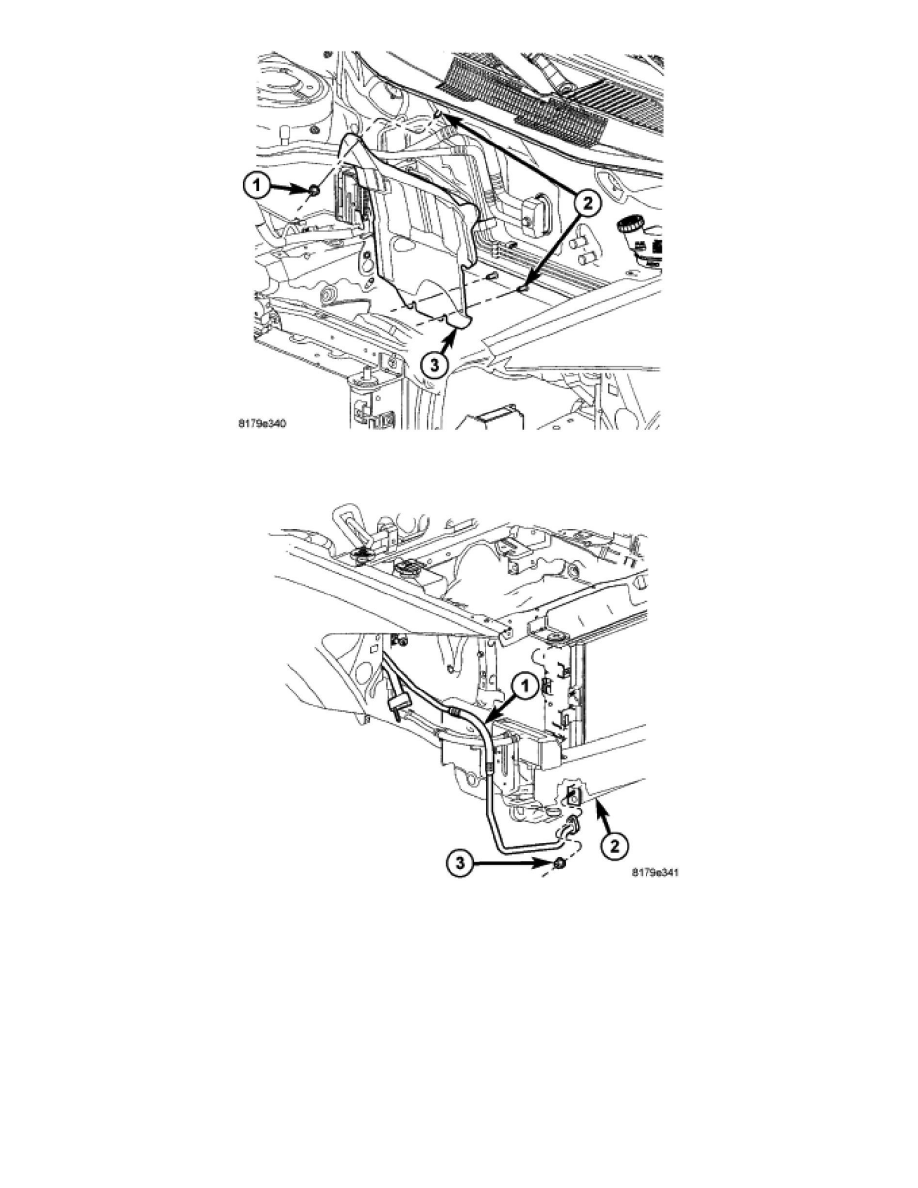
9. Position the heat shield (3) onto the studs (2) located on the dash panel in the engine compartment.
10. Install the three nuts (1) that secure the heat shield to the dash panel. Tighten the nuts to 1 Nm (10 in. lbs.).
NOTE: Illustration shown with front fascia removed for clarity.
11. Raise and support the vehicle.
12. Remove the tape or plugs from the liquid line fitting and the condenser port.
13. Lubricate a new rubber O-ring seal with clean refrigerant oil and install it and a new gasket onto the liquid line fitting. Use only the specified
O-ring as it is made of a special material for the R-134a system. Use only refrigerant oil of the type recommended for the A/C compressor in the
vehicle.
14. Reach up through the opening in the bottom of the front fascia and connect the A/C liquid line (1) to the A/C condenser (2) and install the
retaining nut (3). Tighten the nut to 5 Nm (44 in. lbs.).
15. Install the A/C accumulator See: Heating and Air Conditioning/Accumulator HVAC/Service and Repair/Installation.
16. Lower the vehicle.
17. Reconnect the negative battery cable.
18. Evacuate the refrigerant system See: Heating and Air Conditioning/Service and Repair/Refrigerant System Evacuate
19. Be certain to adjust the refrigerant oil level when servicing the A/C refrigerant system See: Heating and Air Conditioning/Service and