
Grand Cherokee 2WD L6-242 4.0L VIN S MFI (1993)
2.
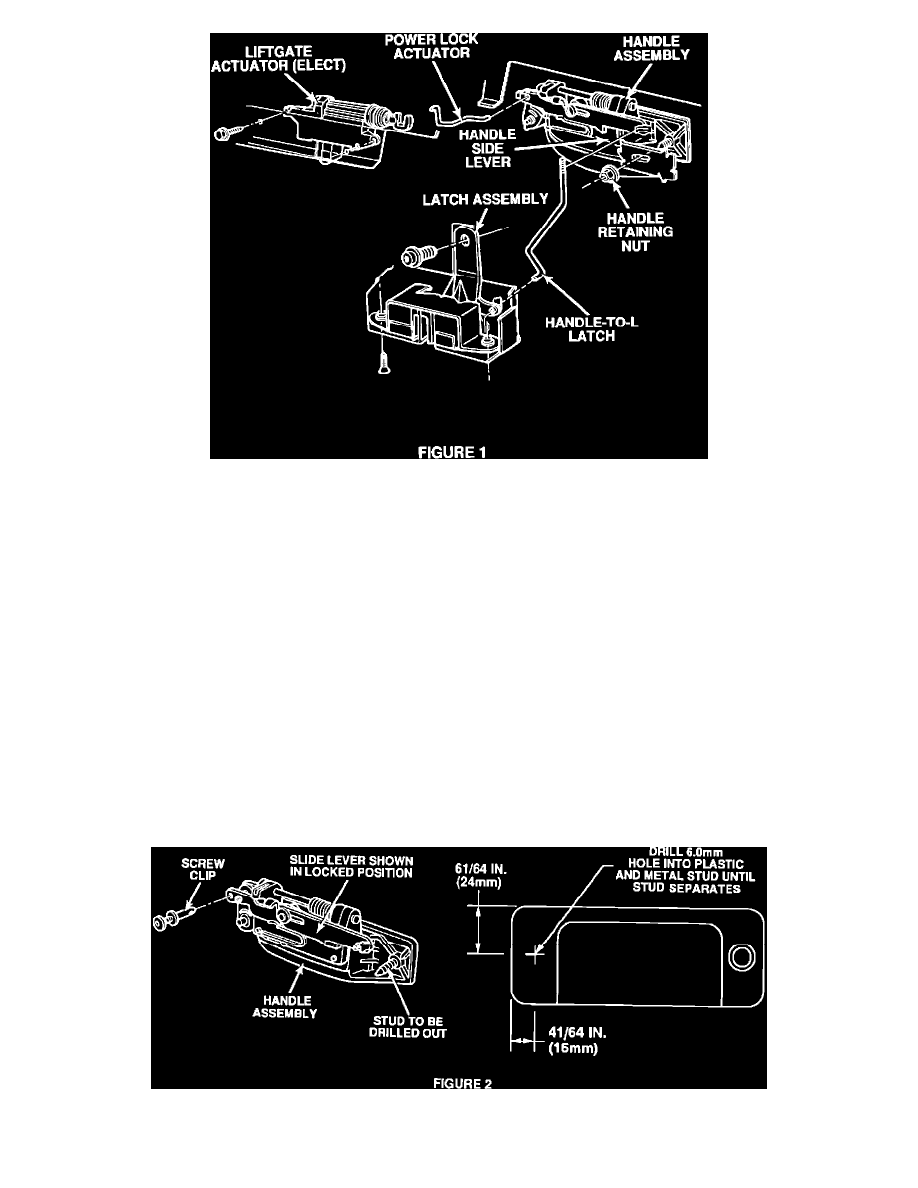
Disconnect the handle-to-latch rod from the handle assembly by placing a screwdriver between the retaining clip and rod and prying the rod out of
the clip (Figure 1).
CAUTION:
IF THE HANDLE-TO-LATCH ROD IS NOT REMOVED AS DESCRIBED ABOVE, DAMAGE TO THE LATCH ASSEMBLY MAY RESULT.
3.
Move the handle slide lever to the extreme left as viewed from inside the vehicle or to the passenger side of the vehicle (unlocked position). Be
sure the rod is in the relaxed position, (with no preload), press the rod firmly into the metal lip on the slide lever.
4.
With the liftgate in the open position, verify that the lock/unlock functions operate properly.
NOTE:
DO NOT CLOSE THE LIFTGATE AT THIS TIME. CHECK THE SIZE OF THE HEAD ON THE LIFTGATE STRIKER ASSEMBLY
FASTENERS. IF THE FASTENER HEADS ARE SMALLER THAN 11/16 IN. (18 MM), REPLACE THE STRIKER ASSEMBLY. REFER TO THE
"STRIKER WITH SEAL PLATE INSTALLATION" PROCEDURE IN THIS BULLETIN.
5.
If the liftgate actuator operation is slow or sluggish during the verification in step 4, replace the actuator with PN 55154745.
6.
Install the trim panel as described in the Service Manual No. 81-370-2147.
Liftgate Handle Replacement Procedure
1.
Drill out the hidden stud in the liftgate handle using a 1/4 in. (6 mm) drill bit. The stud location is shown in Figure 2.