
Grand Cherokee 2WD L6-242 4.0L VIN S MFI (1993)
A.
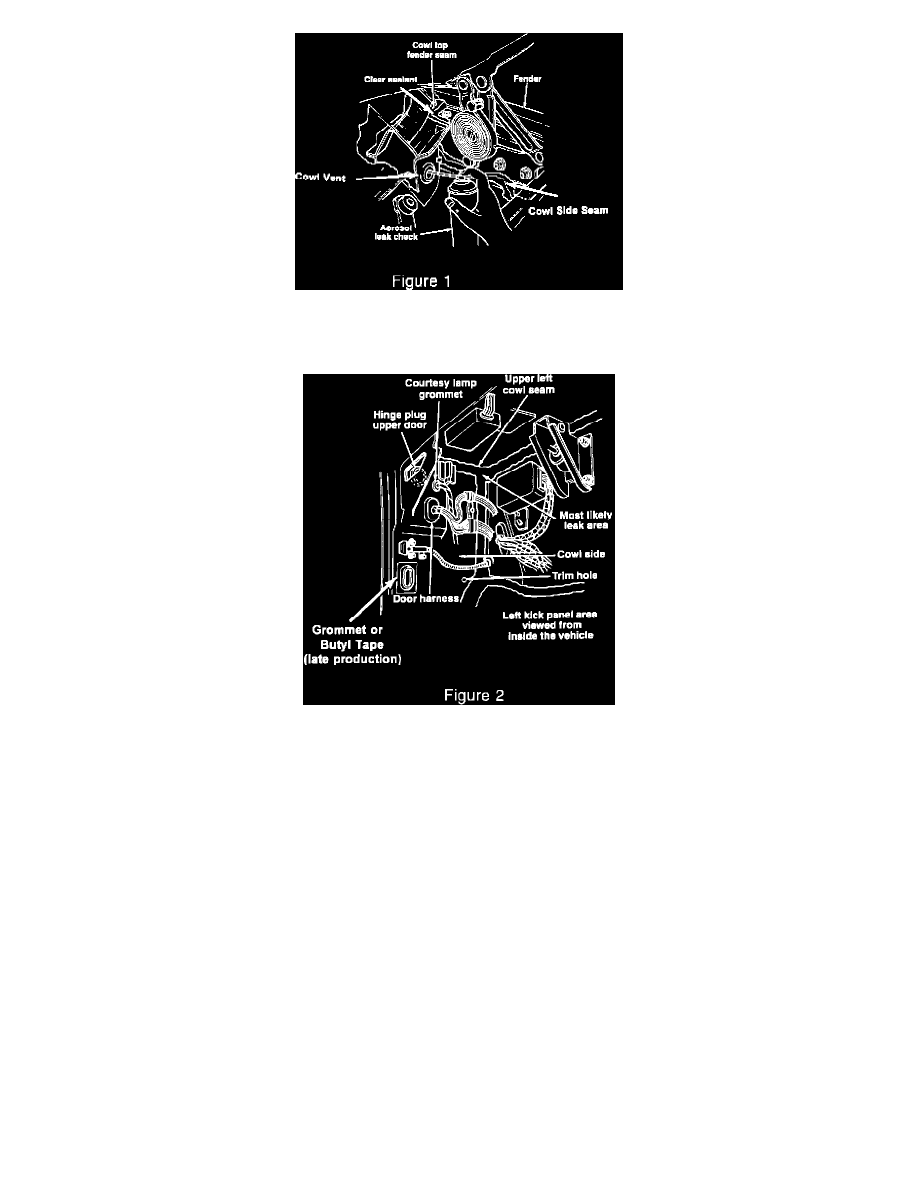
Upper Left Side Cowl - Dash panel (Under Hood) (Fig. 1).
B.
Left Cowl Top-To-Fender Top (Under Hood) (Fig. 1).
C.
Upper Left Cowl Side Seam Area (Inside Vehicle) (Fig. 2).
A.
UPPER LEFT SIDE COWL - DASH PANEL (UNDER HOOD)
NOTE:
THIS PROCEDURE WILL REQUIRE SPRAYING SEALER INTO THE COWL AREA. IT WILL REQUIRE CONNECTING TWO
PLASTIC WANDS TOGETHER FOR USE ON THE LEAK CHEK AEROSOL SPRAY CAN. SPLIT THE END OF ONE WAND AND
SLIDE IT INSIDE THE OTHER ONE. APPLY TAPE AROUND THE JOINT TO PREVENT LEAKAGE WHEN THE SEALER IS BEING
APPLIED.
1.
Park the windshield wipers in a vertical position on the windshield.
2.
Remove the cowl cover.
3.
To seal the upper left side cowl-to-dash panel joint, remove the rubber plug (if present and discard) from the vent hole in the cowl panel
(Fig. 1).
4.
Insert the Leak Chek plastic wand through the vent hole and work the wand into the top rear outer corner of the plenum. Apply the Leak
Chek Sealer moving the wand from the top of the plenum downward as it is slowly removed from the plenum out the vent hole. Several thin
layers with drying time between each layer are recommended.
NOTE:
LEAK CHEK MAY RUN OUT OF THE COWL VENT LOCATED JUST BELOW THE VENT HOLE. THIS IS NOT A PROBLEM;
HOWEVER, DO NOT ALLOW THE SEALER TO DRY AND CLOSE OFF THE VENT.