
Grand Cherokee 2WD L6-242 4.0L VIN S MFI (1993)
dealer reference as needed.
Service Procedure
A.
Inspect for Low Resistance Coil:
1.
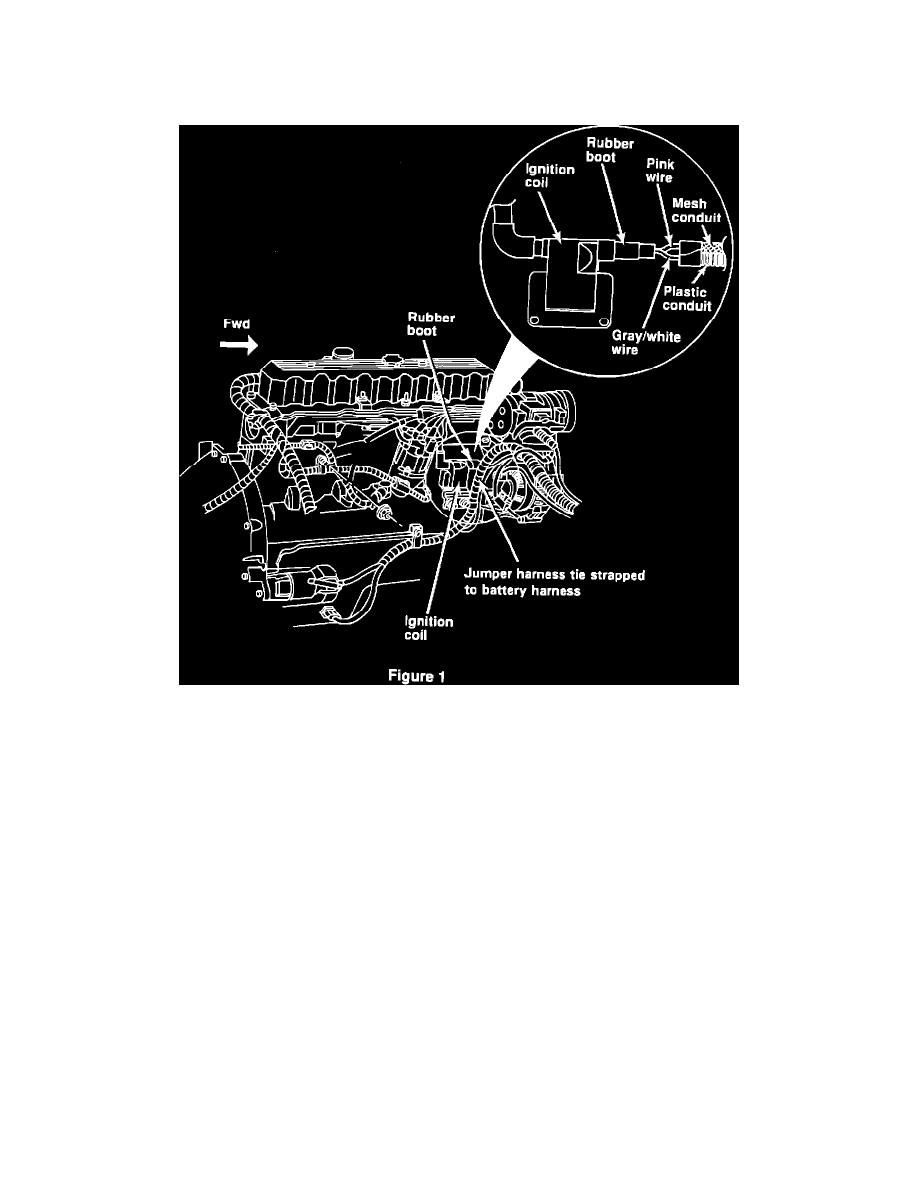
The new coil and jumper harness may have already been installed through Technical Service Bulletin (TSB) 08-35-93. Inspect the primary
coil wiring. If a jumper harness is present, the vehicle has already been repaired and no further action is necessary (Figure 1). The jumper
harness can be identified by a rubber boot on the coil connector and a pink wire covered by a mesh convolute. The jumper harness should be
looped and secured to the battery harness. All vehicles without this jumper harness must have the coil replaced and the jumper harness
installed. Proceed to Section B.
B.
Replace Ignition Coil:
1.
With the ignition key in the OFF position, disconnect the negative battery cable.
Note:
To ensure customer satisfaction, remember to record all radio settings before disconnecting the battery and to reset the electronic memory
when you have completed the service procedure.
2.
Disconnect the secondary and primary wiring from the ignition coil.
3.
Remove coil assembly from bracket. Discard the ignition coil.
4.
Install the provided ignition coil on bracket. Connect the secondary coil wire.
5.
Remove the primary coil wires from the wiring insulator on the engine harness.
Note:
The terminal locking tab must be depressed using a paper clip or small screwdriver (from the terminal end) while pulling back on the wire.